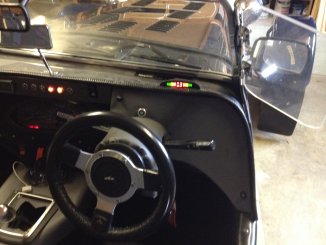
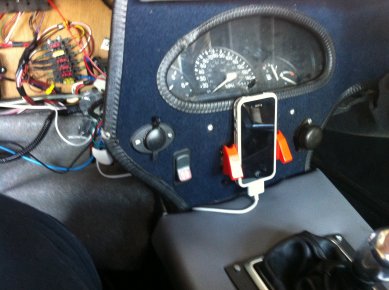
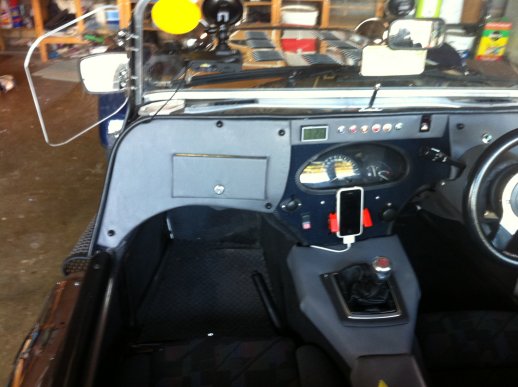
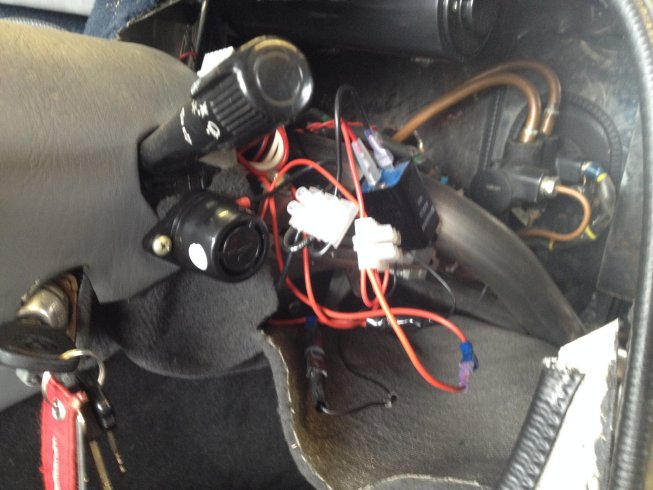
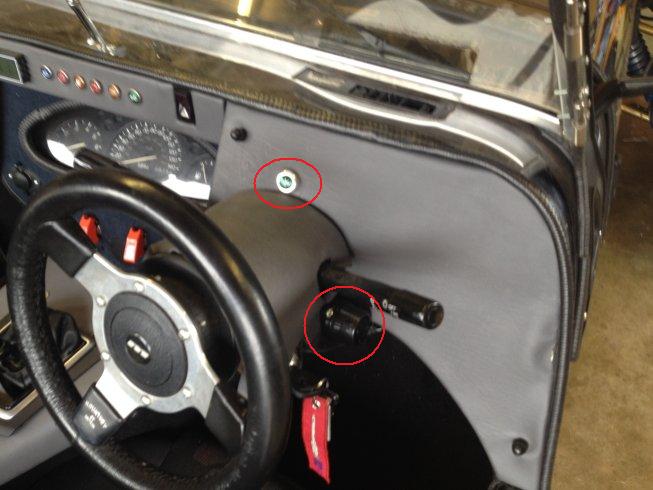
Having proved the concept of the reversing sensors I spent today improving everything
1. New electrical spade connectors arrived so rewired the reversing
switch and made it so it is now only live when the ignition is on and protected by a fuse.
2. Tidied up all the wiring along the back using lots of cable ties.
3. Changed power supply to the LED warning display so it comes off the
reversing switch so is only live when reverse gear is selected.
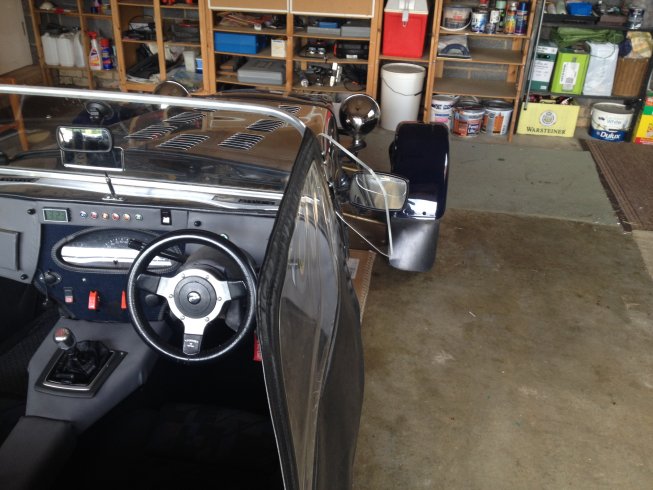
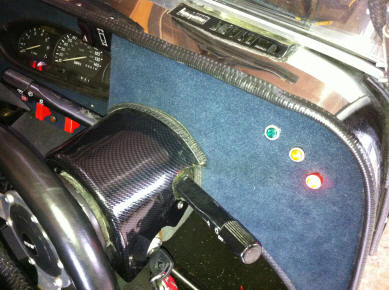
4. Moved the warning display up onto the scuttle.
Good day.
I have found that when strapped in I cannot turn my head far enough round to see how close I am to parked cars. And if I have the top up I am totally blind behind. So the solution was to fix reversing sensors.
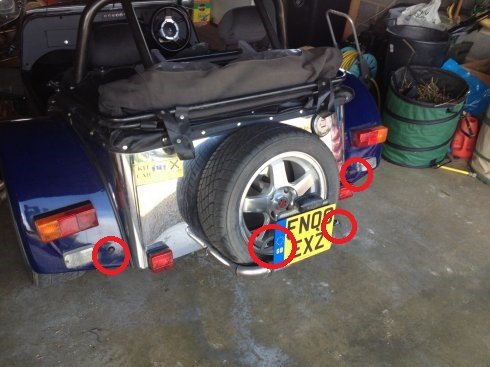
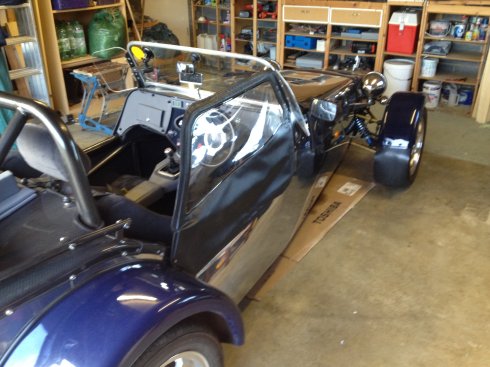
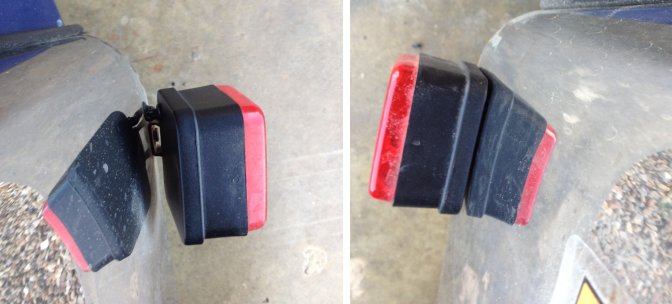
You have to be careful that the sensors have a completely clear field of view so I went for one sensor either side of the number plate and one on each wing.
Here are some closeups.
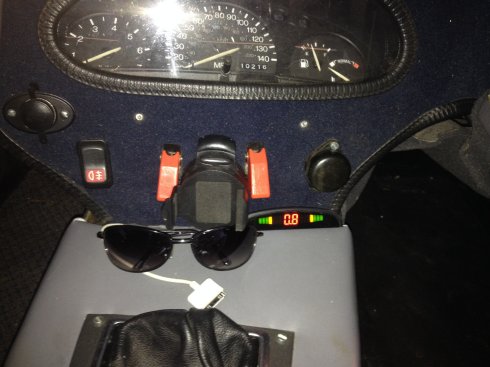
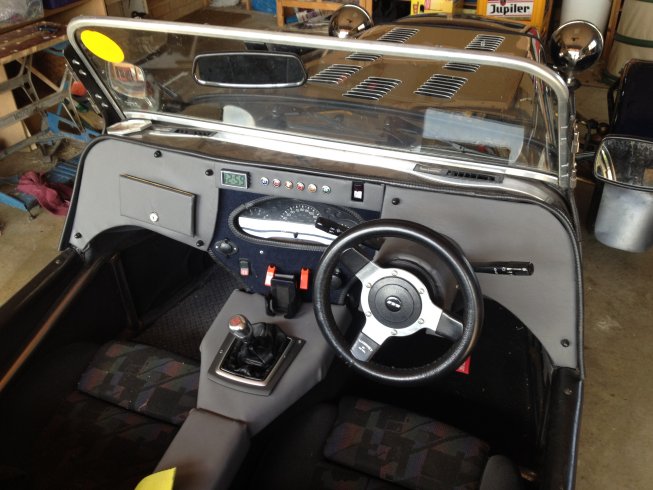
And then I mounted the display/buzzer at the bottom of the dash. I may move it up to eye level after testing it for a bit.
This was taken in the garage with the door shut, with 0.8m from the back to the door.
Also in the future I will probably wire up the display to the reversing switch so it is only live in reverse.
When the offside headlight started to be much dimmer than the nearside one I assumed it was some corrosion on the bulb holder. But when I took it apart I found it was a sealed unit. But it turned out the tried and tested fixing method of "Take it apart and put it back together" worked in this case as it is now fine.
So now ALL the lights are working.
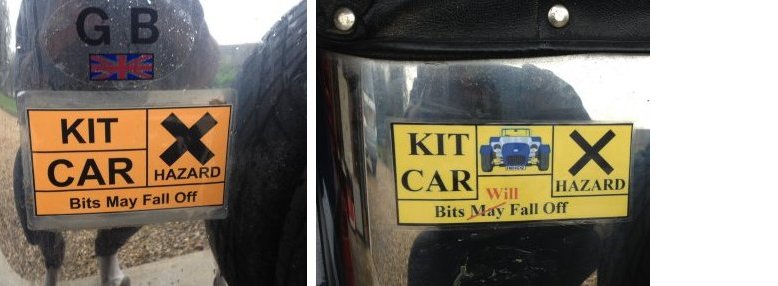
Decided my rear sticker needed updating to reflect reality.
Having done a lot of driving recently with little or no maintenance being done, culminating in total indicator failure again yesterday, I decided it was time to buckle down and spend some time fixing her. Luckily the weather was nice and the temperature reasonably high.
First quick fix was to replace the flasher unit with my spare one. Indicators then worked perfectly, so obviously the old flasher unit had been doused in water once too often.
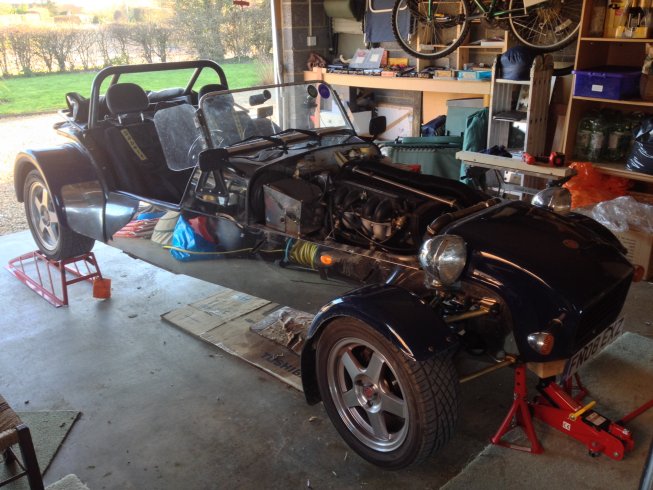
Major job was fixing the reversing lights so for the first time ever, I had the car up on ramps at the back and axle stands at the front allowing me to crawl underneath with no problem. So I inspected everything I could see, and it all looks really good.
I can now see how to access the fuel filter, and replacing the petrol pipe will be fairly easy, although it looked perfectly fine and I haven't has a petrol smell recently with using her on a regular basis so I will leave that for now.
So first task was to find the reversing light. Turned out to be obvious from underneath and the reason for the failure was also obvious as one of the wires has snapped off.
Unfortunately it used a very small spade connector rather than the normal ones I have. Luckily I managed a temporary fix by soldering the wire to the existing spade. I will get some replacement connectors and do a proper fix next time the car is up on the ramp, as well as making the 12v feed ignition controlled rather than direct off the battery (Leaving her in reverse gear parked on a hill drains the battery at the moment).
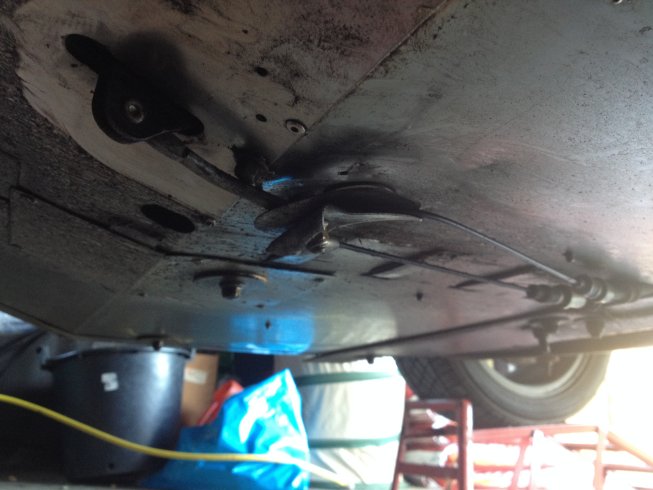
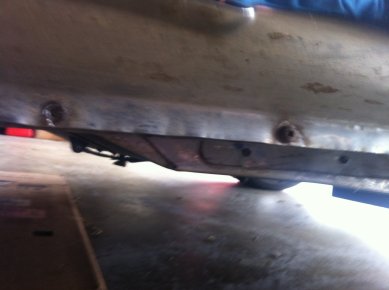
While I was under the car I decided to fit a guard over the handbrake mechanism. As you can see from this photo it is totally exposed, and if I ever get around to replacing the exhaust mounting, it would be vulnerable to grounding.
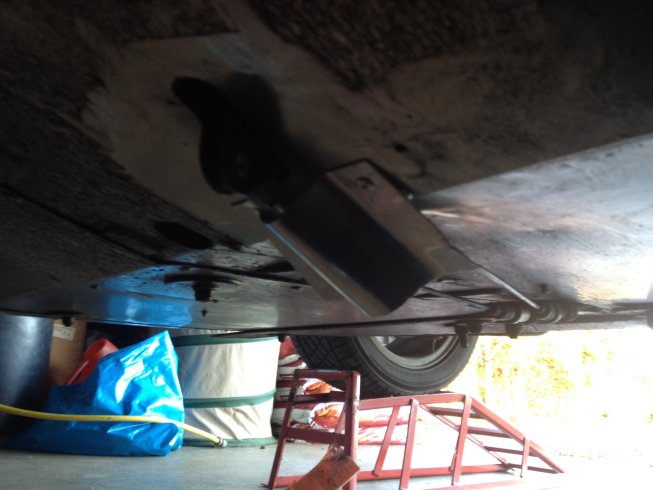
So I riveted a small, shaped, stainless steel plate over it, so that will hit the road before the handbrake mechanism.
So a really good session, although I need to figure out a better way of lifting the car onto ramps as it took 3 stages with the jack to get the wheels high enough up. And for the first time in months, all the lights work. Although one of the headlights appears to be brighter then the other, so will have to investigate that.
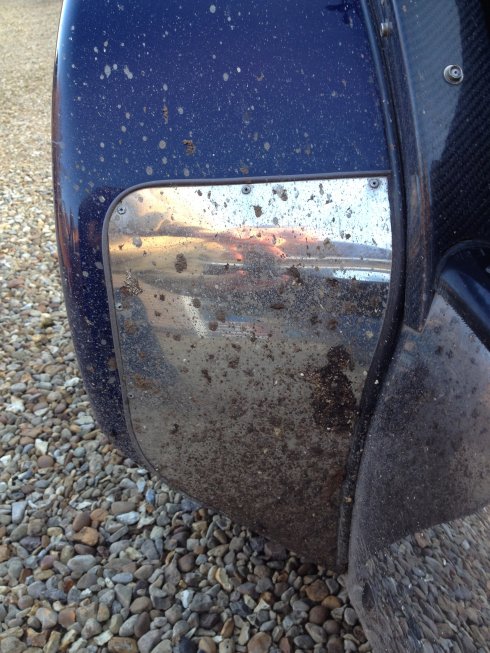
After the recent poor weather the car continues to get filthy. And although the recent change to a 6mm mudflap was working it still wasn't preventing mud from accumulating on the body and the rear mudguard splashguard. But then I realised that unlike most cars, where the mudflap is attached to the body of the car, mine was actually attached to the mudguard which was attached to the wheel.
So whereas on most cars you need an appreciable gap at the bottom of the mudflap to allow for suspension travel (and it still scrapes the ground on my Volvo on a sharp right turn), I did not have this limitation and could install the mudflap as low as I liked.
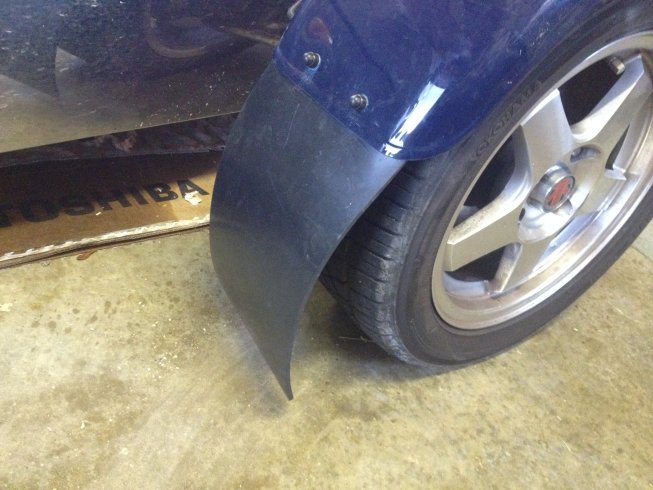
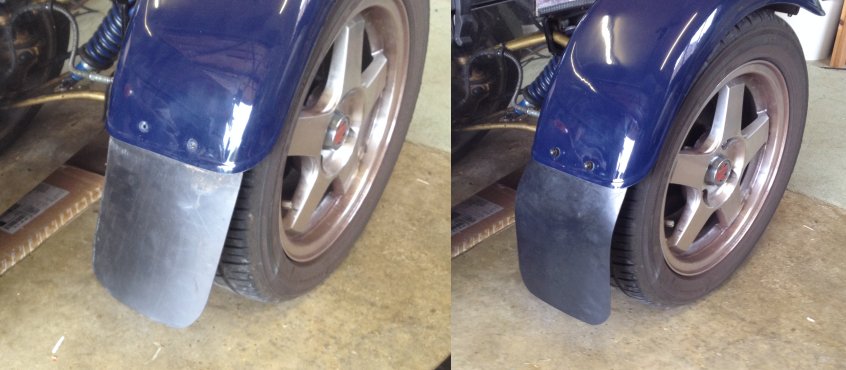
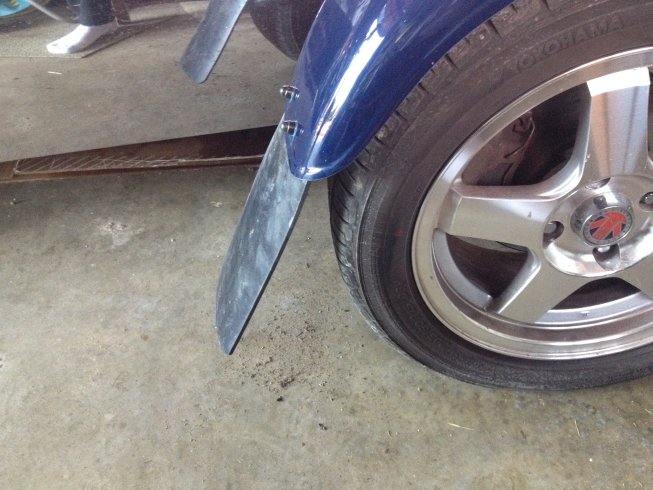
So here is next attempt. I have stuck with 6mm rubber but now it is much longer and clears the ground by only about an inch. Will see tomorrow (weather looking good) if it works. If not I might have to give up.
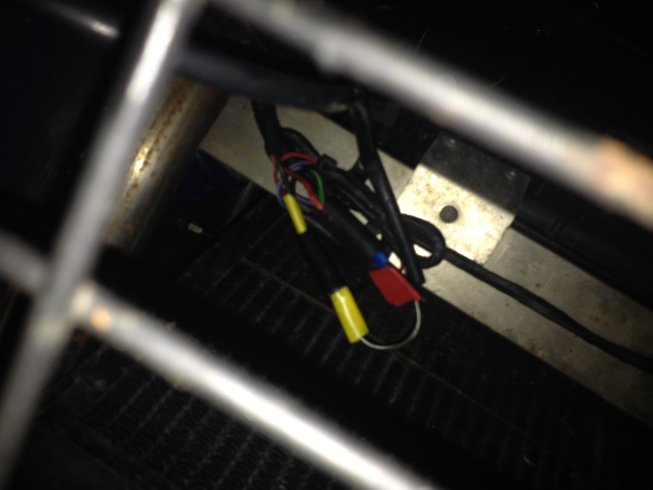
I also took the opportunity to fix the indicators, as technically I was driving illegally. As expected (just the front offside wasn't working, the rest were flashing at double-speed and the bulb was OK) it was a loose connection just inside the nose cone where the indicator wires meet the main loom. I also took the opportunity to mark the wires with coloured insulating tape so that I don't get the wires reversed when I take the nose cone off (next job on my ToDo list is to improve the lower mounting of the cone).
Later: Mudflap very successful, dirt and muck along car and on rear mudguard much reduced. Now I just need to do the other side.
At long last the weather was suitable to go out for a spin and do some small jobs on the car. Still cold but compared with previous days, quite balmy.
So a short blast through the country lanes. Had to take it a bit carefully as some of the roads are still a bit damp. In fact accelerating away from corner a bit too aggressively and I had a very disconcerting 'wiggle' from the back end. With the car not having moved in 2 weeks, the expected petrol smell was there, but nowhere near as bad as I expected. If my supposition is correct that the pipe between the transmission tunnel and the filter is absorbing petrol then evaporating off then that would be logical. I shall see tomorrow if the smell has disappeared.
Checked all the wheel nuts and suspension bolts were still tight. I never do that on the Volvo, just seems a good idea on a home-built car. Gave the stainless steel a good clean. After all the experiments it seems that Windolene is the best thing to use. And also put Rainex on the windscreen. The wipers are pretty pathetic so maybe that will improve the situation if I am forced to drive in the rain.
Only major job undertaken was fitting a new mudflap on the offside front wheel. Back in September (See here) I had fitted a longer mudflap but I was a bit worried it was too flexible.
Turned out I was right, and at speed the flap lifted and even more muck was flicked back along the body and rear mudguard.
So I bought a new 6mm piece of rubber (the previous one was 2mm) and fitted a new stiffer flap.
Unlike a normal car, the wing and mudflap actually move up and down with the wheel, so in theory I could extend the mudflap down till it was almost on the road and that would really guarantee a clean body. Unfortunately that requires a piece of rubber 230cms long, and it is normally sold in 200mm lengths. If this still doesn't protect the body I might have to bite the bullet and buy some oversize pieces.
Next day: Nice long trip for a walk, and lunch, round Rutland Water. And this was what the rear splash protector looked like when I got back.
Back to the drawing board.
And to add insult to injury the right indicators stopped working properly. Narrowed it down to the front right flasher but the bulb is fine so must be a wiring problem. What fun !
Would love to take her out for a run, but is much too cold. And if I did take her out I would have to spend an hour cleaning her as the roads around here are wet & muddy.
Taking of which, I have decided my experimental mudguard flap is too flexible. At speed it swings backwards and allows all the muck on the road to cover the body and rear mudguard. So I have bought some 6mm, much stiffer, rubber and will try that.
Also treated myself to a complete new set of fuses that have built-in LEDs that light up when they blow. Seems like a much better idea than taking each one out to check it.
So when the temperature goes up a bit.......
Decided it was way too
cold to take the Tiger out, as well as the indicators not
working (although I have the doors off so I can use hand signals) and
had all the electrics exposed ready for the replacement flasher unit
arriving. So got into the Volvo and nothing but clicks,
battery flat !!
So off I went, and used hand signals for the first 2 turns then at
the first roundabout force of habit made me select the
indicator. And it worked perfectly :-)
I can only assume the flasher unit has dried out, but I had put it onto
a warm radiator for 2 hours 2 days ago and it hadn't worked, but 24 hrs
in a freezing cold garage and it is OK. Go figure !! At least I will
have a spare flasher unit
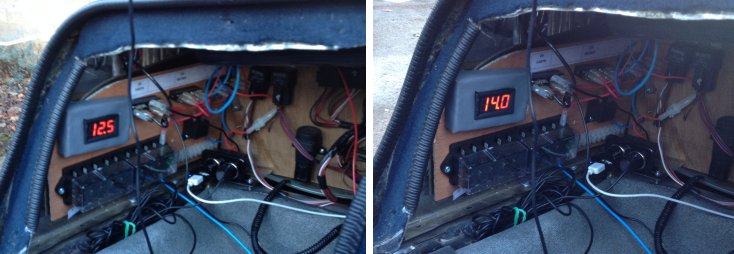
Also came in useful to check battery and alternator. And as you
can see they are both bang on specification, 12.5 V with just the battery and 14.0V when alternator working. And it only dropped to
13.7V when I put the headlights on, again as per specification.
Before Start After Start
So just the reversing lights to fix now.
Although it was a fun journey to Bedford it did upset the car a bit.
When I checked this morning I found that:
1. The nearside fog light unit mounting bracket had broken and the light had fallen off and was hanging by the wire.
2. The brake lights were going on when the clutch was pressed.
3. The indicators were not working.
4. The reversing lights were not working.
Remounted the fog light by removing the mounting bracket, drilling a hole in the plastic back of the light and using the same hole in the panel to bolt it direct to the body. I think the new direct version looks better, flush with the body and much more sturdy. Might redo the offside one to match.
Found that pushing the clutch in was slightly rotating the bar that holds the brake and throttle pedals. So a spray of WD40 and a minor adjustment of my new brake light switch and that was fixed.
Indicator almost certainly a failed flasher unit as when I took it out of the plastic bag I had put it on before it was soaking wet with condensation. And the hazards work so the fundamental circuitry and bulbs are fine. New one on order.
The reversing light is frustrating. The fuse is OK and neither light is working so I think I may have disturbed the switch on the gearbox when I was rooting around the fuel pipes to see if there was a leak. Can't see anything by looking down through tunnel opening. I think I will have to get her up on ramps to look from underneath. Not a showstopper as I can always remove the lights and put blanking plugs in for the MOT. They are not a requirement but must be working if fitted. Most 2Bs don't have them fitted.
Lots to keep me busy, but car still drivable on the road so I don't have to stay housebound.
Took her on a 120 mile round trip today to meet a new owner who has a part-built Superspec. He wanted to see a completed version and I wanted to see a 'naked' one so it was useful for both of us. Also picked up an old friend on the way I hadn't seen for 10 years as he wanted a look as well. Took the A1 on the way down which was pretty boring, so came back the scenic route through country lanes and lots of villages. Was doing well until I hit a snowstorm. Luckily I saw it ahead, so had time to put the top up.
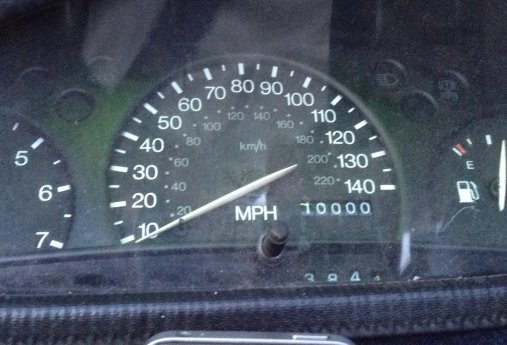
And on the way passed this milestone. She had 6,500 on the clock when I bought her, so I still have another 3000 miles to do to match the previous owner.
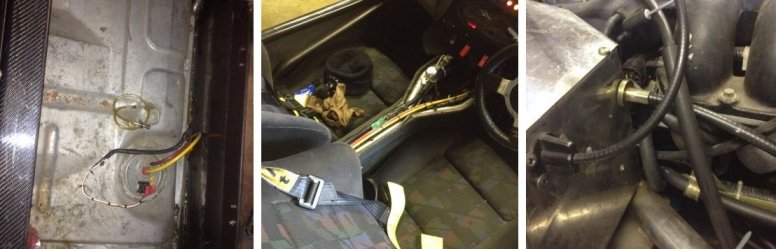
Took her out for a 20 mile run this morning and there was no trace of any petrol smell (and got caught in a snowstorm!). And adding to that the advice on the RHOCaR forum and the fact that there was a very strong smell of petrol in the garage a couple of hours after returning yesterday I think I have narrowed down the problem. This is the 'wiring diagram' of the fuel system
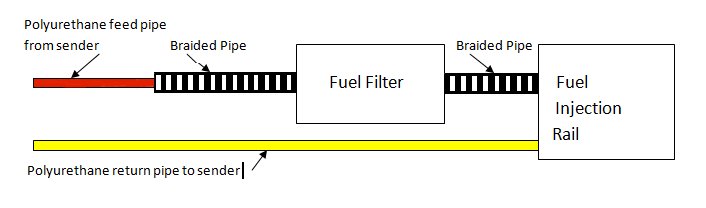
The previous owner tells me he replaced the braided pipe between the filter and injection rail as it was being corroded by modern, ethanol added, fuel. So I suspect the other piece of braided pipe is going the same way. Under normal driving conditions there is no problem, but if the car remains stationary for more than a few days then the pipe starts to absorb petrol. Once the car is started nothing happens for the first couple of minutes but when the engine heats up it starts to evaporate the absorbed petrol (and the smell comes up through the dashboard and tunnel). However, once the car is put away with the engine still hot it continues to evaporate for a few hours, hence the smell in the garage a couple of hours later. By the next morning all the absorbed petrol has evaporated so the smell goes away.
So obviously the fix is to replace the second piece of braided pipe with the latest ethanol-resisted fuel pipe. But this is not an easy fix so I will live with for now, knowing that a quick 'blast around the block' after a lay up will cure the problem overnight.
Back from an extended holiday. Having left the car stationary for 6 weeks this was an ideal time to revisit the petrol smell as I have now proved that it occurs only after the car is not used for some time.
So first thing to do was expose as much of the petrol pipe as I could, the fuel sender, through the back bulkhead, along the centre tunnel, into the fuel filter in the engine bay and then to the fuel injectors.
Initially there was no smell at all, so I could eliminate a permanent leak.
The next stage was to turn the ignition on so the fuel pump would pressurise the system. Did this and after 10 minutes there was still no smell.
Next step was to run the engine, so did that and after 2 minutes still no sign of a smell.
Final step was a run around the block. After a couple of minutes the smell started and by the time I got back to the garage it was quite strong.
So checked around and there was no smell around the engine or the boot or the back of the tunnel, but a very strong smell coming up thought the front of the tunnel by the gearbox. But as far as I could feel there was no leak to create the smell.
So I now know the problem lies between the front of the tunnel, where the fuel pipe from the rear is connected to a pipe coming from the filter. Unfortunately that is very difficult to access so will have to consider what next.
Back in September I fitted an incredibly loud buzzer and a bright flashing light to the indicators to try an avoid leaving them on all the time (there is no self-cancelling mechanism) and said I would report back.
Result: 100% success, I have not accidentally left the indicators on since then.
Suddenly yesterday the speedometer stopped working. So it was off with the passenger side dashboard to check it. Soon found the cable had come out of the instrument cluster so pushed it back in. I thought it should screw in but couldn't get the outer cover to turn. Maybe it is just a push fit and it had vibrated out ?
So took it for a test run and the speedo was fine, but now the tachometer wasn't working. I also noticed the oil pressure light in the instrument cluster was not working although the auxiliary one I have mounted on the top panel was fine. So I assumed I had disturbed a wire while fiddling around behind the cluster.
So off with the dashboard panel again, unplugged the main lead plug from the back of the cluster and looked for a break. Everything seemed fine, although still a rats nest. So plugged the lead back in again and 'bingo', everything worked. So maybe the plug had also vibrated loose.
Anyway, everything now working again. Which is a good thing as it is bl...y cold in the garage :-)
Since I bought the car some 15 months ago I have tended to drive with the doors fitted and the soft top rolled up and stored at the back. Only on really warm days when there was no chance of rain would I drive with the doors off. Even then it was very 'blowy'.
That has changed dramatically since fitting the Wind Deflectors (see here) and now I drive all the time with the doors off. This gives me a problem as to where to store the doors while driving. There is no point having the soft top fitted if I don't have the doors.
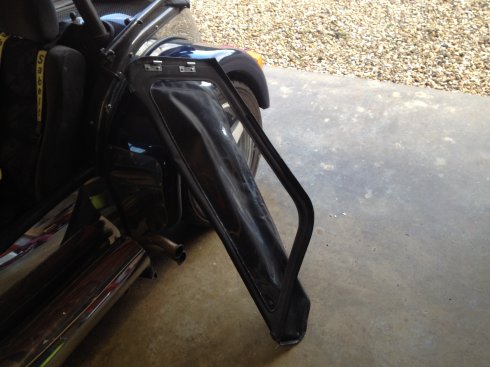
The doors are desgined around a metal 'skelton' covered by fabric. A discussion at the last Meet showed me that many other owners have simply cut the vertical struts of the skeleton so that the doors can be folded and then stored behind the seats.
So out came the hacksaw and 5 minutes later I have 2 folding doors.
They still fit perfectly, and as they are anchored at opposite corners the structural integrity has been maintained. It may be that the bottom front will flap a bit at high speed, so I may look at attaching some small magnets to clamp them to the stainless steel body.
 Most importantly, they now slide in nicely behind the passenger seat. So now I can go out without the doors fitted comfortable in the knowledge that if I get caught in the rain I am fully ready.
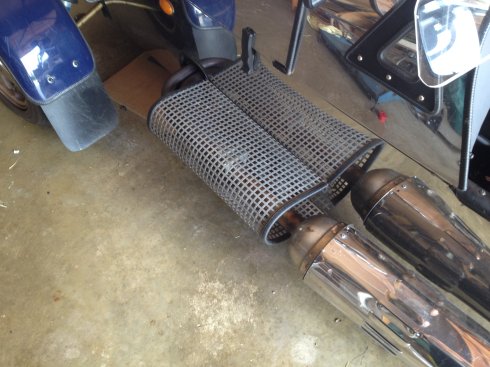
One of the downsides of the dramatic noise reduction as a result of rubber mounting the exhaust (See here) (now you can hear me coming from only 100 yds away rather than half a mile) is that it exposed some other noises and rattles that had previously been hidden by the exhaust noise.
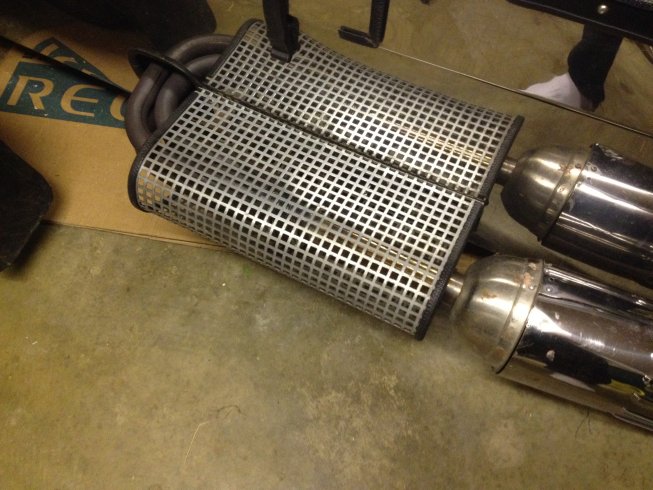
One intrusive one was a vibration from the bell-end of the exhaust heat shield.
This was actually loose when I bought the car and I thought I had fixed it by clamping it to the rest of the heat shield with some stainless steel brackets.
Apparently not well enough :-)
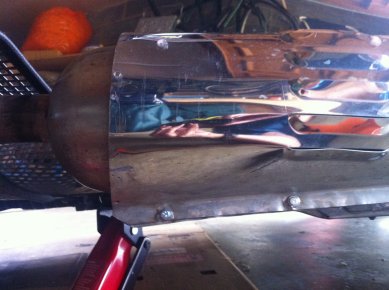
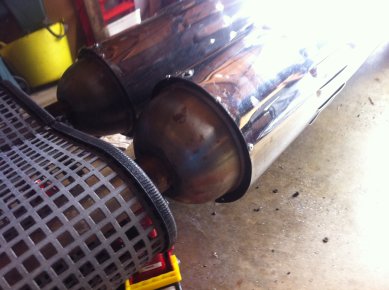
Having seen other Superspecs I knew it was actually supposed to be fitted inside the heat shield. My problem was that the screws holding the hear shield together were rusted solid, which made them impossible to remove and also looked very unsightly.
So it was out with the drill and I drilled out all 6 of them. That enabled me to position the bell housing properly inside the heat shield and then I bolted it back together with stainless nuts and bolts. So now it looks much better and I will be able to remove it easily if needed.
And with addition of some pop rivets on the heat shield to stop the bell housing coming loose again the job was done.
A quick test drive and the rattle has definitely disappeared. At the moment I can't hear anything else rattling or vibrating , but time will tell.
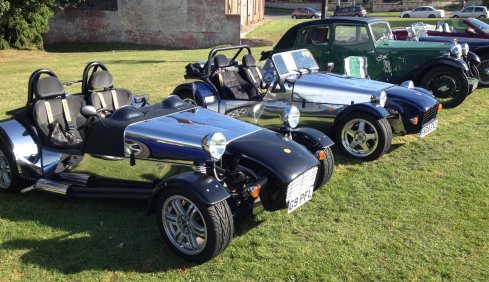
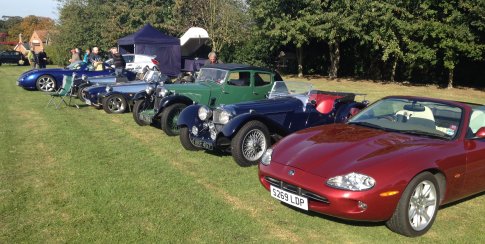
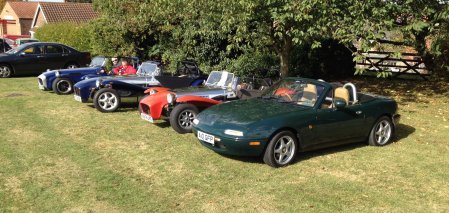
Just back from a cracking day at the Summer Fair at a village a couple of miles away. Weather was perfect, lots to do, eat and see. I not only took my car but also persuaded 5 other members of the Club to come as well. We joined about 40 other 'classic' cars (up from 7 last year) and as usual ours generated lots of interest and chatting. Hardly stopped talking for 6 hours.
A lovely collection
Including a very long serving member who has had to sell his Robin Hood but has treated himself to a Mazda MX5.
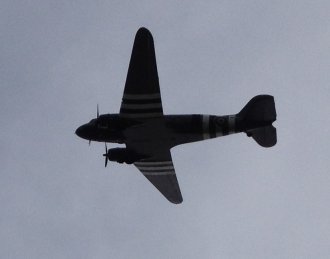
Finale was a fly past by the Battle of Britain Dakota, who flew exactly over my car.
Already looking forward to next year.
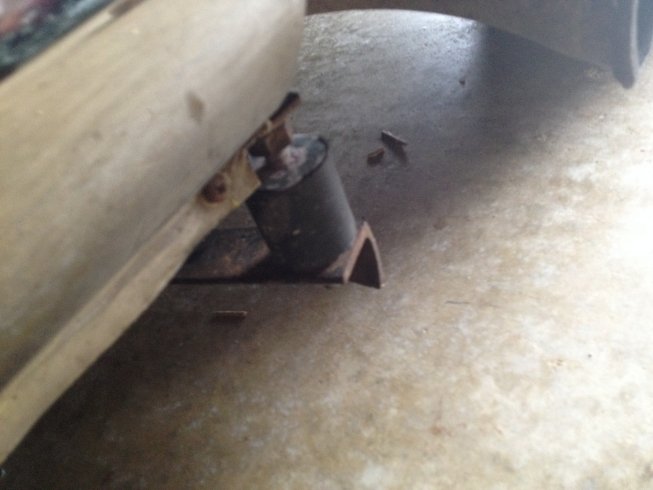
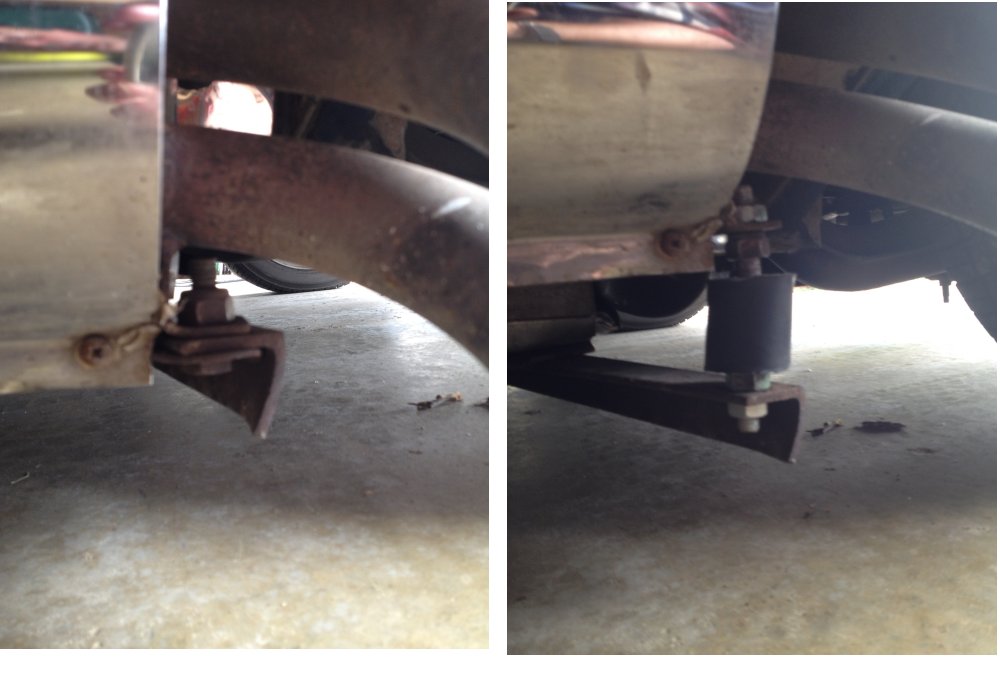
Having raised the front ride height (see here) and fitted a sump guard (see here) I have had no problem with grounding the front. So moving onto the next culprit, I find the rear exhaust mount occasionally grounds, particularly on speed bumps. If I have a passenger in then it grounds every few hundred yards, particularly going round right hand turns.
The problem is that the bracket is a 1" piece of angle iron. This is incredibly strong and as you can see from the picture has suffered no lasting damage as a result of the multiple groundings.
On the face of it the solution is simple, just replace the angle iron with a piece of 5mm steel plate. That would increase the ground clearance by 3/4" and probably prevent any further grounding.
However, there is a downside. If that was carried out the next part that is closest to the ground is the bottom of the handbrake mechanism which protrudes almost an inch below the bottom of the car floor. And if that grounded there would be major consequences and subsequent repairs.
So the question is: Should I leave the angle iron as a protection measure for the handbrake and accept the grounding, or should I replace it to stop the grounding with the risk that if ever I did hit a substantial bump in the road I might damage the handbrake mechanism ?
On balance, particularly as the angle iron does more damage to the speed bumps and none at all to the car when it grounds, I am tempted to leave things alone. Watch this space.
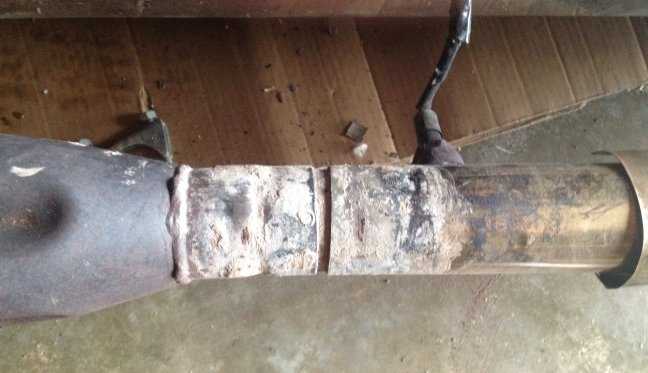
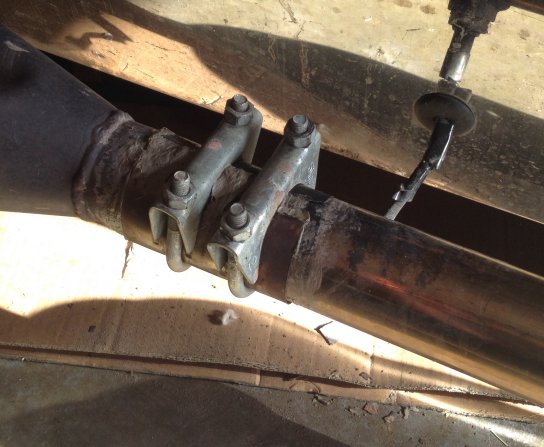
Eventually got round to fixing the exhaust blowing.
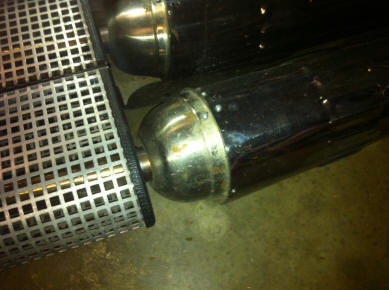
First thing was to remove all the crud from the 2 pipes.
Then an exhaust bandage and plenty of Gun Gum.
And this time I have used a solid piece of steel rather than a Baked Bean can as the final cover in the hope that it will provide the joint with much more support which, in conjunction with the new rubber mount on the back of the exhaust, means I might not have to do it again for some time.
Only time will tell.
And then I remounted the heat shield, this time with 3 self tapping screws, fully tightened so it is properly anchored. I hope :-)
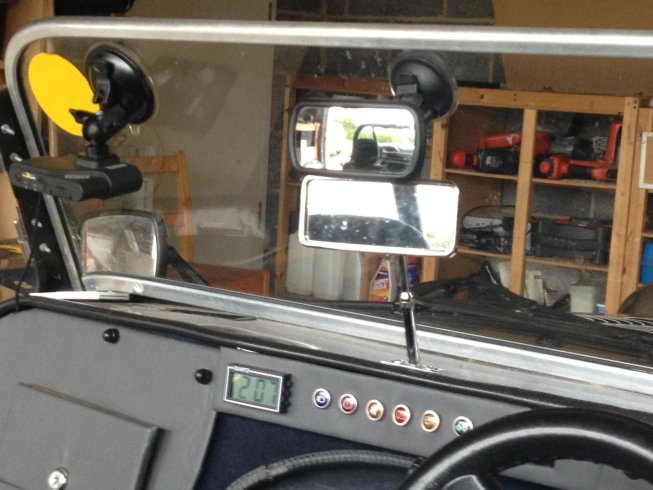
When I lost the original rearview mirror I am convinced I looked absolutely everywhere in the car to find it. But recently, whilst helping someone strap into the passenger seat I saw it had slipped down into the small gap between the seat and the bodywork.
So I put it back on the windscreen, intending to remove the new extending one.
But when I took it for a ride I actually found it was quite useful. The original one is very solid and does not vibrate but has the drawback that it is very wide-angle. So you only see another car when they are right behind you. The other mirror is has a narrow field-of-view so you can see individual cars from some distance away.
So it makes sense to keep both, although I keep having to explain the reason to interested onloookers.
After fitting the new wing to the offside front (see here) I refitted the original mud flap. The problem was that the wing was about 2" shorter, so the bottom of mud flap was correspondingly higher. The result of this was that the stone guard on the rear wing gets absolutely filthy, unlike the nearside, which remains relatively clean.
So the solution was to fit a longer mud flap so that the bottom aligned with the nearside one. A quick trip to E-Bay and a couple of pounds bought some new rubber sheet. And fitted as shown.
You can see the new one is a bit more flexible than the original. Only time will tell if I have to replace it with a more rigid piece of rubber.
But that is half the fun with the car, experimenting with different things to see what works and what doesn't.
If this does work perhaps it's time to replace the nearside wing so I have a matching pair. :-)
As we approach the end of the 'season' the Club get together in a field in Northamptonshire for a weekend before some (not me) lay the cars up for the winter. Apart from being a good social meet, this year the Committee laid on a bouncy castle for the kids, archery lessons for the adults (I actually did surprisingly well although more by luck than ability) and a brewery visit. In the evening there was a BBQ, beer, cake and a band in the marquee.
It was a lovely relaxing weekend, covered yet another 100 miles, starting with a 1:30hr drive down country lanes in glorious weather to get there. And with my new wind deflectors fitted it was all done 'no doors'. Tremendous difference.
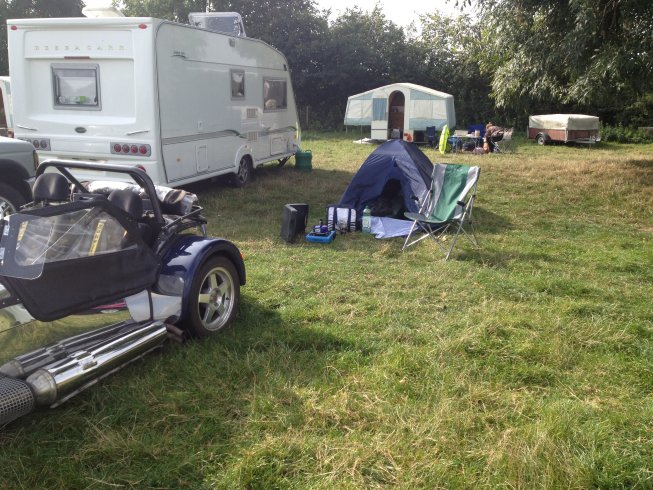
Having now got organised properly I camped overnight again.
Here is my 'home away from home'.
I am now setup to cook my own dinner and Sunday breakfast was muesli and yoghurt, a bacon & egg butty and 2 cups of coffee. More than I normally have at home :-)
I had actually forgotten the real pleasure of waking up on a crisp and clear Autumn morning to the sound of the birds and getting out of the tent into the wonderful weather. Might have been different if it had been raining, but this time it was absolutely lovely.
Came back on another scenic route, stopping at the kids houses for a cup of coffee. I didn't put my headphones on, which was handy as I heard a new noise. It's amazing that with all the squeaks, rattles, pops and bangs that happen all the time a new noise can quickly be discerned.
Turned out it was because 2 self-tapping screws had come out to of the exhaust heat shield causing it to vibrate.
I had also found a bolt and two nuts missing from the offside mudguard I had replaced. Good thing I have the label "Kit Car: Bits May Fall Off" on the back of the car :-)
As so often happens when you see other people's cars and discuss details with them I came away with more ideas to improve the car. So plenty to do over the winter, although in the short term I MUST fix the exhaust blowing and mount the heatshield by a better method.
Having fitted a windscreen camera and also going on long journeys requiring my iPhone to act as a SatNav, and needing to be plugged in to charge, I found one auxiliary socket was not enough and there were lots of untidy wires hanging all round the passenger compartment.
Also my existing auxiliary socket was wired directly to the battery and for both the camera and the iPhone I really need them powered up only when the ignition was live. Time to sort it out.
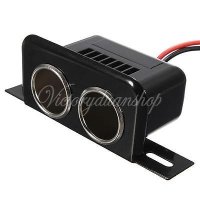
So first thing to do was buy one of these from E-Bay.
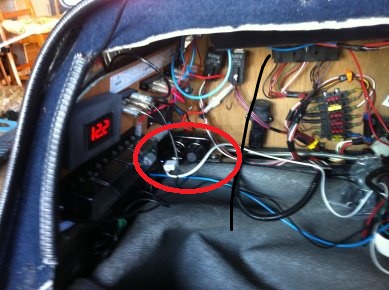
Then I mounted it on the electrical panel on the bulkhead in the passenger footwell to add to the 'rats nest' of wires already in there.
(Note Battery voltage reading 12.2V so still good)
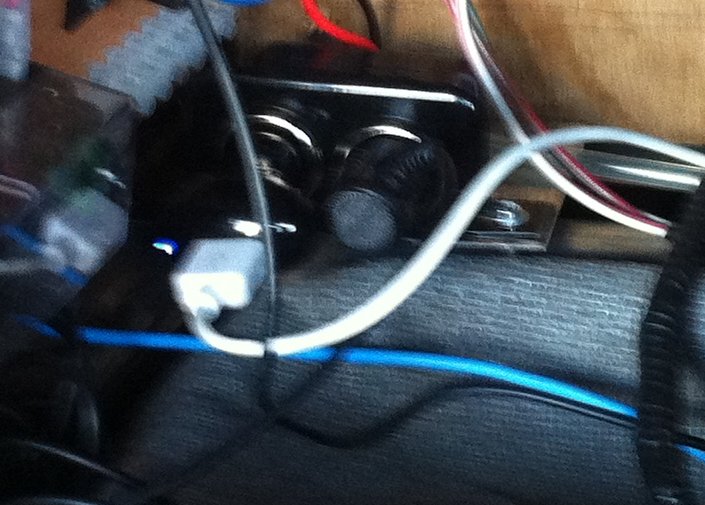
Here's a close up with the USB Charging lead in the left socket and the Camera power supply in the right socket.
And the USB lead just popping out from under the dash.
Resulting in a nice clean finish with minimal wiring showing, both the camera and the iPhone charger power up only when the ignition is turned on and I still have an auxiliary socket for other uses (such as blowing up my mattress when I take her camping).
One of the joys of driving a kit car is the open top and lack of windows. The problem with the design of these cars is that it can get very 'blowy', so many of us drive with the doors on to reduce the effect.
The other solution adopted by many users is to fit perspex wind deflectors to the windscreen pillars. So I decided to join them.
I used the same mounting point as the doors with a couple of pieces of perspex off E-Bay, with some home-built stainless steel brackets.
And by angling them correctly I can still mount the doors if rain is expected. So it isn't an either/or situation.
A quick trial run around the block showed they appear to work well.
Following the second 'blowing' at the exhaust/manifold join I decided it must be a design fault where there is no support for the exhaust pipe except right at the back. That means that all the vibrations and movement of the engine are transmitted to that joint.
Yesterday I visited Richard Stewart (the designer of the car) to pick up some spare parts, and we talked about the problem. He was very surprised that the rear of the exhaust was bolted directly to the chassis and told me it should be rubber mounted to avoid that exact problem. I then realised that in the box of spare parts (aka 'bits left over') that the previous owner had given me there was a rubber mounting that should fit the bill. (He has subsequently admitted he maybe should have fitted it).
So the solid mount was changed for a rubber mount.
Took her for a run and was very surprised to hear a dramatic reduction in the noise level. I wasn't expecting it but I guess it is logical, as the rubber mount prevents the noise from being amplified by the body of the car.
It remains to be seen if my next attempt to fix the exhaust leak lasts longer then the previous one.
As changing the fuel pipe (See here) did not cure the petrol smell it was time to look elsewhere. I still think the leak is at the filler end so it is either at the filler cap or where the pipe meets the fuel tank. After my recent road trip I could see the streaks down the back that showed that she was definitely leaking at the cap, so even if that wasn't the source of the smell it needed investigating.
The actual seal looked OK, but the cap did seem to have some play in it so maybe the seal needs packing a bit.
So as a first experiment I've added a large rubber elastic band as a temporary test. I've no doubt the fuel will very quickly eat through it, but it will show if that is the source of the smell.
Postscript: Filled the tank today and went for a run. The elastic band worked wonders. There must still be a small leak, probably at the pipe/tank junction, as throwing the car round a left turn still generates a smell. But it disappears very quickly. And there are no streaks down the back of the car.
Job done !
Just back from my first go a 'road trip'. I drove from Linconshire to High Wycombe via 2 of my children and the previous owner of the car. Stayed overnight at my brother's house and then returned the following day. I covered a total of 240 miles and the car behaved flawlessly. The weather was just about perfect, overcast so I didn't get blinded or sunburnt, temperature around 70F and no sign of rain. Temperature-wise she ran on the high side of normal but did not overheat, although the fan kicked in a couple of times at traffic lights.
Amazingly, I found the missing rear view mirror (See the original post here and the more recent post here) under the passenger seat while showing my brother around the car. So on the return journey I fitted both mirrors to see what it was like.
The old mirror was rock solid but still badly distorted the view, the new one gave a much better view but still vibrated a bit. Next plan is to run them both and stabilise the lower one by attaching a link to the top one.
The new indicator buzzer was also very successful (See the relevant post here). Even with headphones on I could hear it clearly and never left the indicators on by accident. Apparently my brother could hear it when I turned at the end of his road about 50 yards away :-)
Ever since I have had the car the indicators have been a problem. The car is not fitted with an indicator canceller (or if is fitted it doesn't work), the flasher light on the console is very difficult to see, the buzzer is buried deep inside the dashboard and you cannot see the indicator lights. So I have spent many a long period driving along blissfully unaware that the indicators were flashing.
The previous owner had fitted an extra lamp on the dashboard to help, but I found my right hand obscured it.
So I moved it to the centre console, hoping it would be easier to see. But I still kept missing it as it was very dim (using a multi-meter I found it was only getting about 4 volts) and with the sun shining on it it was almost invisible.
After a chat at Donington I bought a new, large, indicator light and an industrial strength buzzer unit. So out came the panel and some more wires added to the rats nest. And I wired the bulb across the buzzer unit rather than the existing flasher so that it gets the full 12V.
This is the result. A large blindingly bright bulb right in my sightline and the extra-noisy buzzer unit mounted outside on the steering column so it isn't deadened by the dashboard or carpet.
Surely that will solve the problem ?
Only time will tell. I'll report back.