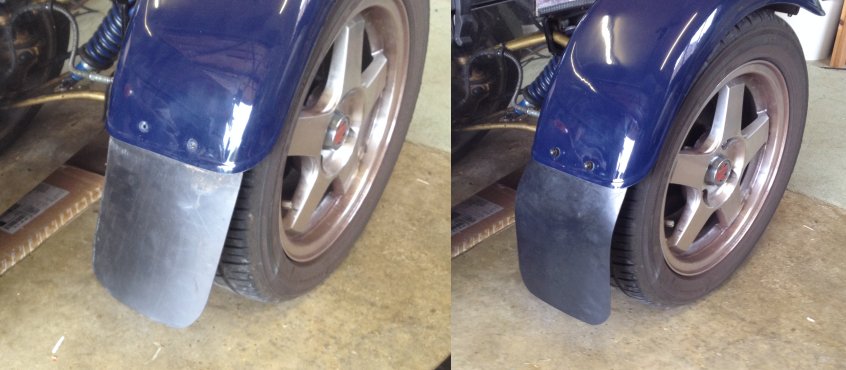
After fitting the new wing to the offside front (see here) I refitted the original mud flap. The problem was that the wing was about 2" shorter, so the bottom of mud flap was correspondingly higher. The result of this was that the stone guard on the rear wing gets absolutely filthy, unlike the nearside, which remains relatively clean.
So the solution was to fit a longer mud flap so that the bottom aligned with the nearside one. A quick trip to E-Bay and a couple of pounds bought some new rubber sheet. And fitted as shown.
You can see the new one is a bit more flexible than the original. Only time will tell if I have to replace it with a more rigid piece of rubber.
But that is half the fun with the car, experimenting with different things to see what works and what doesn't.
If this does work perhaps it's time to replace the nearside wing so I have a matching pair. :-)
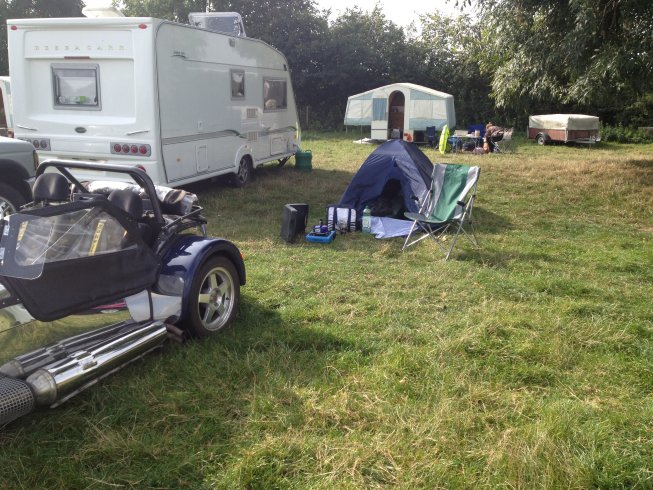
As we approach the end of the 'season' the Club get together in a field in Northamptonshire for a weekend before some (not me) lay the cars up for the winter. Apart from being a good social meet, this year the Committee laid on a bouncy castle for the kids, archery lessons for the adults (I actually did surprisingly well although more by luck than ability) and a brewery visit. In the evening there was a BBQ, beer, cake and a band in the marquee.
It was a lovely relaxing weekend, covered yet another 100 miles, starting with a 1:30hr drive down country lanes in glorious weather to get there. And with my new wind deflectors fitted it was all done 'no doors'. Tremendous difference.
Having now got organised properly I camped overnight again.
Here is my 'home away from home'.
I am now setup to cook my own dinner and Sunday breakfast was muesli and yoghurt, a bacon & egg butty and 2 cups of coffee. More than I normally have at home :-)
I had actually forgotten the real pleasure of waking up on a crisp and clear Autumn morning to the sound of the birds and getting out of the tent into the wonderful weather. Might have been different if it had been raining, but this time it was absolutely lovely.
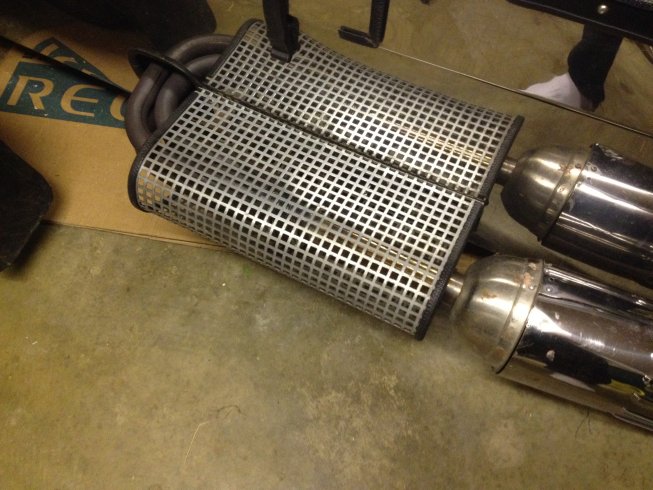
Came back on another scenic route, stopping at the kids houses for a cup of coffee. I didn't put my headphones on, which was handy as I heard a new noise. It's amazing that with all the squeaks, rattles, pops and bangs that happen all the time a new noise can quickly be discerned.
Turned out it was because 2 self-tapping screws had come out to of the exhaust heat shield causing it to vibrate.
I had also found a bolt and two nuts missing from the offside mudguard I had replaced. Good thing I have the label "Kit Car: Bits May Fall Off" on the back of the car :-)
As so often happens when you see other people's cars and discuss details with them I came away with more ideas to improve the car. So plenty to do over the winter, although in the short term I MUST fix the exhaust blowing and mount the heatshield by a better method.
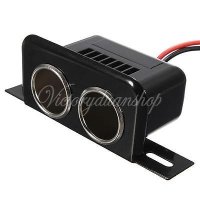
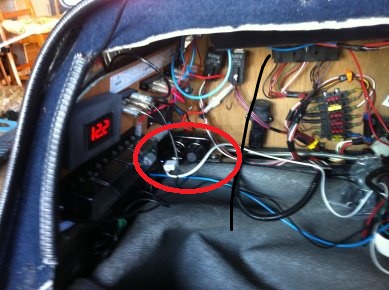
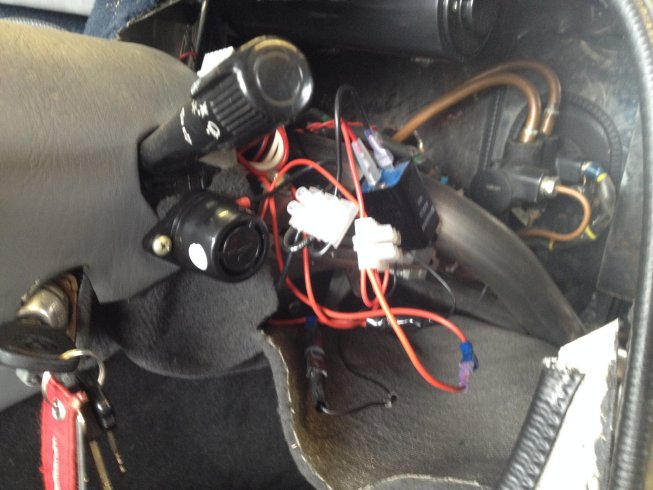
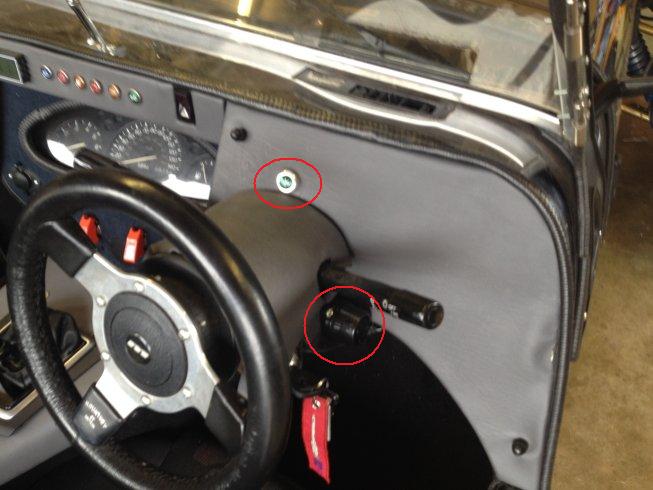
Having fitted a windscreen camera and also going on long journeys requiring my iPhone to act as a SatNav, and needing to be plugged in to charge, I found one auxiliary socket was not enough and there were lots of untidy wires hanging all round the passenger compartment.
Also my existing auxiliary socket was wired directly to the battery and for both the camera and the iPhone I really need them powered up only when the ignition was live. Time to sort it out.
So first thing to do was buy one of these from E-Bay.
Then I mounted it on the electrical panel on the bulkhead in the passenger footwell to add to the 'rats nest' of wires already in there.
(Note Battery voltage reading 12.2V so still good)
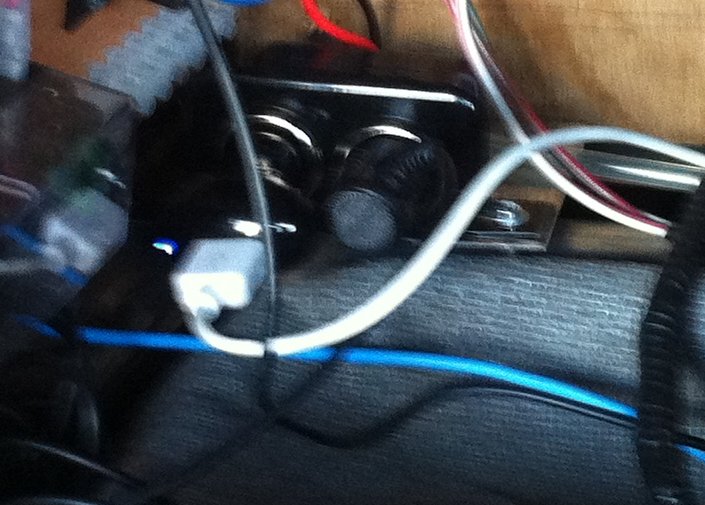
Here's a close up with the USB Charging lead in the left socket and the Camera power supply in the right socket.
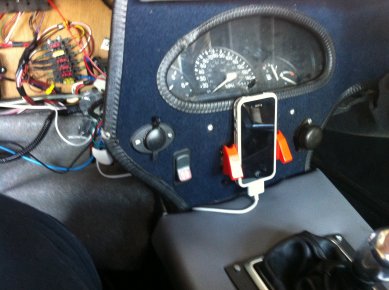
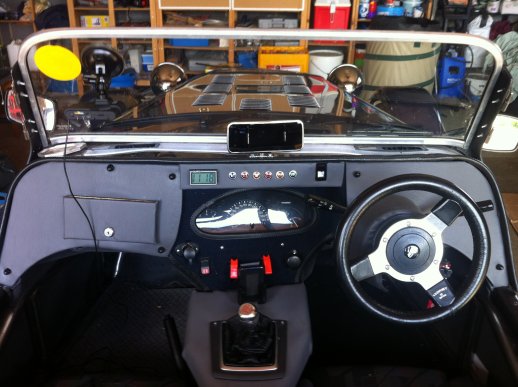
And the USB lead just popping out from under the dash.
Resulting in a nice clean finish with minimal wiring showing, both the camera and the iPhone charger power up only when the ignition is turned on and I still have an auxiliary socket for other uses (such as blowing up my mattress when I take her camping).
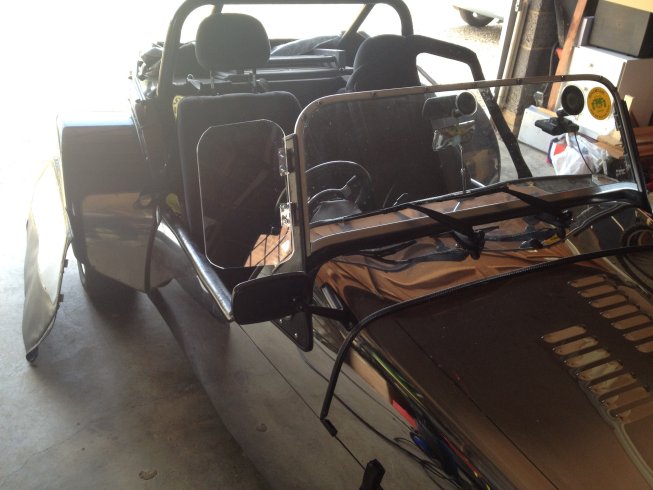
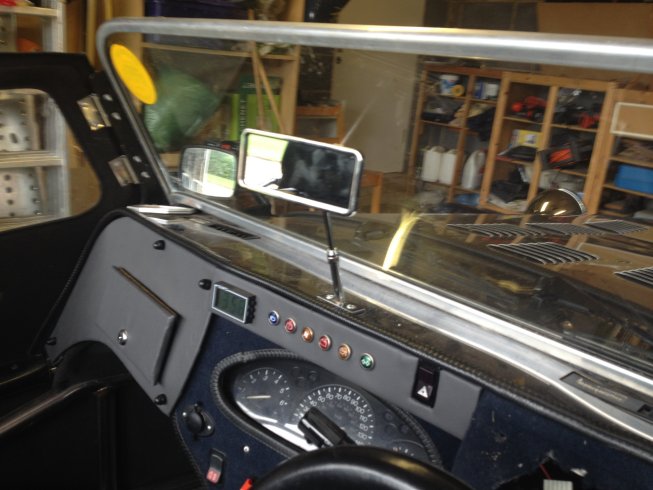
One of the joys of driving a kit car is the open top and lack of windows. The problem with the design of these cars is that it can get very 'blowy', so many of us drive with the doors on to reduce the effect.
The other solution adopted by many users is to fit perspex wind deflectors to the windscreen pillars. So I decided to join them.
I used the same mounting point as the doors with a couple of pieces of perspex off E-Bay, with some home-built stainless steel brackets.
And by angling them correctly I can still mount the doors if rain is expected. So it isn't an either/or situation.
A quick trial run around the block showed they appear to work well.
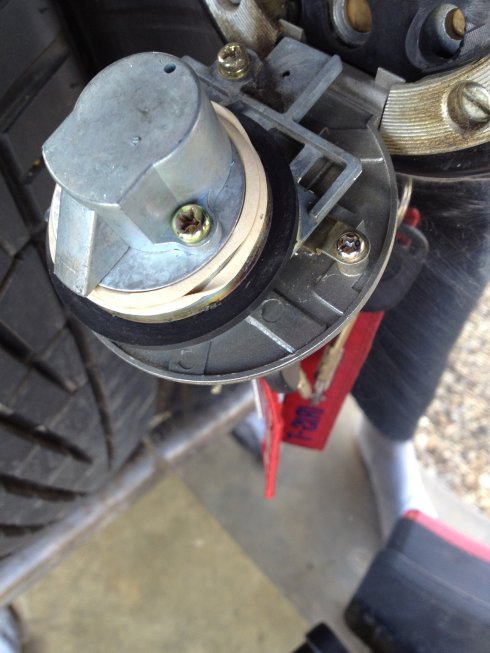
Following the second 'blowing' at the exhaust/manifold join I decided it must be a design fault where there is no support for the exhaust pipe except right at the back. That means that all the vibrations and movement of the engine are transmitted to that joint.
Yesterday I visited Richard Stewart (the designer of the car) to pick up some spare parts, and we talked about the problem. He was very surprised that the rear of the exhaust was bolted directly to the chassis and told me it should be rubber mounted to avoid that exact problem. I then realised that in the box of spare parts (aka 'bits left over') that the previous owner had given me there was a rubber mounting that should fit the bill. (He has subsequently admitted he maybe should have fitted it).
So the solid mount was changed for a rubber mount.
Took her for a run and was very surprised to hear a dramatic reduction in the noise level. I wasn't expecting it but I guess it is logical, as the rubber mount prevents the noise from being amplified by the body of the car.
It remains to be seen if my next attempt to fix the exhaust leak lasts longer then the previous one.
As changing the fuel pipe (See here) did not cure the petrol smell it was time to look elsewhere. I still think the leak is at the filler end so it is either at the filler cap or where the pipe meets the fuel tank. After my recent road trip I could see the streaks down the back that showed that she was definitely leaking at the cap, so even if that wasn't the source of the smell it needed investigating.
The actual seal looked OK, but the cap did seem to have some play in it so maybe the seal needs packing a bit.
So as a first experiment I've added a large rubber elastic band as a temporary test. I've no doubt the fuel will very quickly eat through it, but it will show if that is the source of the smell.
Postscript: Filled the tank today and went for a run. The elastic band worked wonders. There must still be a small leak, probably at the pipe/tank junction, as throwing the car round a left turn still generates a smell. But it disappears very quickly. And there are no streaks down the back of the car.
Job done !
Just back from my first go a 'road trip'. I drove from Linconshire to High Wycombe via 2 of my children and the previous owner of the car. Stayed overnight at my brother's house and then returned the following day. I covered a total of 240 miles and the car behaved flawlessly. The weather was just about perfect, overcast so I didn't get blinded or sunburnt, temperature around 70F and no sign of rain. Temperature-wise she ran on the high side of normal but did not overheat, although the fan kicked in a couple of times at traffic lights.
Amazingly, I found the missing rear view mirror (See the original post here and the more recent post here) under the passenger seat while showing my brother around the car. So on the return journey I fitted both mirrors to see what it was like.
The old mirror was rock solid but still badly distorted the view, the new one gave a much better view but still vibrated a bit. Next plan is to run them both and stabilise the lower one by attaching a link to the top one.
The new indicator buzzer was also very successful (See the relevant post here). Even with headphones on I could hear it clearly and never left the indicators on by accident. Apparently my brother could hear it when I turned at the end of his road about 50 yards away :-)
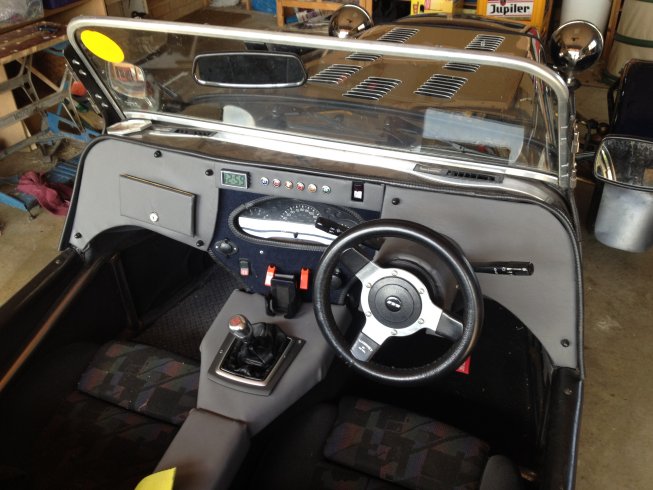
Ever since I have had the car the indicators have been a problem. The car is not fitted with an indicator canceller (or if is fitted it doesn't work), the flasher light on the console is very difficult to see, the buzzer is buried deep inside the dashboard and you cannot see the indicator lights. So I have spent many a long period driving along blissfully unaware that the indicators were flashing.
The previous owner had fitted an extra lamp on the dashboard to help, but I found my right hand obscured it.
So I moved it to the centre console, hoping it would be easier to see. But I still kept missing it as it was very dim (using a multi-meter I found it was only getting about 4 volts) and with the sun shining on it it was almost invisible.
After a chat at Donington I bought a new, large, indicator light and an industrial strength buzzer unit. So out came the panel and some more wires added to the rats nest. And I wired the bulb across the buzzer unit rather than the existing flasher so that it gets the full 12V.
This is the result. A large blindingly bright bulb right in my sightline and the extra-noisy buzzer unit mounted outside on the steering column so it isn't deadened by the dashboard or carpet.
Surely that will solve the problem ?
Only time will tell. I'll report back.
A few months ago I fitted a nice rear view mirror to the scuttle to replace the one stuck on the windscreen that was vibrating too much.
Although it worked well it was a bit low and with the wet weather gear rolled up at the back I couldn't see much.
I did think of mounting it on a piece of wood to lift it up but eventually decided on a more elegant solution.
An extending one. Much better view now.
The journey to Donington and back again showed up the limitations of my cooling system re-designs. Pottering along at 50-60mph, as I normally do, and the temperature was perfect. But once I started accelerating hard and doing 70mph + as I had to on the Memorial Run, I found she overheated again. Also my legs go very hot as the air was coming out in the footwell. A number of people on the Club Forum have pointed out that people always concentrate on getting the maximum air flow through the radiator, forgetting that you also have to provide somewhere for the air to escape as well. So I think my problem is that while I have enough air going through the radiator but at speed it cannot escape from the engine bay so just backs up and slows down the flow through the radiator.
So I need to figure out an escape route for the air.
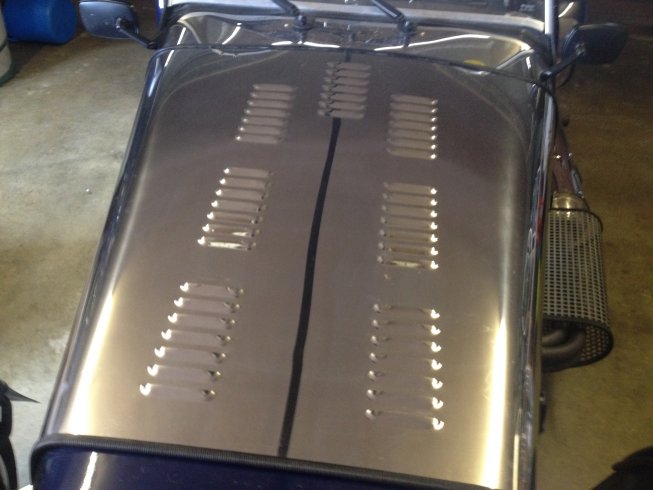
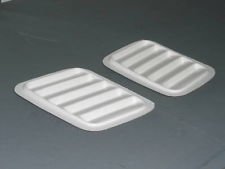
I already have lots of small louvres in the bonnet but apparently they are not man enough for the job.
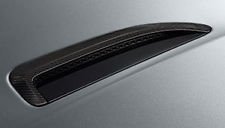
I could try putting some larger louvres in the side panels
or a large hole in the top of the bonnet.
More research needed.
During the repairs needed for the MOT the mechanic tried to repair the leak in the sump. Unfortunately, although he did quite a bit of welding/brazing he eventually had to admit defeat. He has reduced the leak to a tablespoonful a week, so I still need the high tech solution while the garage is in the garage, but the leak is so small I think I will just live with it.
The only long-term solution would be a new sump and I really don't think I need to spend that amount of money just to prevent a small drip.