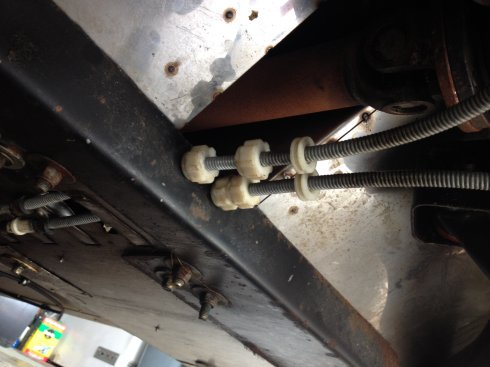
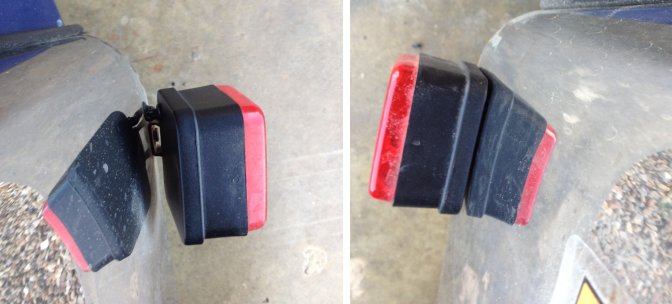
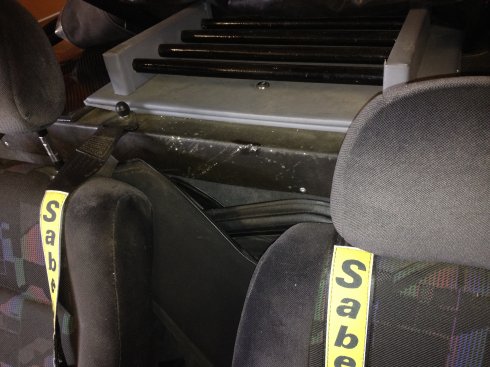
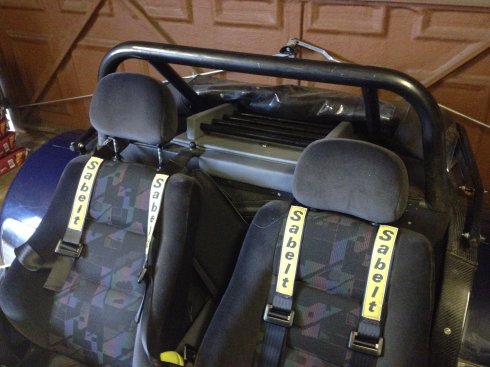
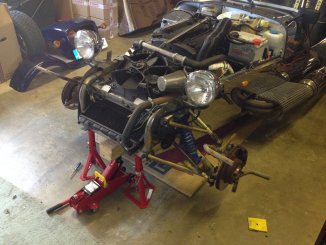
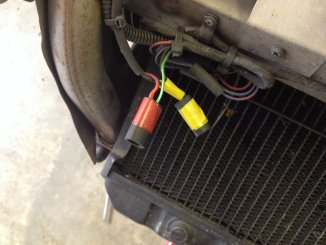
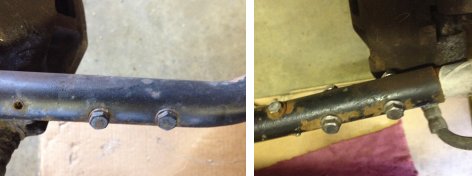
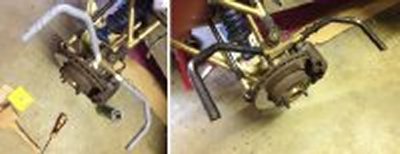
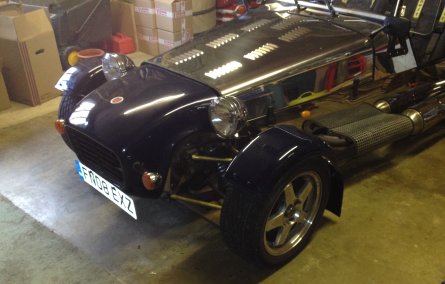
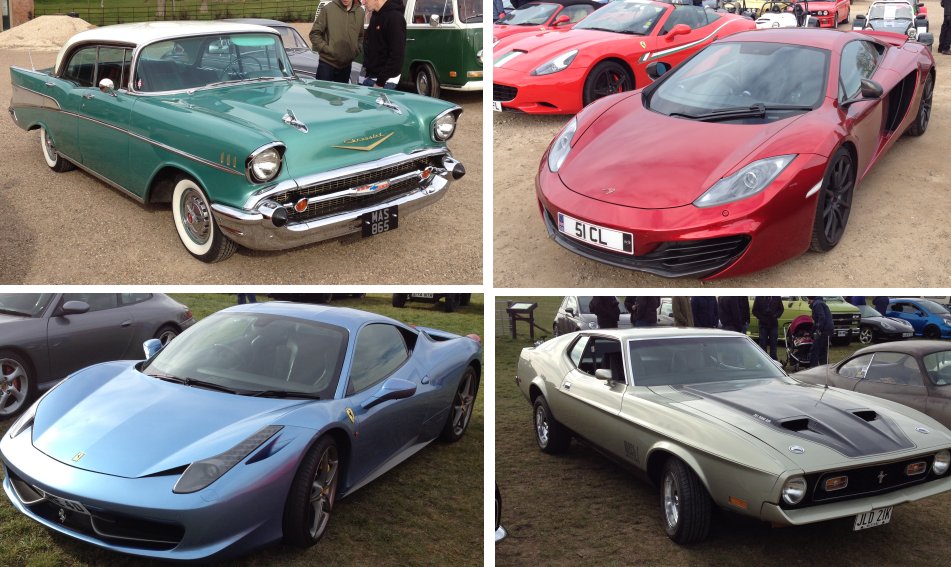
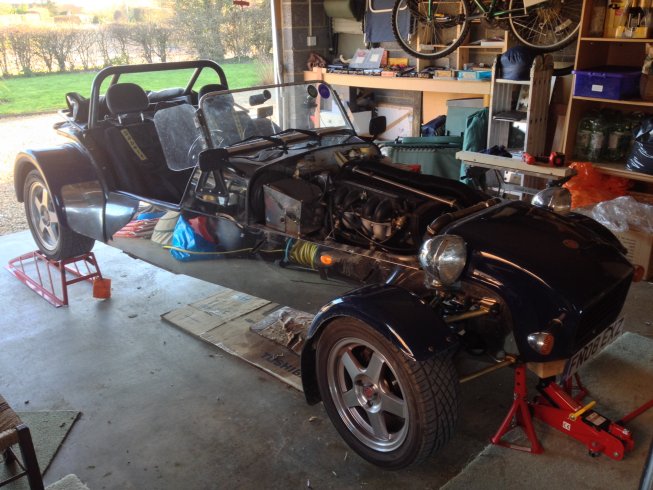
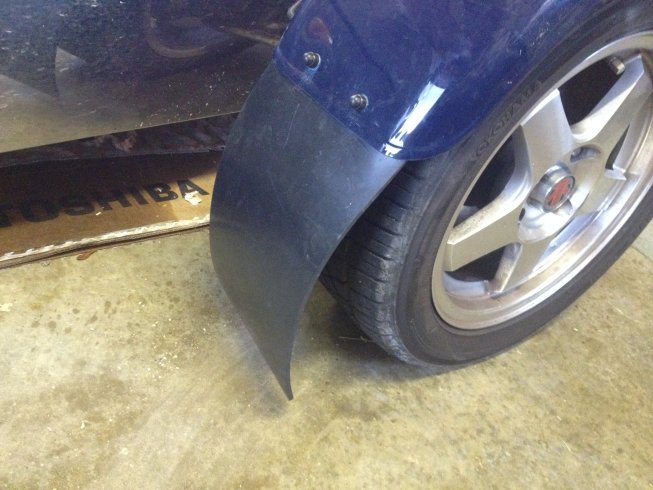
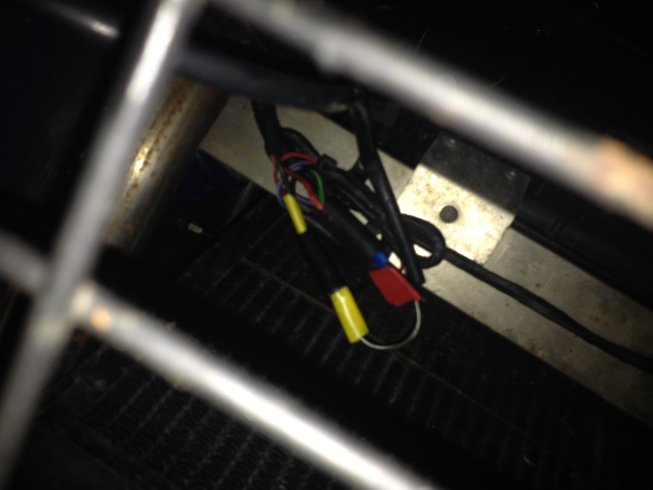
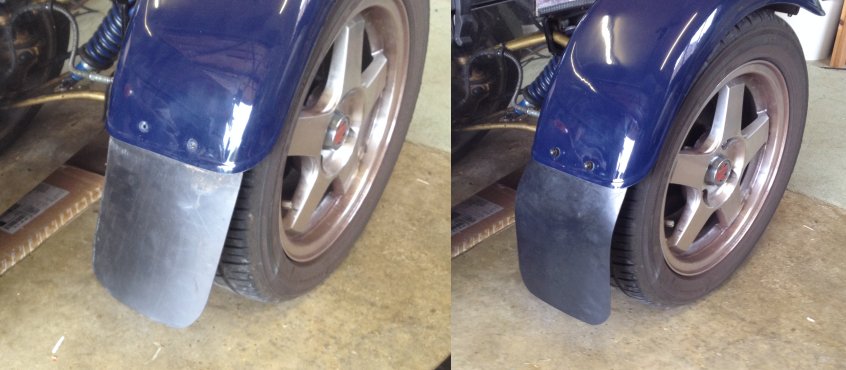
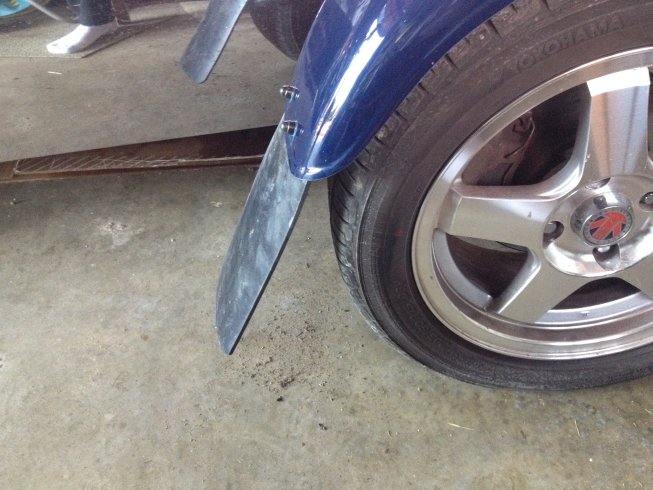
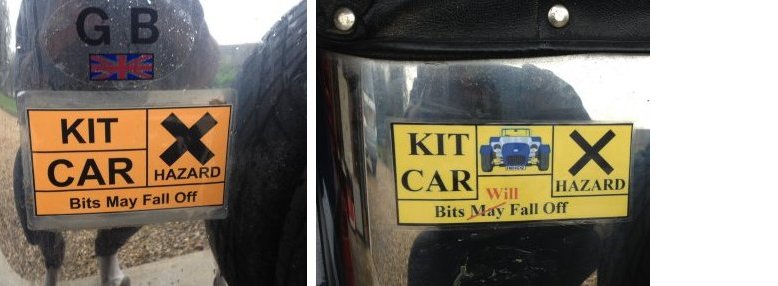
Even though I am out of the country it doesn't stop me watching out for useful spare parts. So have just picked up these for a song
You never know when I might need replacements !!
SuperSpec
Tuesday, 21 July 2015
Monday, 8 June 2015
Picnic at Rutland Water
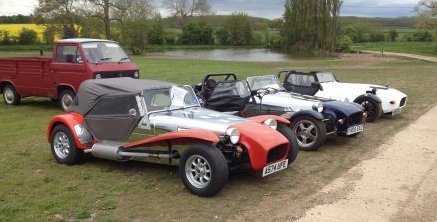
Ever since becoming Area Secretary I had thought the ideal meet would be a Sunday picnic lunch at Rutland Water. This Sunday the weather looked as though it was going to be perfect so I posted a message on the forum saying I would be there having a relaxing lunch and invited anyone else who fancied it to pitch up.
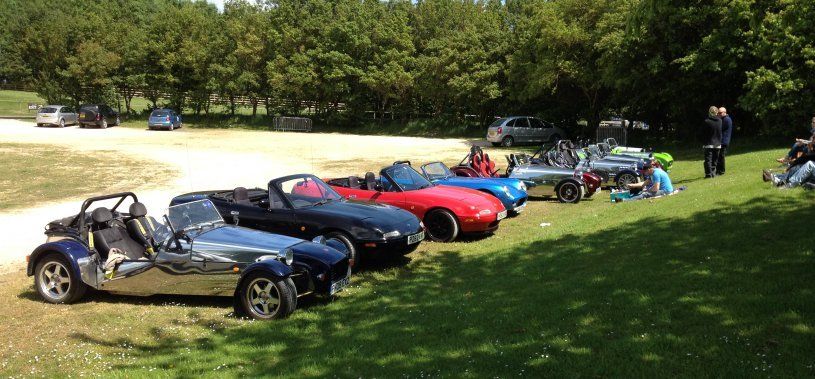
Very successful, we got 4 Robin Hoods, 2 GBS Zeroes, a Mazda MX5, a Roadster and a Stylus. There should have been 2 more Robin Hoods but one had to go to a poorly girlfriend and one went to the wrong car park.
Everyone agreed it was a first rate idea.
Very successful, we got 4 Robin Hoods, 2 GBS Zeroes, a Mazda MX5, a Roadster and a Stylus. There should have been 2 more Robin Hoods but one had to go to a poorly girlfriend and one went to the wrong car park.
Everyone agreed it was a first rate idea.
Wednesday, 3 June 2015
New Tent
Having proven I like camping at the kit car shows (4 times now) I
decided to treat myself to a new tent. My original cheap one from
Downtown was OK, but very low (3') so getting dressed and undressed
was a challenge (got cramp last time) and wasn't suitable for
staying inside if the weather was poor. So bought this one at the
Halfords sale:
Three-man tent, 6 ft high in centre, separate internal bedspace with vestibule for sitting in if it is raining. Very luxurious
And I did do my research first so I knew I could get it on the car, and here is the proof:
Just needs some bungee cords to hold it to the boot lid.
Roll on the next show. Or maybe I will just go off 'walkabout' for a long weekend.
For those that haven't seen it packed I can get the following in the car: Tent, Airbed (and Pump), Sleeping Bag, Pillow, Camping Chair, Gas Stove, Kettle, Frying Pan, Plate, Mug, Knife/Fork/Spoon, First Aid Kit, Waterproof Trousers and Jacket, Change of clothes, 2 days food and 6 bottles of beer What more does a man need ?
Three-man tent, 6 ft high in centre, separate internal bedspace with vestibule for sitting in if it is raining. Very luxurious
And I did do my research first so I knew I could get it on the car, and here is the proof:
Just needs some bungee cords to hold it to the boot lid.
Roll on the next show. Or maybe I will just go off 'walkabout' for a long weekend.
For those that haven't seen it packed I can get the following in the car: Tent, Airbed (and Pump), Sleeping Bag, Pillow, Camping Chair, Gas Stove, Kettle, Frying Pan, Plate, Mug, Knife/Fork/Spoon, First Aid Kit, Waterproof Trousers and Jacket, Change of clothes, 2 days food and 6 bottles of beer What more does a man need ?
Thursday, 28 May 2015
New Floor Covering for Footwells
Right from the start I had found that
the carpet in the footwells used to get very messy and required regular vacuuming.
I had experimented with an extra removable carpet and a rubber floor mat but found they both kept rucking up and making driving difficult.
I had long admired a friend's car that used aluminium treadplates on his car so decided to go down that route. So after building cardboard templates and a few minutes with an angle grinder I have new floor coverings.
They look rather good and make getting in easier as I can slide my feet under the dash.
I had experimented with an extra removable carpet and a rubber floor mat but found they both kept rucking up and making driving difficult.
I had long admired a friend's car that used aluminium treadplates on his car so decided to go down that route. So after building cardboard templates and a few minutes with an angle grinder I have new floor coverings.
They look rather good and make getting in easier as I can slide my feet under the dash.
Tuesday, 26 May 2015
More E-Bay Bargains
Having a permanent Tab in my browser looking for Robin Hood spare parts, I just picked up a couple of bargains.
First was a set of 5 alloy wheels with 16 matching wheel nuts and 4 Robin Hood centre covers.
I had to drive 1:30hr to pick them up but was very surprised to find that not only were they brand new but they were in the original packaging. A great bargain at £150.
Next was a replacement handbrake from a Ford Sierra. I had originally intended just to use it as a spare, but it is in pristine condition, is tighter than the one I have fitted at the moment and comes with a built-in warning light switch. Looks like I will have to swap them over.
Amazingly this one cost just £5.50.
At this rate I will have a complete new car :-)
First was a set of 5 alloy wheels with 16 matching wheel nuts and 4 Robin Hood centre covers.
I had to drive 1:30hr to pick them up but was very surprised to find that not only were they brand new but they were in the original packaging. A great bargain at £150.
Next was a replacement handbrake from a Ford Sierra. I had originally intended just to use it as a spare, but it is in pristine condition, is tighter than the one I have fitted at the moment and comes with a built-in warning light switch. Looks like I will have to swap them over.
Amazingly this one cost just £5.50.
At this rate I will have a complete new car :-)
Thursday, 21 May 2015
Some Seat Maintenance
Having done the front and back ends I thought it was time to do some work on the interior, mainly the seats. There were various things I fancied doing.
1. Clean out under the seats.
2. Clean the seats.
3. Overhaul the seat mechanism.
4. Check seat mountings.
Obviously the first thing I needed to do was to remove the seats. The driver seat turned out to be easier than I expected, just held in by 4 bolts bolted through the floor. It was a bit of a tight fit and I had to remove the tunnel top, but I eventually got it out. The passenger seat was more difficult as one of the 'captive' bolts 'wasn't'. But with a bit of fiddling I managed to get the nut off the bolt.
Once the seats were out this was what the floor looked like. So a good brush out and vacuum was called for.
And this was what I found during the cleaning.
2 x Bolts, 3 x Nuts, 3 x Washers, 2 x Nut Covers, 2 x Screws, 2 x Electrical Terminators, a Plug, a side arm off some spectacles, a penny and a packet of mints. A veritable gold mine :-)
Once I had the seats out I was pleased to find there were actually 4 sets of adjusters on the drivers seat (forward/backward, height, rake & lumbar support) instead of just the two I had used (forward/backward & rake). The other 2 had been hidden by the side panel of the car. So I preset them before putting the seats back in. The passenger seat had 3 adjusters, as the height was fixed.
Next thing was to fix the 'non-captive' bolt. I haven't taught myself welding yet so I resorted to a new bolt with a narrow nut tightened right up to lock the bolt in position.
Then a good wash and scrub of the seat fabric.
Both seats were simply mounted through the floor but with large iron washers and metal strips to spread the load and prevent them pulling through the stainless steel floor.
Although they were perfectly safe I took the opportunity to add some extra spreaders (from B&Q) to make then even stronger. And just to be ultra-sure I replaced all the nuts with new Nyloc ones.
1. Clean out under the seats.
2. Clean the seats.
3. Overhaul the seat mechanism.
4. Check seat mountings.
Obviously the first thing I needed to do was to remove the seats. The driver seat turned out to be easier than I expected, just held in by 4 bolts bolted through the floor. It was a bit of a tight fit and I had to remove the tunnel top, but I eventually got it out. The passenger seat was more difficult as one of the 'captive' bolts 'wasn't'. But with a bit of fiddling I managed to get the nut off the bolt.
Once the seats were out this was what the floor looked like. So a good brush out and vacuum was called for.
And this was what I found during the cleaning.
2 x Bolts, 3 x Nuts, 3 x Washers, 2 x Nut Covers, 2 x Screws, 2 x Electrical Terminators, a Plug, a side arm off some spectacles, a penny and a packet of mints. A veritable gold mine :-)
Once I had the seats out I was pleased to find there were actually 4 sets of adjusters on the drivers seat (forward/backward, height, rake & lumbar support) instead of just the two I had used (forward/backward & rake). The other 2 had been hidden by the side panel of the car. So I preset them before putting the seats back in. The passenger seat had 3 adjusters, as the height was fixed.
Next thing was to fix the 'non-captive' bolt. I haven't taught myself welding yet so I resorted to a new bolt with a narrow nut tightened right up to lock the bolt in position.
Then a good wash and scrub of the seat fabric.
Both seats were simply mounted through the floor but with large iron washers and metal strips to spread the load and prevent them pulling through the stainless steel floor.
Although they were perfectly safe I took the opportunity to add some extra spreaders (from B&Q) to make then even stronger. And just to be ultra-sure I replaced all the nuts with new Nyloc ones.
Sunday, 17 May 2015
Handbrake adjusted
Having initially failed to work out how the handbrake adjustors worked I did some research on the Internet and on the RHOCar forum and figured it out. So up came the back wheels again.
The basic problem was the brake did not begin to bite until the 4th-5th click of the ratchet and wasn't fully on until the 7th-8th click.
So I wound it up (The plastic unit just sits in the chassis member and when you rotate it it moves along the outer cable, taking up the slack) until the bite started at the 2nd-3rd click and it was full on by 4-5th click. Much better now.
Here is a picture of the unit just before I tighten up the second (nearest) locknut.
Still don't know the purpose of the extra washers ?
The basic problem was the brake did not begin to bite until the 4th-5th click of the ratchet and wasn't fully on until the 7th-8th click.
So I wound it up (The plastic unit just sits in the chassis member and when you rotate it it moves along the outer cable, taking up the slack) until the bite started at the 2nd-3rd click and it was full on by 4-5th click. Much better now.
Here is a picture of the unit just before I tighten up the second (nearest) locknut.
Still don't know the purpose of the extra washers ?
Saturday, 16 May 2015
Rear End Tinkering
Having spent time sorting out the front end I decided to have a look at the rear end. There were 3 things on the ToDo List:
1. Raise the rear height. I had tried before and failed to manage it.
2. Adjust the handbrake. Although it had passed the MOT I felt it needed tightening up a bit.
3. Mount the offside fog light direct to the body to match the nearside light.
Didn't have much success. I couldn't actually release 2 of the wheel nuts on the nearside rear wheel, in fact I snapped my wheel brace trying. Looks as though the garage tightened them with an air gun a bit too aggressively. I still tried to raise the springs, but as before, when I tried to turn the lock nut the whole shock absorber rotated. Have to leave that to the experts with the right tools.
And didn't manage to do the handbrake either. I couldn't actually see where the adjuster was so will have to do some research.
But I did manage the fog light, although it was rusted solid and I had to drill out the original bolt. So now the 2 sides match.
1. Raise the rear height. I had tried before and failed to manage it.
2. Adjust the handbrake. Although it had passed the MOT I felt it needed tightening up a bit.
3. Mount the offside fog light direct to the body to match the nearside light.
Didn't have much success. I couldn't actually release 2 of the wheel nuts on the nearside rear wheel, in fact I snapped my wheel brace trying. Looks as though the garage tightened them with an air gun a bit too aggressively. I still tried to raise the springs, but as before, when I tried to turn the lock nut the whole shock absorber rotated. Have to leave that to the experts with the right tools.
And didn't manage to do the handbrake either. I couldn't actually see where the adjuster was so will have to do some research.
But I did manage the fog light, although it was rusted solid and I had to drill out the original bolt. So now the 2 sides match.
Thursday, 14 May 2015
Cosmetic Addition
Storing the doors behind the seats was a good idea, but because the gap was very narrow I found that the back panel was getting rather scuffed.
and as it showed through white on black it was very obvious and let the car down.
So the first thing to do was to try and move the seats. I had tried before and failed, as they had been in a fixed position for 5 years, but after a lot of 'gentle' persuasion I managed to bring the backs up a bit and give some extra clearance for storing the doors.
Having fixed the reason for the damage, I then just built a vinyl-covered addon from hardboard and glued it on.
Looks very smart :-)
So the first thing to do was to try and move the seats. I had tried before and failed, as they had been in a fixed position for 5 years, but after a lot of 'gentle' persuasion I managed to bring the backs up a bit and give some extra clearance for storing the doors.
Having fixed the reason for the damage, I then just built a vinyl-covered addon from hardboard and glued it on.
Looks very smart :-)
Wednesday, 13 May 2015
New Wing and Front End Tinkering
Having been running with mismatched front wings since the crash, when I had to replace the offside wing, I decided it was time to put the new matching wing on the nearside. And it gave me the opportunity to fix a number of small issues I had with the front end.
1. One of the wing mountings was loose and only stayed tight with the wing actually mounted and taking the strain.
2. The wings were mounted using ordinary bolts and nuts and I had already lost a couple through vibration. The bolts needed to be replaced with Nyloc nuts.
3. I needed to label the indicator wires so it wasn't trial and error whenever I removed and replaced the nose cone.
4. The wing mountings were beginning to rust so needed painting.
5. The wishbones also needed touching up.
6. The nose cone was only held by one bolt at the bottom as it was almost impossible to insert the second bolt due to the proximity of the radiator.
So the first thing to do was remove the nose cone and the wings.
This gave me access to the radiator and hoses, and it seemed to me as though the lower radiator hose did not have any water in whereas it should be full. So I actually disconnected the hose at the top of the radiator and filled the cooling system from there (rather than through the expansion bottle) while squeezing the hose to try and expel any air. She took about 3 litres of more water, so it will be interesting to see the effect.
Next was to label the connections for the indicators.
Now I know which wire goes where.
The next task was the loose wing mounting bar. It appeared that the holes in the shaft were larger than the holes in the mount so no matter how tight the bolts were it still remained loose. Simple solution was to drill larger holes in the wing mounting bar and fit some oversized bolts. The result is a rock-solid mount.
Now to the painting. First a good clean and wire brush on the stays, then a coat of primer, followed by a top coat.
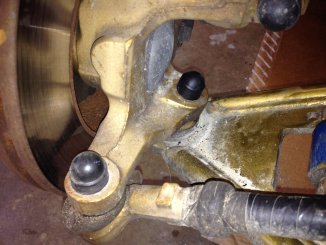
And the same for the wishbones. And while there I noticed that I had missed the bottom wishbone joint when I had put plastic nut covers on everything, so added them.
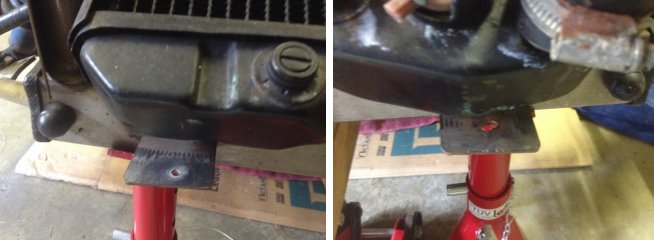
Next job to tackle was the bottom mounting of the nose cone. You can see from this left/right photo that the left one is clear and easily accessible, but the right one is partially blocked by the bottom hose mounting on the radiator, making it difficult to put a nut and bolt in when mounting the nose cone.
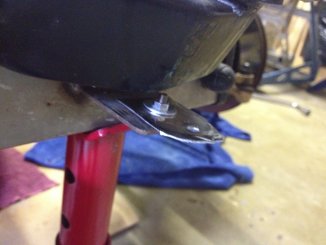
The simple fix was to fit a couple of stainless steel 'extenders' to make the holes more accessible.
Now the primary task of replacing the nearside wing. As previously covered, the new ones were about 2" shorter than the original ones so a separate mounting plate had to be used, and an extra long mud flap. So I made an exact copy of the offside wing, mudflap and mounting bracket. Then put both wings on the car using nyloc nuts throughout. Finally put the wheels back on.
So following a final check of all the nuts, particularly the wheel nuts, the nose cone was replaced and we are good to go.
She looks lovely and clean and smart, with at long last a matching pair of front cycle wings.
1. One of the wing mountings was loose and only stayed tight with the wing actually mounted and taking the strain.
2. The wings were mounted using ordinary bolts and nuts and I had already lost a couple through vibration. The bolts needed to be replaced with Nyloc nuts.
3. I needed to label the indicator wires so it wasn't trial and error whenever I removed and replaced the nose cone.
4. The wing mountings were beginning to rust so needed painting.
5. The wishbones also needed touching up.
6. The nose cone was only held by one bolt at the bottom as it was almost impossible to insert the second bolt due to the proximity of the radiator.
So the first thing to do was remove the nose cone and the wings.
This gave me access to the radiator and hoses, and it seemed to me as though the lower radiator hose did not have any water in whereas it should be full. So I actually disconnected the hose at the top of the radiator and filled the cooling system from there (rather than through the expansion bottle) while squeezing the hose to try and expel any air. She took about 3 litres of more water, so it will be interesting to see the effect.
Next was to label the connections for the indicators.
Now I know which wire goes where.
The next task was the loose wing mounting bar. It appeared that the holes in the shaft were larger than the holes in the mount so no matter how tight the bolts were it still remained loose. Simple solution was to drill larger holes in the wing mounting bar and fit some oversized bolts. The result is a rock-solid mount.
Now to the painting. First a good clean and wire brush on the stays, then a coat of primer, followed by a top coat.
And the same for the wishbones. And while there I noticed that I had missed the bottom wishbone joint when I had put plastic nut covers on everything, so added them.
Next job to tackle was the bottom mounting of the nose cone. You can see from this left/right photo that the left one is clear and easily accessible, but the right one is partially blocked by the bottom hose mounting on the radiator, making it difficult to put a nut and bolt in when mounting the nose cone.
The simple fix was to fit a couple of stainless steel 'extenders' to make the holes more accessible.
Now the primary task of replacing the nearside wing. As previously covered, the new ones were about 2" shorter than the original ones so a separate mounting plate had to be used, and an extra long mud flap. So I made an exact copy of the offside wing, mudflap and mounting bracket. Then put both wings on the car using nyloc nuts throughout. Finally put the wheels back on.
So following a final check of all the nuts, particularly the wheel nuts, the nose cone was replaced and we are good to go.
She looks lovely and clean and smart, with at long last a matching pair of front cycle wings.
Monday, 11 May 2015
Three weekends in a row
Making up for the 2 months away, I took the car to the "Horsepower at the Hall" meet up at Doddington Hall near Lincoln this weekend after the Stilton Cheese Run and Stoneleigh the last 2 weekends. I invited all the Lincolnshire members but in the event, only one other turned up, mainly because the weather was very poor. I was lucky and the rain held off all the way there (about a 1hr run)
So we parked up together and were joined by a new Westfield owner, who I tried to get to join the club. As it turned out I had to put the top up for 30 mins or so when a shower came through.
The weather also cut down on the attendees so there were only about 100 cars, compared with the normal 200, but still some nice ones to look at.
A nice run back home, with just some spots of rain showing on the windscreen but nothing felt inside the car.
Passed the 11,000 mile mark :-)
So we parked up together and were joined by a new Westfield owner, who I tried to get to join the club. As it turned out I had to put the top up for 30 mins or so when a shower came through.
The weather also cut down on the attendees so there were only about 100 cars, compared with the normal 200, but still some nice ones to look at.
A nice run back home, with just some spots of rain showing on the windscreen but nothing felt inside the car.
Passed the 11,000 mile mark :-)
Thursday, 7 May 2015
Second Year at Stoneleigh
For the second year running I camped over at Stoneleigh. Now that Donnington has been cancelled the only 'official' kit car shows are Stoneleigh and the RHOCar 'End of Season' bash, so I needed to attend.
I had a wedding reception on the Saturday night so prepositioned the car at my daughters house near Kettering. Unfortunately, it poured with rain all night and when I came to start her in the morning she was completely dead. Once I took the bonnet off the reason was obvious, as the engine electrics were dripping wet. So it was out with m daughter's hair dryer and 5 minutes later she was running perfectly. So I have cut a piece of plastic sheet to cover the engine compartment if I ever have to leave her outside again. Lesson learned.
Nothing really new at the show so after a quick run around the stalls I parked up at the Club stand and spent the rest of the time chatting with old frinds and catching up.
I had a wedding reception on the Saturday night so prepositioned the car at my daughters house near Kettering. Unfortunately, it poured with rain all night and when I came to start her in the morning she was completely dead. Once I took the bonnet off the reason was obvious, as the engine electrics were dripping wet. So it was out with m daughter's hair dryer and 5 minutes later she was running perfectly. So I have cut a piece of plastic sheet to cover the engine compartment if I ever have to leave her outside again. Lesson learned.
Nothing really new at the show so after a quick run around the stalls I parked up at the Club stand and spent the rest of the time chatting with old frinds and catching up.
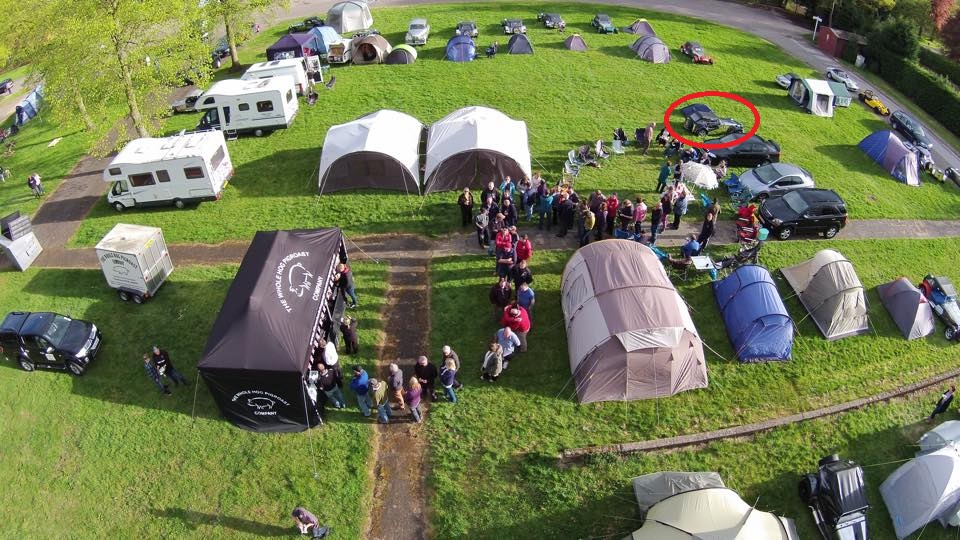
Then off to the campsite for a few beers, a hog roast and chatting long into the night. Here is an overhead shot from a drone while we were queuing for the hog roast. My car and (small) tent are circled..
Then same again on Sunday, left about 14:00 and had a nice 70 mile run home.
Summer definately getting close so looking forward to more runouts.
Monday, 27 April 2015
Back from holiday
After 2 months away, arrived back and covered almost 200 miles in the first 2 days :-)
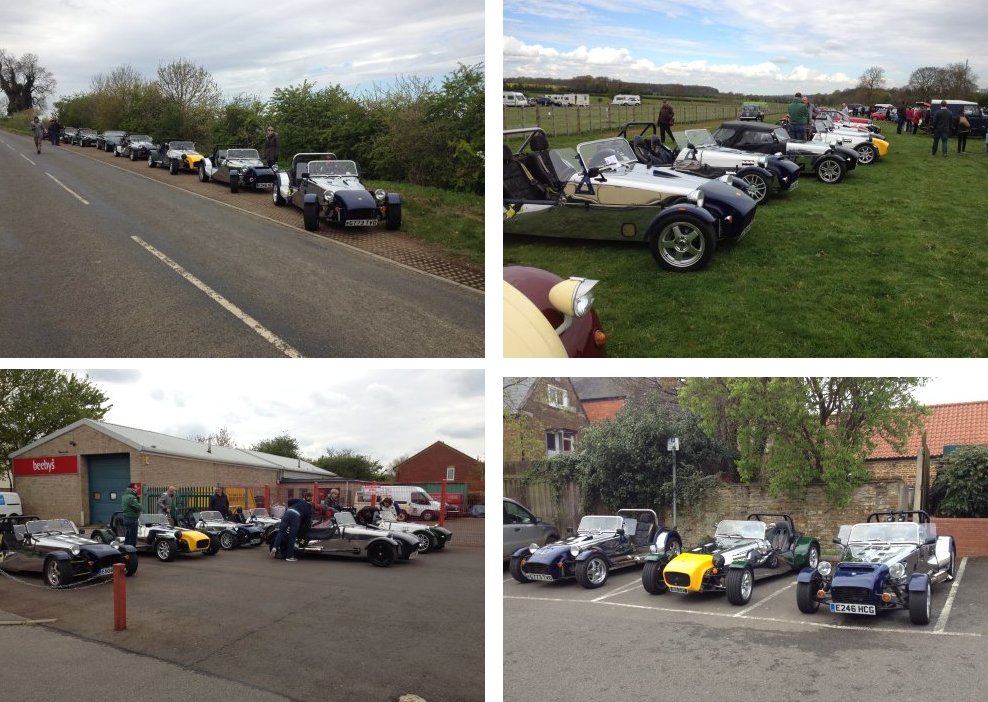
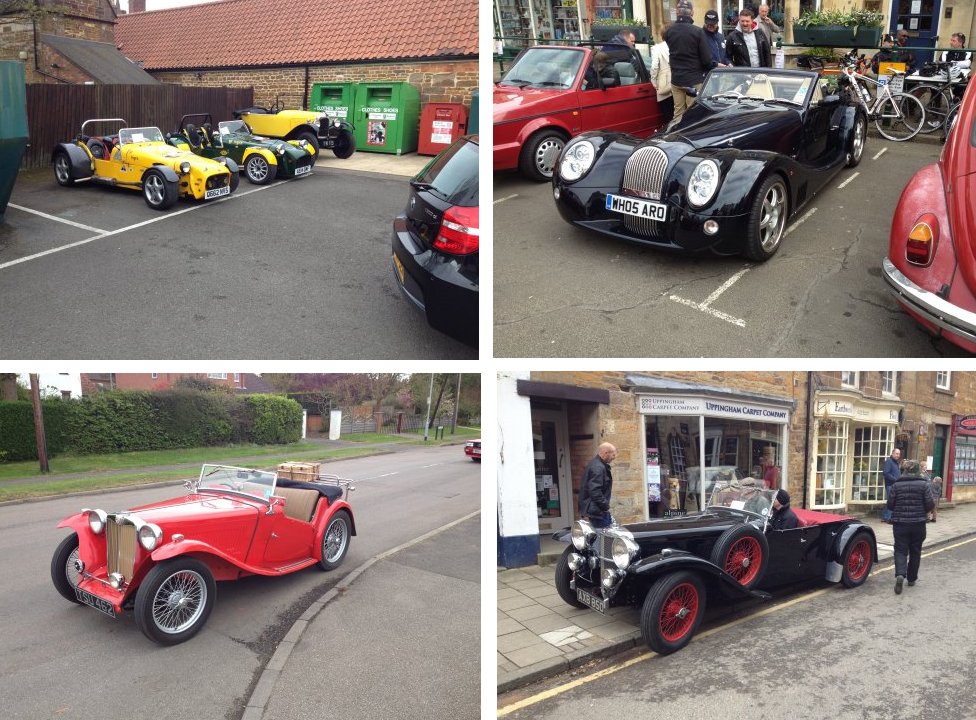
First trip was my second go at the annual Stilton Cheese Classic Car Run (http://stiltoncheeserun.webs.com/). It was great turn out, with 8 Robin Hood cars, 6 of which stayed together for the whole run. After a look around the other 300 participants we did the first 40 miles, stopping off at New Lodge Farm shop for coffee and 'stickies'. Then another 40 miles, finishing up with a pub lunch.
Here are some pictures.
And the next day a run to the hospital. Originally I was going to take the Volvo but the weather was soooo nice..... :-)
I proved the fuel smell hypothesis as for the first 3 miles the day before when I filled her up at the garage there was no smell. Then it started and by the time I got back it was very bad. Later that night the smell in the garage was terrible as it evaporated off. Then next day for the Stilton Run there was no trace of a smell. So I guess I might eventually replace the fuel hose from the tunnel to the filter, but there is no rush.
Now the silencer has started to rattle. Next job is to check that out.
First trip was my second go at the annual Stilton Cheese Classic Car Run (http://stiltoncheeserun.webs.com/). It was great turn out, with 8 Robin Hood cars, 6 of which stayed together for the whole run. After a look around the other 300 participants we did the first 40 miles, stopping off at New Lodge Farm shop for coffee and 'stickies'. Then another 40 miles, finishing up with a pub lunch.
Here are some pictures.
And the next day a run to the hospital. Originally I was going to take the Volvo but the weather was soooo nice..... :-)
I proved the fuel smell hypothesis as for the first 3 miles the day before when I filled her up at the garage there was no smell. Then it started and by the time I got back it was very bad. Later that night the smell in the garage was terrible as it evaporated off. Then next day for the Stilton Run there was no trace of a smell. So I guess I might eventually replace the fuel hose from the tunnel to the filter, but there is no rush.
Now the silencer has started to rattle. Next job is to check that out.
Monday, 9 March 2015
Horsepower at the Hall
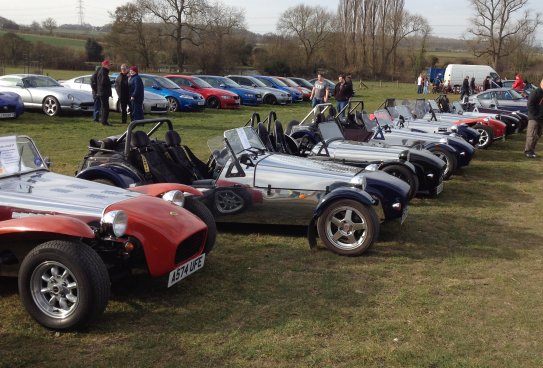
Time for the March RHOCar meeting and this month we went to Doddington Hall near Lincoln to take part in their car meet "Horsepower at the Hall". See https://www.facebook.com/horsepoweratthehall. We even made their Cover picture.
Good turn out from the boys
And there were lots of other cars as well, here are my favourites.
Good turn out from the boys
And there were lots of other cars as well, here are my favourites.
Wednesday, 4 March 2015
Longest Journey Yet
A cracking 2 days. No technical work, just a long drive.
Drove her to my brother in Prestwood via : Oakham to drop off a crash helmet, Wollaston to see the grandchildren (they were at school), North Marston to allow the previous owner to get reaquainted with her then Prestwood.
Stayed overnight and took her to the local pub,
Then back via Costco at Milton Keynes (forgot my card), the grandchildren again (saw them this time) and home.
Total distance covered 250 miles, with 90% of it on small country roads. She behaved impeccably, all that went wrong was a bolt fell out of the windscreen wiper, easily fixed with a paper clip.
On the downside it was a bit chilly and the wind was terrible. Even blew of my beanie hat that was pulled down right to my neck. Had to stop and walk back 300 yds to pick it up.
Lovely time.
Drove her to my brother in Prestwood via : Oakham to drop off a crash helmet, Wollaston to see the grandchildren (they were at school), North Marston to allow the previous owner to get reaquainted with her then Prestwood.
Stayed overnight and took her to the local pub,
Then back via Costco at Milton Keynes (forgot my card), the grandchildren again (saw them this time) and home.
Total distance covered 250 miles, with 90% of it on small country roads. She behaved impeccably, all that went wrong was a bolt fell out of the windscreen wiper, easily fixed with a paper clip.
On the downside it was a bit chilly and the wind was terrible. Even blew of my beanie hat that was pulled down right to my neck. Had to stop and walk back 300 yds to pick it up.
Lovely time.
Wednesday, 25 February 2015
Rewiring the Reversing System
Having proved the concept of the reversing sensors I spent today improving everything
1. New electrical spade connectors arrived so rewired the reversing switch and made it so it is now only live when the ignition is on and protected by a fuse.
2. Tidied up all the wiring along the back using lots of cable ties.
3. Changed power supply to the LED warning display so it comes off the reversing switch so is only live when reverse gear is selected.
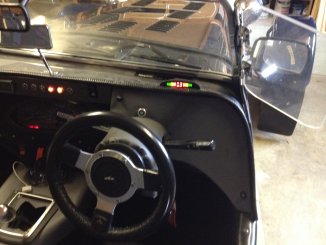
4. Moved the warning display up onto the scuttle.
Good day.
1. New electrical spade connectors arrived so rewired the reversing switch and made it so it is now only live when the ignition is on and protected by a fuse.
2. Tidied up all the wiring along the back using lots of cable ties.
3. Changed power supply to the LED warning display so it comes off the reversing switch so is only live when reverse gear is selected.
4. Moved the warning display up onto the scuttle.
Good day.
Monday, 23 February 2015
Reversing Sensors fitted
I have found that when strapped in I cannot turn my head far enough round to see how close I am to parked cars. And if I have the top up I am totally blind behind. So the solution was to fix reversing sensors.
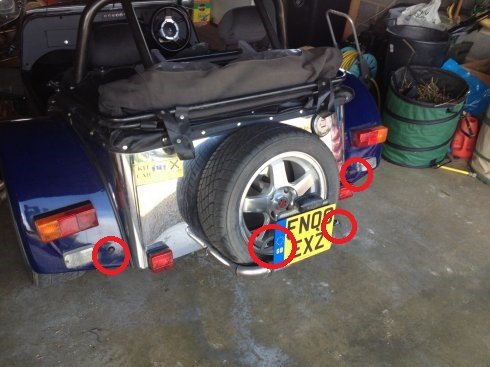
You have to be careful that the sensors have a completely clear field of view so I went for one sensor either side of the number plate and one on each wing.
Here are some closeups.
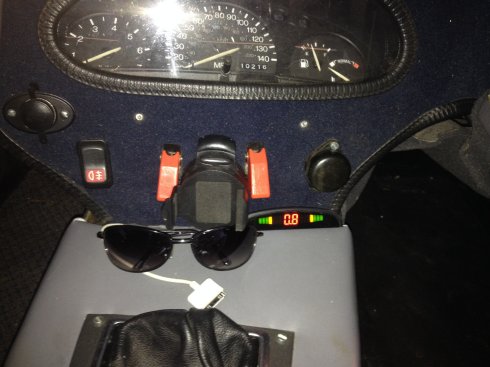
And then I mounted the display/buzzer at the bottom of the dash. I may move it up to eye level after testing it for a bit.
This was taken in the garage with the door shut, with 0.8m from the back to the door.
Also in the future I will probably wire up the display to the reversing switch so it is only live in reverse.
You have to be careful that the sensors have a completely clear field of view so I went for one sensor either side of the number plate and one on each wing.
Here are some closeups.
And then I mounted the display/buzzer at the bottom of the dash. I may move it up to eye level after testing it for a bit.
This was taken in the garage with the door shut, with 0.8m from the back to the door.
Also in the future I will probably wire up the display to the reversing switch so it is only live in reverse.
Sunday, 22 February 2015
Headlight fixed
When the offside headlight started to be much dimmer than the nearside one I assumed it was some corrosion on the bulb holder. But when I took it apart I found it was a sealed unit. But it turned out the tried and tested fixing method of "Take it apart and put it back together" worked in this case as it is now fine.
So now ALL the lights are working.
Thursday, 19 February 2015
Wednesday, 18 February 2015
A Good Session in the Garage
Having done a lot of driving recently with little or no maintenance being done, culminating in total indicator failure again yesterday, I decided it was time to buckle down and spend some time fixing her. Luckily the weather was nice and the temperature reasonably high.
First quick fix was to replace the flasher unit with my spare one. Indicators then worked perfectly, so obviously the old flasher unit had been doused in water once too often.
Major job was fixing the reversing lights so for the first time ever, I had the car up on ramps at the back and axle stands at the front allowing me to crawl underneath with no problem. So I inspected everything I could see, and it all looks really good.
I can now see how to access the fuel filter, and replacing the petrol pipe will be fairly easy, although it looked perfectly fine and I haven't has a petrol smell recently with using her on a regular basis so I will leave that for now.
So first task was to find the reversing light. Turned out to be obvious from underneath and the reason for the failure was also obvious as one of the wires has snapped off.
Unfortunately it used a very small spade connector rather than the normal ones I have. Luckily I managed a temporary fix by soldering the wire to the existing spade. I will get some replacement connectors and do a proper fix next time the car is up on the ramp, as well as making the 12v feed ignition controlled rather than direct off the battery (Leaving her in reverse gear parked on a hill drains the battery at the moment).
While I was under the car I decided to fit a guard over the handbrake mechanism. As you can see from this photo it is totally exposed, and if I ever get around to replacing the exhaust mounting, it would be vulnerable to grounding.
So I riveted a small, shaped, stainless steel plate over it, so that will hit the road before the handbrake mechanism.
So a really good session, although I need to figure out a better way of lifting the car onto ramps as it took 3 stages with the jack to get the wheels high enough up. And for the first time in months, all the lights work. Although one of the headlights appears to be brighter then the other, so will have to investigate that.
First quick fix was to replace the flasher unit with my spare one. Indicators then worked perfectly, so obviously the old flasher unit had been doused in water once too often.
Major job was fixing the reversing lights so for the first time ever, I had the car up on ramps at the back and axle stands at the front allowing me to crawl underneath with no problem. So I inspected everything I could see, and it all looks really good.
I can now see how to access the fuel filter, and replacing the petrol pipe will be fairly easy, although it looked perfectly fine and I haven't has a petrol smell recently with using her on a regular basis so I will leave that for now.
So first task was to find the reversing light. Turned out to be obvious from underneath and the reason for the failure was also obvious as one of the wires has snapped off.
Unfortunately it used a very small spade connector rather than the normal ones I have. Luckily I managed a temporary fix by soldering the wire to the existing spade. I will get some replacement connectors and do a proper fix next time the car is up on the ramp, as well as making the 12v feed ignition controlled rather than direct off the battery (Leaving her in reverse gear parked on a hill drains the battery at the moment).
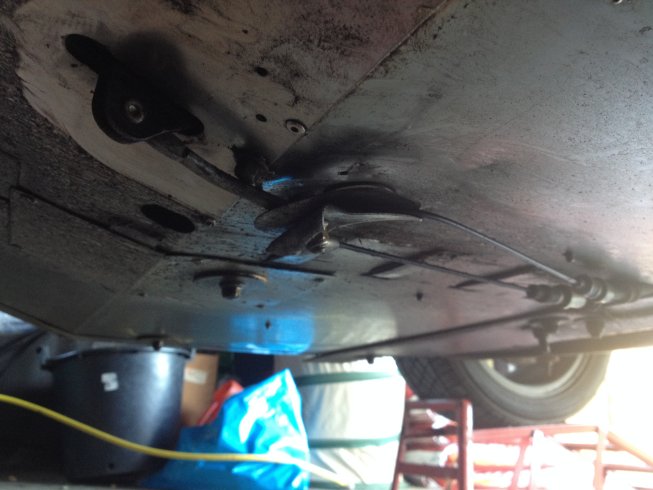
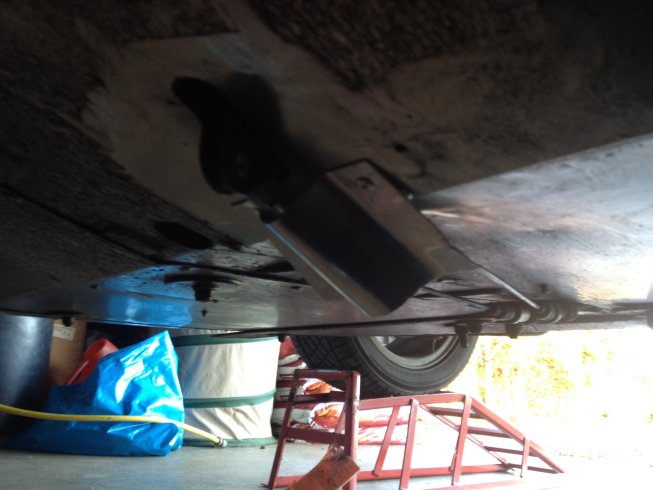
While I was under the car I decided to fit a guard over the handbrake mechanism. As you can see from this photo it is totally exposed, and if I ever get around to replacing the exhaust mounting, it would be vulnerable to grounding.
So I riveted a small, shaped, stainless steel plate over it, so that will hit the road before the handbrake mechanism.
So a really good session, although I need to figure out a better way of lifting the car onto ramps as it took 3 stages with the jack to get the wheels high enough up. And for the first time in months, all the lights work. Although one of the headlights appears to be brighter then the other, so will have to investigate that.
Monday, 16 February 2015
The Mudflap Saga Continues
After the recent poor weather the car continues to get filthy. And although the recent change to a 6mm mudflap was working it still wasn't preventing mud from accumulating on the body and the rear mudguard splashguard. But then I realised that unlike most cars, where the mudflap is attached to the body of the car, mine was actually attached to the mudguard which was attached to the wheel.
So whereas on most cars you need an appreciable gap at the bottom of the mudflap to allow for suspension travel (and it still scrapes the ground on my Volvo on a sharp right turn), I did not have this limitation and could install the mudflap as low as I liked.
So here is next attempt. I have stuck with 6mm rubber but now it is much longer and clears the ground by only about an inch. Will see tomorrow (weather looking good) if it works. If not I might have to give up.
I also took the opportunity to fix the indicators, as technically I was driving illegally. As expected (just the front offside wasn't working, the rest were flashing at double-speed and the bulb was OK) it was a loose connection just inside the nose cone where the indicator wires meet the main loom. I also took the opportunity to mark the wires with coloured insulating tape so that I don't get the wires reversed when I take the nose cone off (next job on my ToDo list is to improve the lower mounting of the cone).
Later: Mudflap very successful, dirt and muck along car and on rear mudguard much reduced. Now I just need to do the other side.
So whereas on most cars you need an appreciable gap at the bottom of the mudflap to allow for suspension travel (and it still scrapes the ground on my Volvo on a sharp right turn), I did not have this limitation and could install the mudflap as low as I liked.
So here is next attempt. I have stuck with 6mm rubber but now it is much longer and clears the ground by only about an inch. Will see tomorrow (weather looking good) if it works. If not I might have to give up.
I also took the opportunity to fix the indicators, as technically I was driving illegally. As expected (just the front offside wasn't working, the rest were flashing at double-speed and the bulb was OK) it was a loose connection just inside the nose cone where the indicator wires meet the main loom. I also took the opportunity to mark the wires with coloured insulating tape so that I don't get the wires reversed when I take the nose cone off (next job on my ToDo list is to improve the lower mounting of the cone).
Later: Mudflap very successful, dirt and muck along car and on rear mudguard much reduced. Now I just need to do the other side.
Sunday, 8 February 2015
The Weather Improves
At long last the weather was suitable to go out for a spin and do some small jobs on the car. Still cold but compared with previous days, quite balmy.
So a short blast through the country lanes. Had to take it a bit carefully as some of the roads are still a bit damp. In fact accelerating away from corner a bit too aggressively and I had a very disconcerting 'wiggle' from the back end. With the car not having moved in 2 weeks, the expected petrol smell was there, but nowhere near as bad as I expected. If my supposition is correct that the pipe between the transmission tunnel and the filter is absorbing petrol then evaporating off then that would be logical. I shall see tomorrow if the smell has disappeared.
Checked all the wheel nuts and suspension bolts were still tight. I never do that on the Volvo, just seems a good idea on a home-built car. Gave the stainless steel a good clean. After all the experiments it seems that Windolene is the best thing to use. And also put Rainex on the windscreen. The wipers are pretty pathetic so maybe that will improve the situation if I am forced to drive in the rain.
Only major job undertaken was fitting a new mudflap on the offside front wheel. Back in September (See here) I had fitted a longer mudflap but I was a bit worried it was too flexible.
Turned out I was right, and at speed the flap lifted and even more muck was flicked back along the body and rear mudguard.
So I bought a new 6mm piece of rubber (the previous one was 2mm) and fitted a new stiffer flap.
Unlike a normal car, the wing and mudflap actually move up and down with the wheel, so in theory I could extend the mudflap down till it was almost on the road and that would really guarantee a clean body. Unfortunately that requires a piece of rubber 230cms long, and it is normally sold in 200mm lengths. If this still doesn't protect the body I might have to bite the bullet and buy some oversize pieces.
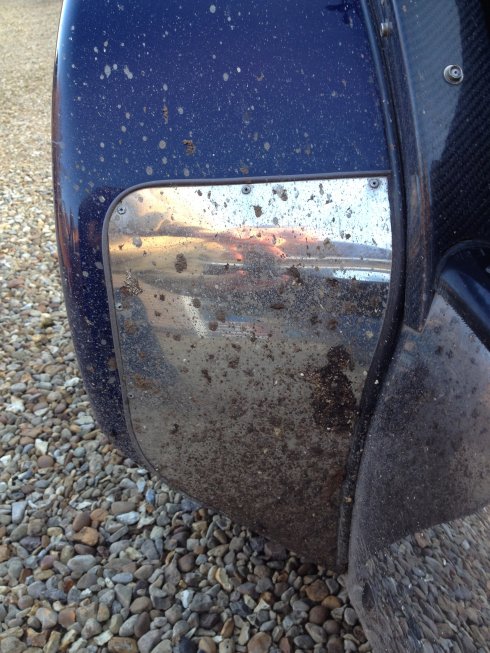
Next day: Nice long trip for a walk, and lunch, round Rutland Water. And this was what the rear splash protector looked like when I got back.
Back to the drawing board.
And to add insult to injury the right indicators stopped working properly. Narrowed it down to the front right flasher but the bulb is fine so must be a wiring problem. What fun !
So a short blast through the country lanes. Had to take it a bit carefully as some of the roads are still a bit damp. In fact accelerating away from corner a bit too aggressively and I had a very disconcerting 'wiggle' from the back end. With the car not having moved in 2 weeks, the expected petrol smell was there, but nowhere near as bad as I expected. If my supposition is correct that the pipe between the transmission tunnel and the filter is absorbing petrol then evaporating off then that would be logical. I shall see tomorrow if the smell has disappeared.
Checked all the wheel nuts and suspension bolts were still tight. I never do that on the Volvo, just seems a good idea on a home-built car. Gave the stainless steel a good clean. After all the experiments it seems that Windolene is the best thing to use. And also put Rainex on the windscreen. The wipers are pretty pathetic so maybe that will improve the situation if I am forced to drive in the rain.
Only major job undertaken was fitting a new mudflap on the offside front wheel. Back in September (See here) I had fitted a longer mudflap but I was a bit worried it was too flexible.
Turned out I was right, and at speed the flap lifted and even more muck was flicked back along the body and rear mudguard.
So I bought a new 6mm piece of rubber (the previous one was 2mm) and fitted a new stiffer flap.
Unlike a normal car, the wing and mudflap actually move up and down with the wheel, so in theory I could extend the mudflap down till it was almost on the road and that would really guarantee a clean body. Unfortunately that requires a piece of rubber 230cms long, and it is normally sold in 200mm lengths. If this still doesn't protect the body I might have to bite the bullet and buy some oversize pieces.
Next day: Nice long trip for a walk, and lunch, round Rutland Water. And this was what the rear splash protector looked like when I got back.
Back to the drawing board.
And to add insult to injury the right indicators stopped working properly. Narrowed it down to the front right flasher but the bulb is fine so must be a wiring problem. What fun !
Sunday, 1 February 2015
Frustrating
Would love to take her out for a run, but is much too cold. And if I did take her out I would have to spend an hour cleaning her as the roads around here are wet & muddy.
Taking of which, I have decided my experimental mudguard flap is too flexible. At speed it swings backwards and allows all the muck on the road to cover the body and rear mudguard. So I have bought some 6mm, much stiffer, rubber and will try that.
Also treated myself to a complete new set of fuses that have built-in LEDs that light up when they blow. Seems like a much better idea than taking each one out to check it.
So when the temperature goes up a bit.......
Taking of which, I have decided my experimental mudguard flap is too flexible. At speed it swings backwards and allows all the muck on the road to cover the body and rear mudguard. So I have bought some 6mm, much stiffer, rubber and will try that.
Also treated myself to a complete new set of fuses that have built-in LEDs that light up when they blow. Seems like a much better idea than taking each one out to check it.
So when the temperature goes up a bit.......
Saturday, 24 January 2015
It's Magic
Decided it was way too
cold to take the Tiger out, as well as the indicators not
working (although I have the doors off so I can use hand signals) and
had all the electrics exposed ready for the replacement flasher unit
arriving. So got into the Volvo and nothing but clicks,
battery flat !!
So off I went, and used hand signals for the first 2 turns then at the first roundabout force of habit made me select the indicator. And it worked perfectly :-) I can only assume the flasher unit has dried out, but I had put it onto a warm radiator for 2 hours 2 days ago and it hadn't worked, but 24 hrs in a freezing cold garage and it is OK. Go figure !! At least I will have a spare flasher unit
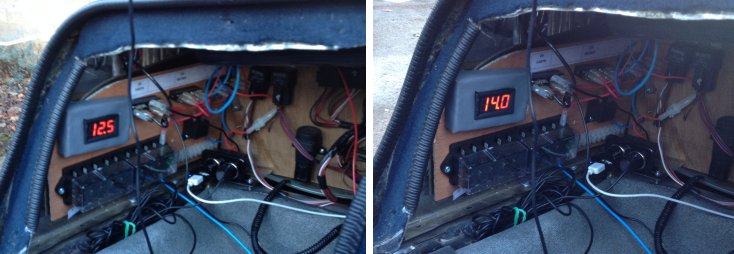
Also came in useful to check battery and alternator. And as you can see they are both bang on specification, 12.5 V with just the battery and 14.0V when alternator working. And it only dropped to 13.7V when I put the headlights on, again as per specification.
Before Start After Start
So just the reversing lights to fix now.
So off I went, and used hand signals for the first 2 turns then at the first roundabout force of habit made me select the indicator. And it worked perfectly :-) I can only assume the flasher unit has dried out, but I had put it onto a warm radiator for 2 hours 2 days ago and it hadn't worked, but 24 hrs in a freezing cold garage and it is OK. Go figure !! At least I will have a spare flasher unit
Also came in useful to check battery and alternator. And as you can see they are both bang on specification, 12.5 V with just the battery and 14.0V when alternator working. And it only dropped to 13.7V when I put the headlights on, again as per specification.
Before Start After Start
So just the reversing lights to fix now.
Sunday, 18 January 2015
Aftermath of the Long Journey
Although it was a fun journey to Bedford it did upset the car a bit.
When I checked this morning I found that:
1. The nearside fog light unit mounting bracket had broken and the light had fallen off and was hanging by the wire.
2. The brake lights were going on when the clutch was pressed.
3. The indicators were not working.
4. The reversing lights were not working.
Remounted the fog light by removing the mounting bracket, drilling a hole in the plastic back of the light and using the same hole in the panel to bolt it direct to the body. I think the new direct version looks better, flush with the body and much more sturdy. Might redo the offside one to match.
Found that pushing the clutch in was slightly rotating the bar that holds the brake and throttle pedals. So a spray of WD40 and a minor adjustment of my new brake light switch and that was fixed.
Indicator almost certainly a failed flasher unit as when I took it out of the plastic bag I had put it on before it was soaking wet with condensation. And the hazards work so the fundamental circuitry and bulbs are fine. New one on order.
The reversing light is frustrating. The fuse is OK and neither light is working so I think I may have disturbed the switch on the gearbox when I was rooting around the fuel pipes to see if there was a leak. Can't see anything by looking down through tunnel opening. I think I will have to get her up on ramps to look from underneath. Not a showstopper as I can always remove the lights and put blanking plugs in for the MOT. They are not a requirement but must be working if fitted. Most 2Bs don't have them fitted.
Lots to keep me busy, but car still drivable on the road so I don't have to stay housebound.
When I checked this morning I found that:
1. The nearside fog light unit mounting bracket had broken and the light had fallen off and was hanging by the wire.
2. The brake lights were going on when the clutch was pressed.
3. The indicators were not working.
4. The reversing lights were not working.
Remounted the fog light by removing the mounting bracket, drilling a hole in the plastic back of the light and using the same hole in the panel to bolt it direct to the body. I think the new direct version looks better, flush with the body and much more sturdy. Might redo the offside one to match.
Found that pushing the clutch in was slightly rotating the bar that holds the brake and throttle pedals. So a spray of WD40 and a minor adjustment of my new brake light switch and that was fixed.
Indicator almost certainly a failed flasher unit as when I took it out of the plastic bag I had put it on before it was soaking wet with condensation. And the hazards work so the fundamental circuitry and bulbs are fine. New one on order.
The reversing light is frustrating. The fuse is OK and neither light is working so I think I may have disturbed the switch on the gearbox when I was rooting around the fuel pipes to see if there was a leak. Can't see anything by looking down through tunnel opening. I think I will have to get her up on ramps to look from underneath. Not a showstopper as I can always remove the lights and put blanking plugs in for the MOT. They are not a requirement but must be working if fitted. Most 2Bs don't have them fitted.
Lots to keep me busy, but car still drivable on the road so I don't have to stay housebound.
Subscribe to:
Posts (Atom)