I was very grateful when one of the members of the RHOCaR club gave me a Superspec exhaust to get me through the MOT (see here). While we were talking later he said he had a spare ECU, as he had replaced his with a more up-to-date one. So as yesterday was such a glorious day I arranged to take the car up to his workshop in Chesterfield to show him the car and pick up the ECU.
As I left he gave me the ECU and a box containng all this:
The ECU, 2 new rear shock absorbers (with bushes), a spare instrument cluster, the ECU loom with all fuses and plugs and a complete set of rear lights (normal, stop, reverse, indicater and number plate illuminater).
Very grateful to him and I am now well on the way to having a complete set of spare parts for the car.
SuperSpec
Friday, 11 September 2015
Wednesday, 9 September 2015
Raising Ride Height
While I had the shocks disassembled to replace the bushes and I had access to the whole unit I decided to try raising the ride height a bit to stop the exhaust grounding. So I wound them up about 1/2" (If you remember I could not do that in situ as the whole unit was rotating when I turned the adjuster, now I could hold that in a clamp while turning the adjuster).
Took her for a short run and the ride height doesn't seem to have made much difference. There is a spot on the exit from the village that I always avoid as I ground there regardless, so I tried again. She still grounded, although it was more of a 'kiss' than a violent thump. Maybe I could try adding another 1/2" to the coils. We'll see how it goes.
Rear Suspension Bushes
At the MOT there had been an advisory on the nearside bottom suspension bush. Following my
mechanic's advice that changing the rear suspension bushes was very
straightforward I decided to give it a try.
Obviously had no idea what the bushes were from (a search for Sierra rear suspension bushes produced nothing) but at first glance a set of Land Rover suspension bushes looked like they might be OK.
So £2.99 (free postage, next day delivery) later I got these.
So jacked up the car with wheels off and with the bottom bolt of the shock absorber removed, and as predicted the shocks came clear and I got access to the whole bottom end.
The first surprise was the nearside, which had been the MOT advisory. The bottom bush was a bit ropey, as expected, but the top bush (the one you can't see until the suspension is dropped) was completely missing. Either it had disintegrated over time or maybe it was never fitted ?
Anyway, the nice surprise was that the Land Rover bush was almost right. This is what the proper one looks like:
So although not an exact match it was certainly miles better than the one that was in. So I rebuilt it using the new ones. And while I was on a roll I decided to check the offside as well. Good thing I did as although the bottom bush was OK (the one in the picture), the top one was present but badly split. So I decided I might as well go the whole hog and replace both of those. I can now keep the good one as a template when I go to the next car show, to buy a proper set, although I am actually quite confident the Land Rover ones will be fine.
Good job done
Obviously had no idea what the bushes were from (a search for Sierra rear suspension bushes produced nothing) but at first glance a set of Land Rover suspension bushes looked like they might be OK.
So £2.99 (free postage, next day delivery) later I got these.
So jacked up the car with wheels off and with the bottom bolt of the shock absorber removed, and as predicted the shocks came clear and I got access to the whole bottom end.
The first surprise was the nearside, which had been the MOT advisory. The bottom bush was a bit ropey, as expected, but the top bush (the one you can't see until the suspension is dropped) was completely missing. Either it had disintegrated over time or maybe it was never fitted ?
Anyway, the nice surprise was that the Land Rover bush was almost right. This is what the proper one looks like:
So although not an exact match it was certainly miles better than the one that was in. So I rebuilt it using the new ones. And while I was on a roll I decided to check the offside as well. Good thing I did as although the bottom bush was OK (the one in the picture), the top one was present but badly split. So I decided I might as well go the whole hog and replace both of those. I can now keep the good one as a template when I go to the next car show, to buy a proper set, although I am actually quite confident the Land Rover ones will be fine.
Good job done
Monday, 7 September 2015
Front End Day
Had a 'front end' day today. I had a number of outstanding jobs:
1. Check steering U/J joint to make sure bolts were still tight after replacement (mechanics advice)
2. Change serpentine belt (mechanics advice)
3. Refit sump guard
4. General check of suspension and steering, making sure everything tight.
So put the front wheels up on ramps so I was safe underneath and had a good session. All the bolts for steering and suspension still good so that gives peace of mind (Why do I keep checking them when I never ever look at the Volvo ?).
Successfully changed the belt. Had to Google how to do it as the mechanic had said you loosen off the tensioner and I could not see how to do it. Turns out he was wrong and it is an automatic tensioner. So you just put a spanner on it and swing it to one side and the belt falls off.
Having been warned, I didn't make the classic mistake of not drawing a diagram of the routing first, and the new belt (I have carried a spare in the boot for 2 years) went back on very easily.
Looking at the old one it looks fine to me although there is a very slight cut (3mm) on one side. Certainly good enough to keep as an emergency spare. And it certainly hasn't done any harm changing it.
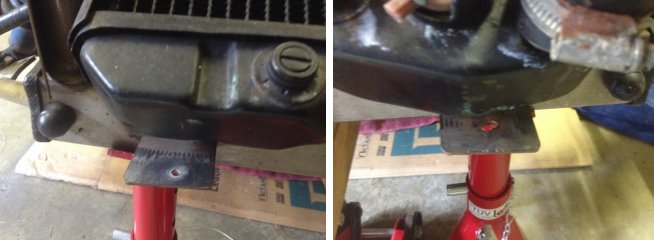
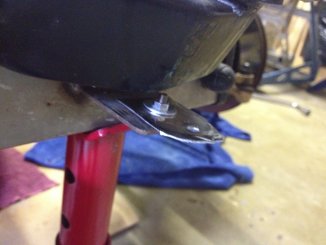
And I decided to put back the sump guard that the mechanic had taken off. I accepted his point that the 2 'skid bars' he had welded on would protect the sump on sleeping policeman (or ferry loading ramps) but I was still slightly worried about going over a sharp stone that would puncture the centre.
So again using the belt and braces principle I decided an extra layer of protection would do no harm. Had a slight problem as he had sheared one of the bolts and left the remaining part in, but managed to drill it out without damaging the thread.
So it is back on, ready for action.
1. Check steering U/J joint to make sure bolts were still tight after replacement (mechanics advice)
2. Change serpentine belt (mechanics advice)
3. Refit sump guard
4. General check of suspension and steering, making sure everything tight.
So put the front wheels up on ramps so I was safe underneath and had a good session. All the bolts for steering and suspension still good so that gives peace of mind (Why do I keep checking them when I never ever look at the Volvo ?).
Successfully changed the belt. Had to Google how to do it as the mechanic had said you loosen off the tensioner and I could not see how to do it. Turns out he was wrong and it is an automatic tensioner. So you just put a spanner on it and swing it to one side and the belt falls off.
Having been warned, I didn't make the classic mistake of not drawing a diagram of the routing first, and the new belt (I have carried a spare in the boot for 2 years) went back on very easily.
Looking at the old one it looks fine to me although there is a very slight cut (3mm) on one side. Certainly good enough to keep as an emergency spare. And it certainly hasn't done any harm changing it.
And I decided to put back the sump guard that the mechanic had taken off. I accepted his point that the 2 'skid bars' he had welded on would protect the sump on sleeping policeman (or ferry loading ramps) but I was still slightly worried about going over a sharp stone that would puncture the centre.
So again using the belt and braces principle I decided an extra layer of protection would do no harm. Had a slight problem as he had sheared one of the bolts and left the remaining part in, but managed to drill it out without damaging the thread.
So it is back on, ready for action.
Cooling System (7)
At the MOT the mechanic had noted a small weep at the thermostat housing, and I was finding more and more water on the floor of the garage. So it was time to change the gasket. I had bought a new thermostat a few months ago and it come with it's own 'generic' gaskets made of paper. But when I checked on E-Bay I found it should be fitted with a rubber gasket.
There were actually 5 for sale so I bought 2 so I have a spare (I did wonder about buying all 5 and becoming the sole supplier)
So whipped off the thermostat housing, saw the paper gasket has actually split, popped in the new rubber one and put it all back together.
I filled up the system and went off for lunch. When I came back there was water all over the floor. I hunted high and low for the leak but had no success, but I could see the thermostat housing was still weeping a bit. So this time I took it all apart, cleaned everything, removed all trace of the old gasket and made sure the 2 mating surfaces were perfectly clean. Put it back together and there is no apparent leak and after a long drive the system was still full and after a few hours there was no water on the garage floor.
I also took the advice of a fellow Superspec owner and replaced the 13psi radiator cap with a 20psi cap to stop the system overflowing.
And while I was checking it all I took all 4 spark plugs out to see if one of them was different. In fact they were all a nice chocolate colour, meaning the mixture is correct and that a gasket problem is actually unlikely.
There were actually 5 for sale so I bought 2 so I have a spare (I did wonder about buying all 5 and becoming the sole supplier)
So whipped off the thermostat housing, saw the paper gasket has actually split, popped in the new rubber one and put it all back together.
I filled up the system and went off for lunch. When I came back there was water all over the floor. I hunted high and low for the leak but had no success, but I could see the thermostat housing was still weeping a bit. So this time I took it all apart, cleaned everything, removed all trace of the old gasket and made sure the 2 mating surfaces were perfectly clean. Put it back together and there is no apparent leak and after a long drive the system was still full and after a few hours there was no water on the garage floor.
I also took the advice of a fellow Superspec owner and replaced the 13psi radiator cap with a 20psi cap to stop the system overflowing.
And while I was checking it all I took all 4 spark plugs out to see if one of them was different. In fact they were all a nice chocolate colour, meaning the mixture is correct and that a gasket problem is actually unlikely.
Saturday, 29 August 2015
New Grille
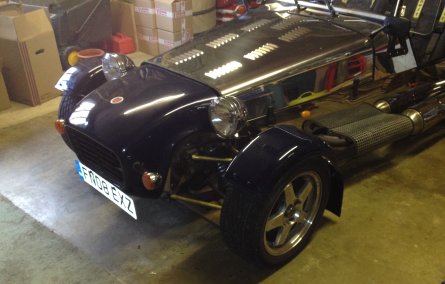
As a consolation present for the damaged rear wing I treated her to a new grill. Here is the before and after.
Looks lovely.
Looks lovely.
My Second crash
Crash Number Two this morning. Totally my fault again of course, but as I wasn't
actually in the car so I was never in any danger
She was sitting in the garage and my daughter-in-law's Citroen was parked outside. I had put her in reverse to demonstrate the rear sensors to my son, had a chat about the new exhaust pipe then I leaned in to start the car to demonstrate the nice new idle and.........
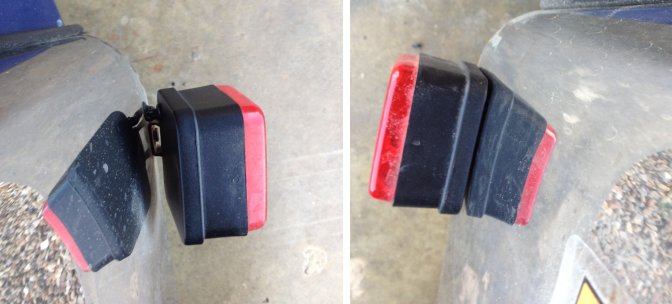
She went smartly backwards straight into the Citroen. But here is the incredible bit. Because of the angles involved the bottom of the rear wing hit the rear wheel of the car and actually pushed the Citroen about 3 feet sideways. When we separated them the ONLY damage to the Citroen was a bit of blue GRP stain on the wheel, which we wiped off. The bodywork was untouched. On the Tiger there was some damage, the reversing light cover was cracked, the rear light unit plastic cover was snapped in two and knocked off and there was a lot of scuffing on the edge of the wing.
But amazingly, that was it. All the lights still operated
perfectly, I fixed the plastic light unit with superglue (as you can
see there is a bit missing in the middle which we can't find, so
will probably replace it next year for the MOT) and I already have a
spare reversing light cover I can fit. so I just need to get the
sandpaper, primer and paint out to tidy up the wing. I still have a
complete new body set up in the attic but I don't think it's time
for that yet.
If you had told me the GRP rear wing was strong enough to push a Citroen 3 feet sideways without breaking I would never have believed it. And how the wing completely missed the bodywork and just hit the wheel is a miracle. Mind you, if they had been on concrete and not gravel it might have been a different story.
So pride hurt, my daughter-in-law is never going to let me forget it And the Tiger gets another war wound so she looks even more 'lived in'. But good lesson learned so I won't do that again.
She was sitting in the garage and my daughter-in-law's Citroen was parked outside. I had put her in reverse to demonstrate the rear sensors to my son, had a chat about the new exhaust pipe then I leaned in to start the car to demonstrate the nice new idle and.........
She went smartly backwards straight into the Citroen. But here is the incredible bit. Because of the angles involved the bottom of the rear wing hit the rear wheel of the car and actually pushed the Citroen about 3 feet sideways. When we separated them the ONLY damage to the Citroen was a bit of blue GRP stain on the wheel, which we wiped off. The bodywork was untouched. On the Tiger there was some damage, the reversing light cover was cracked, the rear light unit plastic cover was snapped in two and knocked off and there was a lot of scuffing on the edge of the wing.
But amazingly, that was it. All the lights still operated
perfectly, I fixed the plastic light unit with superglue (as you can
see there is a bit missing in the middle which we can't find, so
will probably replace it next year for the MOT) and I already have a
spare reversing light cover I can fit. so I just need to get the
sandpaper, primer and paint out to tidy up the wing. I still have a
complete new body set up in the attic but I don't think it's time
for that yet. If you had told me the GRP rear wing was strong enough to push a Citroen 3 feet sideways without breaking I would never have believed it. And how the wing completely missed the bodywork and just hit the wheel is a miracle. Mind you, if they had been on concrete and not gravel it might have been a different story.
So pride hurt, my daughter-in-law is never going to let me forget it And the Tiger gets another war wound so she looks even more 'lived in'. But good lesson learned so I won't do that again.
Thursday, 27 August 2015
New Luggage Rack
One of the members of the Club has just sold his car and was clearing out the garage so I decided to have his luggage rack.
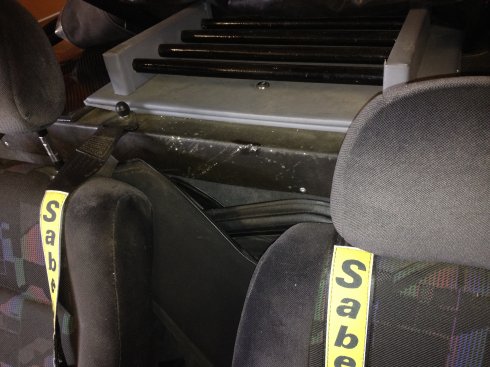
Very clever design. Two tubes are mounted underneath attached to the chassis using exhaust pipe clamps. And then the luggage rack slides into them and is held by 2 knurled nuts.
Now when I go camping I might be able to see out of the back.
Tuesday, 25 August 2015
This must be magic ?
Ever since I have had the car it has been marginal on the
emissions test and this year, even with a completely new exhaust system
it only just scraped through. At the same time I have always felt that
something wasn't working properly. Although she idled OK there was a
bit of hunting. When I pulled away she occasionally hiccupped, when I
put my foot down there was sometimes a bit of hesitation before the revs
picked up, and she would regularly have a small uncommanded surge for
no apparent reason (lamda sensor switching mixtures?). Finally, there
was lots of popping and banging on the overrun.
But up till now I have lived with that, as with a non-programmable ECU and the fuel injection I didn't think anything could be done or adjusted. I just assumed some of the sensors were a bit iffy.
But while I was asking for help on the Robin Hood forum regarding my catalytic converter Nigel Evans (n.r.evans) told me of a trick a mechanic had recommended to him when he was trying to pass the emissions test, which I don't recall reading on the forum before, and that was to block off one of the 2 exhaust outlets. So, willing to try anything I shoved the remains of an old tea towel up the exhaust.
What an amazing transformation. She now idles perfectly, and there is no hesitation during acceleration. The power (apparently more than before) comes on smoothly when I put my foot down, and there are no more unexplained surges. She is now working as you would expect. There is also no more popping and banging on the overrun (which is a pity as I quite liked it
)
So what is the explanation for this dramatic improvement? Nigel's mechanic reckons that when the system was designed there was no attempt made to match all the exhaust components, they were just picked because they fitted together in the right space available. In particular he thinks the lamda sensor needs some back pressure before it will work correctly and with the exhaust as designed there just wasn't enough. Blocking one of the outlets is just enough to provide the necessary back pressure to make the sensor work. Obviously I can't prove it but it seems very logical?
I haven't had a chance to check if it has improved the emissions yet but based on Nigel's experience I am very confident. Meanwhile I am enjoying a much improved performance. I just need to find a more professional way of blocking it than an old tea towel.
But up till now I have lived with that, as with a non-programmable ECU and the fuel injection I didn't think anything could be done or adjusted. I just assumed some of the sensors were a bit iffy.
But while I was asking for help on the Robin Hood forum regarding my catalytic converter Nigel Evans (n.r.evans) told me of a trick a mechanic had recommended to him when he was trying to pass the emissions test, which I don't recall reading on the forum before, and that was to block off one of the 2 exhaust outlets. So, willing to try anything I shoved the remains of an old tea towel up the exhaust.
What an amazing transformation. She now idles perfectly, and there is no hesitation during acceleration. The power (apparently more than before) comes on smoothly when I put my foot down, and there are no more unexplained surges. She is now working as you would expect. There is also no more popping and banging on the overrun (which is a pity as I quite liked it
So what is the explanation for this dramatic improvement? Nigel's mechanic reckons that when the system was designed there was no attempt made to match all the exhaust components, they were just picked because they fitted together in the right space available. In particular he thinks the lamda sensor needs some back pressure before it will work correctly and with the exhaust as designed there just wasn't enough. Blocking one of the outlets is just enough to provide the necessary back pressure to make the sensor work. Obviously I can't prove it but it seems very logical?
I haven't had a chance to check if it has improved the emissions yet but based on Nigel's experience I am very confident. Meanwhile I am enjoying a much improved performance. I just need to find a more professional way of blocking it than an old tea towel.
Poor Hot Start Solved ?
Ever since I have had the car I have dreaded stalling, as trying to start a hot engine has been very difficult. As discussed at the post here, there have been various suggestions put forward. I thought that the extra earth strap would help, but unfortunately it soon became apparent that it wasn't the answer.
Another suggestion made was on a radio show, and that was that the starter motor was getting hot and the resistance in the windings was going up, hence the poor cranking. I could see the logic of that as the starter motor is hidden behind the engine with no air flow over it. So I decided I would experiment with adding a pipe to provide some ram air cooling to see if that would help.
Here is the initial try, taking air from just in front of the engine and funneling it vertically down onto the starter.
At first try it seemed to work. After a long drive and with the engine nicely warmed up she cranked over a full speed when I tried a restart. Only time will tell.
Update: 4 x Hot Starts today, all cranked over at full speed. Looking good.
Another suggestion made was on a radio show, and that was that the starter motor was getting hot and the resistance in the windings was going up, hence the poor cranking. I could see the logic of that as the starter motor is hidden behind the engine with no air flow over it. So I decided I would experiment with adding a pipe to provide some ram air cooling to see if that would help.
Here is the initial try, taking air from just in front of the engine and funneling it vertically down onto the starter.
At first try it seemed to work. After a long drive and with the engine nicely warmed up she cranked over a full speed when I tried a restart. Only time will tell.
Update: 4 x Hot Starts today, all cranked over at full speed. Looking good.
Thursday, 20 August 2015
Cooling System (6)
During the recent work being carried out I asked my mechanic to take a look at the cooling system. He reproduced all the problems I have seen, but apart from a small weep at the thermostat, which needs a new gasket, he could not find the leak.
Unfortunately that means it is probably a head gasket problem. It's not going into the oil, which is good, but the fact that the system pressurises before the engine warms up probably means there is a leak into one of the cylinders. We haven't managed to do the gas test (to see if there is any exhaust gas in the water) so we can't be 100% certain yet.
It would cost at least £800 to do the head, so as the engine appears to be running OK, I think I will just keep topping her up and living with it.
Unfortunately that means it is probably a head gasket problem. It's not going into the oil, which is good, but the fact that the system pressurises before the engine warms up probably means there is a leak into one of the cylinders. We haven't managed to do the gas test (to see if there is any exhaust gas in the water) so we can't be 100% certain yet.
It would cost at least £800 to do the head, so as the engine appears to be running OK, I think I will just keep topping her up and living with it.
Wednesday, 19 August 2015
Passed the MOT
Once the catalytic converter had been replaced, we put her in for the MOT. Unfortunately she failed, but only on the steering lower Universal Joint.
This had an interesting history. The previous owner warned me that she had previously failed on the same joint, but after he had tightened it up she had passed. Last year, she was again loose but my mechanic managed to get her tight enough to pass. This year the actual joint was worn so no amount of tightening would give us a pass.
Luckily I had bought a spare one last year so I thought we good to go.
Unfortunately it soon became apparent that this one (and the one already on the car) were from a Land Rover instead of an Escort and were slightly too big to grip the splines on the shaft properly. Hence the need for the drastic over tightening. But the mechanic tackled it with some big tools and managed to make it fit
Apart from that, and an advisory on one of the rubber bushes on the rear shock absorber she passed with flying colours.
This had an interesting history. The previous owner warned me that she had previously failed on the same joint, but after he had tightened it up she had passed. Last year, she was again loose but my mechanic managed to get her tight enough to pass. This year the actual joint was worn so no amount of tightening would give us a pass.
Luckily I had bought a spare one last year so I thought we good to go.
Unfortunately it soon became apparent that this one (and the one already on the car) were from a Land Rover instead of an Escort and were slightly too big to grip the splines on the shaft properly. Hence the need for the drastic over tightening. But the mechanic tackled it with some big tools and managed to make it fit
Apart from that, and an advisory on one of the rubber bushes on the rear shock absorber she passed with flying colours.
Petrol Smell Solved
When I gave the car to my mechanic for the MOT I asked him to check out the petrol smell, as the car had been sitting for over a month when he came to pick it up. I had decided that the problem was that the pipe was absorbing petrol, which then evaporated off when the engine was warmed up.
Turns out I was totally wrong. What was actually happening was that as the pipes dried out the joints were opening slightly, causing an actual leak. When the pipes got wet again the joints swelled up and sealed the gap.
The big problem was that there was no insert in the plastic pipe so that when the Jubilee clip was tightened it compressed the plastic pipe and after time the joint would leak.
Haven't had a chance to test it yet, but he is confident that the replacement pipe will cure it.
Yet another example of a poor design decision on the car,
Turns out I was totally wrong. What was actually happening was that as the pipes dried out the joints were opening slightly, causing an actual leak. When the pipes got wet again the joints swelled up and sealed the gap.
The big problem was that there was no insert in the plastic pipe so that when the Jubilee clip was tightened it compressed the plastic pipe and after time the joint would leak.
Haven't had a chance to test it yet, but he is confident that the replacement pipe will cure it.
Yet another example of a poor design decision on the car,
Exhaust woes
I knew there was a problem with the exhaust system before I gave the car to my friendly mechanic for him to get it through the MOT. It had been rattling quite badly, obviously from inside, and the engine was not running properly. As you can see from this post I had changed the rear mount from solid to a rubber mount. It now looked as though the extra vibration had loosened off the baffles.
When he took it apart it turned out to be the catalytic converter that had disintegrated and parts of it had gone into the silencer and that was causing the rattle. The good news was that once the bits were removed the silencer was fine. We knew this was a non-standard cat so both of us went on-line to try and source a new one. And we both lucked in. He found one at his local supplier and astonishingly, I was offered a complete exhaust system by another member of the RHOCar club. I just had to pick it up.
So, having previously bought a manifold I now have a complete spare exhaust system. I think it might be time to redesign the system by adding a flexible joint between the manifold and the exhaust system and mount the can at both ends, thereby isolating it from the engine vibration.
When he took it apart it turned out to be the catalytic converter that had disintegrated and parts of it had gone into the silencer and that was causing the rattle. The good news was that once the bits were removed the silencer was fine. We knew this was a non-standard cat so both of us went on-line to try and source a new one. And we both lucked in. He found one at his local supplier and astonishingly, I was offered a complete exhaust system by another member of the RHOCar club. I just had to pick it up.
So, having previously bought a manifold I now have a complete spare exhaust system. I think it might be time to redesign the system by adding a flexible joint between the manifold and the exhaust system and mount the can at both ends, thereby isolating it from the engine vibration.
Tuesday, 21 July 2015
More spare parts
Even though I am out of the country it doesn't stop me watching out for useful spare parts. So have just picked up these for a song
You never know when I might need replacements !!
Monday, 8 June 2015
Picnic at Rutland Water
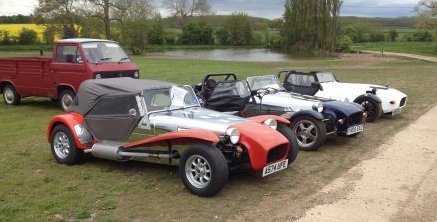
Ever since becoming Area Secretary I had thought the ideal meet would be a Sunday picnic lunch at Rutland Water. This Sunday the weather looked as though it was going to be perfect so I posted a message on the forum saying I would be there having a relaxing lunch and invited anyone else who fancied it to pitch up.
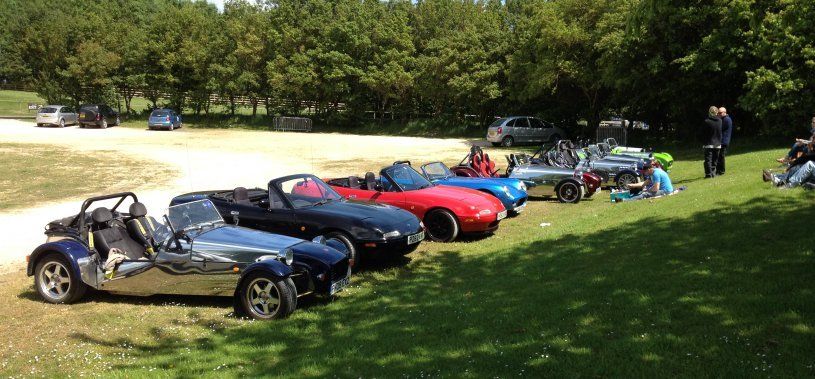
Very successful, we got 4 Robin Hoods, 2 GBS Zeroes, a Mazda MX5, a Roadster and a Stylus. There should have been 2 more Robin Hoods but one had to go to a poorly girlfriend and one went to the wrong car park.
Everyone agreed it was a first rate idea.
Very successful, we got 4 Robin Hoods, 2 GBS Zeroes, a Mazda MX5, a Roadster and a Stylus. There should have been 2 more Robin Hoods but one had to go to a poorly girlfriend and one went to the wrong car park.
Everyone agreed it was a first rate idea.
Wednesday, 3 June 2015
New Tent
Having proven I like camping at the kit car shows (4 times now) I
decided to treat myself to a new tent. My original cheap one from
Downtown was OK, but very low (3') so getting dressed and undressed
was a challenge (got cramp last time) and wasn't suitable for
staying inside if the weather was poor. So bought this one at the
Halfords sale:
Three-man tent, 6 ft high in centre, separate internal bedspace with vestibule for sitting in if it is raining. Very luxurious
And I did do my research first so I knew I could get it on the car, and here is the proof:
Just needs some bungee cords to hold it to the boot lid.
Roll on the next show. Or maybe I will just go off 'walkabout' for a long weekend.
For those that haven't seen it packed I can get the following in the car: Tent, Airbed (and Pump), Sleeping Bag, Pillow, Camping Chair, Gas Stove, Kettle, Frying Pan, Plate, Mug, Knife/Fork/Spoon, First Aid Kit, Waterproof Trousers and Jacket, Change of clothes, 2 days food and 6 bottles of beer What more does a man need ?
Three-man tent, 6 ft high in centre, separate internal bedspace with vestibule for sitting in if it is raining. Very luxurious
And I did do my research first so I knew I could get it on the car, and here is the proof:
Just needs some bungee cords to hold it to the boot lid.
Roll on the next show. Or maybe I will just go off 'walkabout' for a long weekend.
For those that haven't seen it packed I can get the following in the car: Tent, Airbed (and Pump), Sleeping Bag, Pillow, Camping Chair, Gas Stove, Kettle, Frying Pan, Plate, Mug, Knife/Fork/Spoon, First Aid Kit, Waterproof Trousers and Jacket, Change of clothes, 2 days food and 6 bottles of beer What more does a man need ?
Thursday, 28 May 2015
New Floor Covering for Footwells
Right from the start I had found that
the carpet in the footwells used to get very messy and required regular vacuuming.
I had experimented with an extra removable carpet and a rubber floor mat but found they both kept rucking up and making driving difficult.
I had long admired a friend's car that used aluminium treadplates on his car so decided to go down that route. So after building cardboard templates and a few minutes with an angle grinder I have new floor coverings.
They look rather good and make getting in easier as I can slide my feet under the dash.
I had experimented with an extra removable carpet and a rubber floor mat but found they both kept rucking up and making driving difficult.
I had long admired a friend's car that used aluminium treadplates on his car so decided to go down that route. So after building cardboard templates and a few minutes with an angle grinder I have new floor coverings.
They look rather good and make getting in easier as I can slide my feet under the dash.
Tuesday, 26 May 2015
More E-Bay Bargains
Having a permanent Tab in my browser looking for Robin Hood spare parts, I just picked up a couple of bargains.
First was a set of 5 alloy wheels with 16 matching wheel nuts and 4 Robin Hood centre covers.
I had to drive 1:30hr to pick them up but was very surprised to find that not only were they brand new but they were in the original packaging. A great bargain at £150.
Next was a replacement handbrake from a Ford Sierra. I had originally intended just to use it as a spare, but it is in pristine condition, is tighter than the one I have fitted at the moment and comes with a built-in warning light switch. Looks like I will have to swap them over.
Amazingly this one cost just £5.50.
At this rate I will have a complete new car :-)
First was a set of 5 alloy wheels with 16 matching wheel nuts and 4 Robin Hood centre covers.
I had to drive 1:30hr to pick them up but was very surprised to find that not only were they brand new but they were in the original packaging. A great bargain at £150.
Next was a replacement handbrake from a Ford Sierra. I had originally intended just to use it as a spare, but it is in pristine condition, is tighter than the one I have fitted at the moment and comes with a built-in warning light switch. Looks like I will have to swap them over.
Amazingly this one cost just £5.50.
At this rate I will have a complete new car :-)
Thursday, 21 May 2015
Some Seat Maintenance
Having done the front and back ends I thought it was time to do some work on the interior, mainly the seats. There were various things I fancied doing.
1. Clean out under the seats.
2. Clean the seats.
3. Overhaul the seat mechanism.
4. Check seat mountings.
Obviously the first thing I needed to do was to remove the seats. The driver seat turned out to be easier than I expected, just held in by 4 bolts bolted through the floor. It was a bit of a tight fit and I had to remove the tunnel top, but I eventually got it out. The passenger seat was more difficult as one of the 'captive' bolts 'wasn't'. But with a bit of fiddling I managed to get the nut off the bolt.
Once the seats were out this was what the floor looked like. So a good brush out and vacuum was called for.
And this was what I found during the cleaning.
2 x Bolts, 3 x Nuts, 3 x Washers, 2 x Nut Covers, 2 x Screws, 2 x Electrical Terminators, a Plug, a side arm off some spectacles, a penny and a packet of mints. A veritable gold mine :-)
Once I had the seats out I was pleased to find there were actually 4 sets of adjusters on the drivers seat (forward/backward, height, rake & lumbar support) instead of just the two I had used (forward/backward & rake). The other 2 had been hidden by the side panel of the car. So I preset them before putting the seats back in. The passenger seat had 3 adjusters, as the height was fixed.
Next thing was to fix the 'non-captive' bolt. I haven't taught myself welding yet so I resorted to a new bolt with a narrow nut tightened right up to lock the bolt in position.
Then a good wash and scrub of the seat fabric.
Both seats were simply mounted through the floor but with large iron washers and metal strips to spread the load and prevent them pulling through the stainless steel floor.
Although they were perfectly safe I took the opportunity to add some extra spreaders (from B&Q) to make then even stronger. And just to be ultra-sure I replaced all the nuts with new Nyloc ones.
1. Clean out under the seats.
2. Clean the seats.
3. Overhaul the seat mechanism.
4. Check seat mountings.
Obviously the first thing I needed to do was to remove the seats. The driver seat turned out to be easier than I expected, just held in by 4 bolts bolted through the floor. It was a bit of a tight fit and I had to remove the tunnel top, but I eventually got it out. The passenger seat was more difficult as one of the 'captive' bolts 'wasn't'. But with a bit of fiddling I managed to get the nut off the bolt.
Once the seats were out this was what the floor looked like. So a good brush out and vacuum was called for.
And this was what I found during the cleaning.
2 x Bolts, 3 x Nuts, 3 x Washers, 2 x Nut Covers, 2 x Screws, 2 x Electrical Terminators, a Plug, a side arm off some spectacles, a penny and a packet of mints. A veritable gold mine :-)
Once I had the seats out I was pleased to find there were actually 4 sets of adjusters on the drivers seat (forward/backward, height, rake & lumbar support) instead of just the two I had used (forward/backward & rake). The other 2 had been hidden by the side panel of the car. So I preset them before putting the seats back in. The passenger seat had 3 adjusters, as the height was fixed.
Next thing was to fix the 'non-captive' bolt. I haven't taught myself welding yet so I resorted to a new bolt with a narrow nut tightened right up to lock the bolt in position.
Then a good wash and scrub of the seat fabric.
Both seats were simply mounted through the floor but with large iron washers and metal strips to spread the load and prevent them pulling through the stainless steel floor.
Although they were perfectly safe I took the opportunity to add some extra spreaders (from B&Q) to make then even stronger. And just to be ultra-sure I replaced all the nuts with new Nyloc ones.
Sunday, 17 May 2015
Handbrake adjusted
Having initially failed to work out how the handbrake adjustors worked I did some research on the Internet and on the RHOCar forum and figured it out. So up came the back wheels again.
The basic problem was the brake did not begin to bite until the 4th-5th click of the ratchet and wasn't fully on until the 7th-8th click.
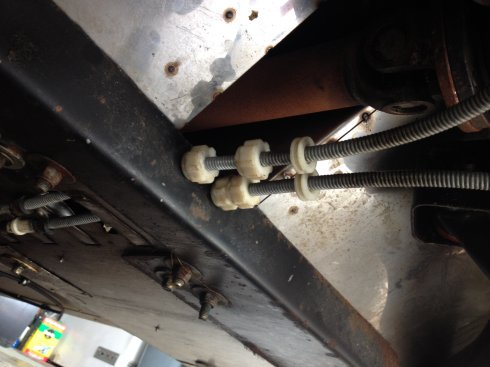
So I wound it up (The plastic unit just sits in the chassis member and when you rotate it it moves along the outer cable, taking up the slack) until the bite started at the 2nd-3rd click and it was full on by 4-5th click. Much better now.
Here is a picture of the unit just before I tighten up the second (nearest) locknut.
Still don't know the purpose of the extra washers ?
The basic problem was the brake did not begin to bite until the 4th-5th click of the ratchet and wasn't fully on until the 7th-8th click.
So I wound it up (The plastic unit just sits in the chassis member and when you rotate it it moves along the outer cable, taking up the slack) until the bite started at the 2nd-3rd click and it was full on by 4-5th click. Much better now.
Here is a picture of the unit just before I tighten up the second (nearest) locknut.
Still don't know the purpose of the extra washers ?
Saturday, 16 May 2015
Rear End Tinkering
Having spent time sorting out the front end I decided to have a look at the rear end. There were 3 things on the ToDo List:
1. Raise the rear height. I had tried before and failed to manage it.
2. Adjust the handbrake. Although it had passed the MOT I felt it needed tightening up a bit.
3. Mount the offside fog light direct to the body to match the nearside light.
Didn't have much success. I couldn't actually release 2 of the wheel nuts on the nearside rear wheel, in fact I snapped my wheel brace trying. Looks as though the garage tightened them with an air gun a bit too aggressively. I still tried to raise the springs, but as before, when I tried to turn the lock nut the whole shock absorber rotated. Have to leave that to the experts with the right tools.
And didn't manage to do the handbrake either. I couldn't actually see where the adjuster was so will have to do some research.
But I did manage the fog light, although it was rusted solid and I had to drill out the original bolt. So now the 2 sides match.
1. Raise the rear height. I had tried before and failed to manage it.
2. Adjust the handbrake. Although it had passed the MOT I felt it needed tightening up a bit.
3. Mount the offside fog light direct to the body to match the nearside light.
Didn't have much success. I couldn't actually release 2 of the wheel nuts on the nearside rear wheel, in fact I snapped my wheel brace trying. Looks as though the garage tightened them with an air gun a bit too aggressively. I still tried to raise the springs, but as before, when I tried to turn the lock nut the whole shock absorber rotated. Have to leave that to the experts with the right tools.
And didn't manage to do the handbrake either. I couldn't actually see where the adjuster was so will have to do some research.
But I did manage the fog light, although it was rusted solid and I had to drill out the original bolt. So now the 2 sides match.
Thursday, 14 May 2015
Cosmetic Addition
Storing the doors behind the seats was a good idea, but because the gap was very narrow I found that the back panel was getting rather scuffed.
and as it showed through white on black it was very obvious and let the car down.
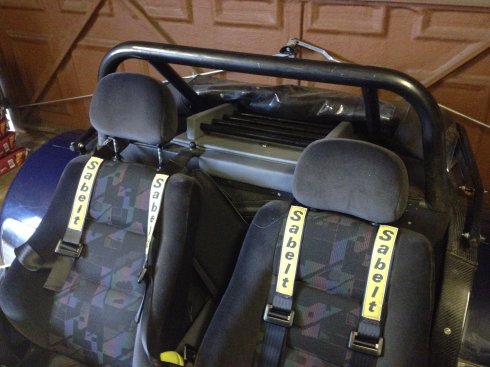
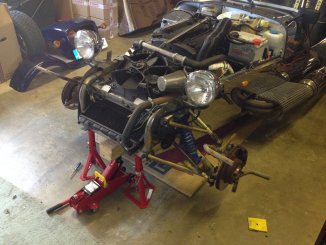
So the first thing to do was to try and move the seats. I had tried before and failed, as they had been in a fixed position for 5 years, but after a lot of 'gentle' persuasion I managed to bring the backs up a bit and give some extra clearance for storing the doors.
Having fixed the reason for the damage, I then just built a vinyl-covered addon from hardboard and glued it on.
Looks very smart :-)
and as it showed through white on black it was very obvious and let the car down.So the first thing to do was to try and move the seats. I had tried before and failed, as they had been in a fixed position for 5 years, but after a lot of 'gentle' persuasion I managed to bring the backs up a bit and give some extra clearance for storing the doors.
Having fixed the reason for the damage, I then just built a vinyl-covered addon from hardboard and glued it on.
Looks very smart :-)
Wednesday, 13 May 2015
New Wing and Front End Tinkering
Having been running with mismatched front wings since the crash, when I had to replace the offside wing, I decided it was time to put the new matching wing on the nearside. And it gave me the opportunity to fix a number of small issues I had with the front end.
1. One of the wing mountings was loose and only stayed tight with the wing actually mounted and taking the strain.
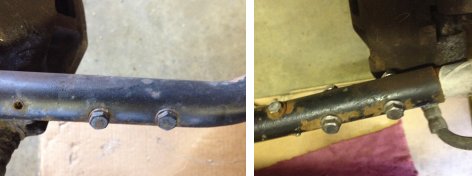
2. The wings were mounted using ordinary bolts and nuts and I had already lost a couple through vibration. The bolts needed to be replaced with Nyloc nuts.
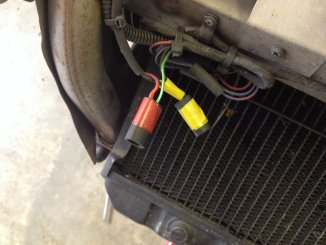
3. I needed to label the indicator wires so it wasn't trial and error whenever I removed and replaced the nose cone.
4. The wing mountings were beginning to rust so needed painting.
5. The wishbones also needed touching up.
6. The nose cone was only held by one bolt at the bottom as it was almost impossible to insert the second bolt due to the proximity of the radiator.
So the first thing to do was remove the nose cone and the wings.
This gave me access to the radiator and hoses, and it seemed to me as though the lower radiator hose did not have any water in whereas it should be full. So I actually disconnected the hose at the top of the radiator and filled the cooling system from there (rather than through the expansion bottle) while squeezing the hose to try and expel any air. She took about 3 litres of more water, so it will be interesting to see the effect.
Next was to label the connections for the indicators.
Now I know which wire goes where.
The next task was the loose wing mounting bar. It appeared that the holes in the shaft were larger than the holes in the mount so no matter how tight the bolts were it still remained loose. Simple solution was to drill larger holes in the wing mounting bar and fit some oversized bolts. The result is a rock-solid mount.
Now to the painting. First a good clean and wire brush on the stays, then a coat of primer, followed by a top coat.
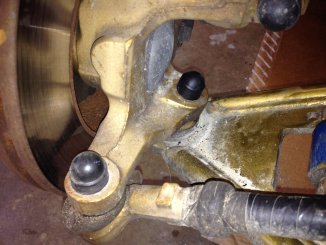
And the same for the wishbones. And while there I noticed that I had missed the bottom wishbone joint when I had put plastic nut covers on everything, so added them.
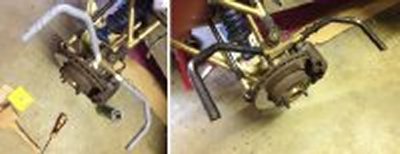
Next job to tackle was the bottom mounting of the nose cone. You can see from this left/right photo that the left one is clear and easily accessible, but the right one is partially blocked by the bottom hose mounting on the radiator, making it difficult to put a nut and bolt in when mounting the nose cone.
The simple fix was to fit a couple of stainless steel 'extenders' to make the holes more accessible.
Now the primary task of replacing the nearside wing. As previously covered, the new ones were about 2" shorter than the original ones so a separate mounting plate had to be used, and an extra long mud flap. So I made an exact copy of the offside wing, mudflap and mounting bracket. Then put both wings on the car using nyloc nuts throughout. Finally put the wheels back on.
So following a final check of all the nuts, particularly the wheel nuts, the nose cone was replaced and we are good to go.
She looks lovely and clean and smart, with at long last a matching pair of front cycle wings.
1. One of the wing mountings was loose and only stayed tight with the wing actually mounted and taking the strain.
2. The wings were mounted using ordinary bolts and nuts and I had already lost a couple through vibration. The bolts needed to be replaced with Nyloc nuts.
3. I needed to label the indicator wires so it wasn't trial and error whenever I removed and replaced the nose cone.
4. The wing mountings were beginning to rust so needed painting.
5. The wishbones also needed touching up.
6. The nose cone was only held by one bolt at the bottom as it was almost impossible to insert the second bolt due to the proximity of the radiator.
So the first thing to do was remove the nose cone and the wings.
This gave me access to the radiator and hoses, and it seemed to me as though the lower radiator hose did not have any water in whereas it should be full. So I actually disconnected the hose at the top of the radiator and filled the cooling system from there (rather than through the expansion bottle) while squeezing the hose to try and expel any air. She took about 3 litres of more water, so it will be interesting to see the effect.
Next was to label the connections for the indicators.
Now I know which wire goes where.
The next task was the loose wing mounting bar. It appeared that the holes in the shaft were larger than the holes in the mount so no matter how tight the bolts were it still remained loose. Simple solution was to drill larger holes in the wing mounting bar and fit some oversized bolts. The result is a rock-solid mount.
Now to the painting. First a good clean and wire brush on the stays, then a coat of primer, followed by a top coat.
And the same for the wishbones. And while there I noticed that I had missed the bottom wishbone joint when I had put plastic nut covers on everything, so added them.
Next job to tackle was the bottom mounting of the nose cone. You can see from this left/right photo that the left one is clear and easily accessible, but the right one is partially blocked by the bottom hose mounting on the radiator, making it difficult to put a nut and bolt in when mounting the nose cone.
The simple fix was to fit a couple of stainless steel 'extenders' to make the holes more accessible.
Now the primary task of replacing the nearside wing. As previously covered, the new ones were about 2" shorter than the original ones so a separate mounting plate had to be used, and an extra long mud flap. So I made an exact copy of the offside wing, mudflap and mounting bracket. Then put both wings on the car using nyloc nuts throughout. Finally put the wheels back on.
So following a final check of all the nuts, particularly the wheel nuts, the nose cone was replaced and we are good to go.
She looks lovely and clean and smart, with at long last a matching pair of front cycle wings.
Monday, 11 May 2015
Three weekends in a row
Making up for the 2 months away, I took the car to the "Horsepower at the Hall" meet up at Doddington Hall near Lincoln this weekend after the Stilton Cheese Run and Stoneleigh the last 2 weekends. I invited all the Lincolnshire members but in the event, only one other turned up, mainly because the weather was very poor. I was lucky and the rain held off all the way there (about a 1hr run)
So we parked up together and were joined by a new Westfield owner, who I tried to get to join the club. As it turned out I had to put the top up for 30 mins or so when a shower came through.
The weather also cut down on the attendees so there were only about 100 cars, compared with the normal 200, but still some nice ones to look at.
A nice run back home, with just some spots of rain showing on the windscreen but nothing felt inside the car.
Passed the 11,000 mile mark :-)
So we parked up together and were joined by a new Westfield owner, who I tried to get to join the club. As it turned out I had to put the top up for 30 mins or so when a shower came through.
The weather also cut down on the attendees so there were only about 100 cars, compared with the normal 200, but still some nice ones to look at.
A nice run back home, with just some spots of rain showing on the windscreen but nothing felt inside the car.
Passed the 11,000 mile mark :-)
Thursday, 7 May 2015
Second Year at Stoneleigh
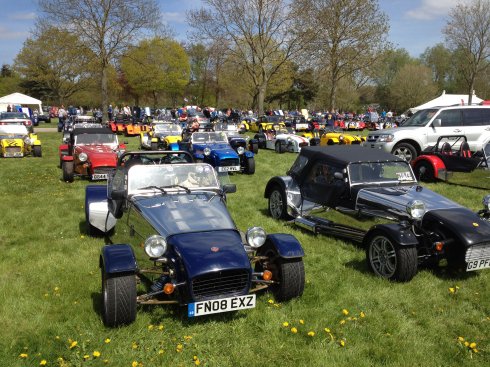
For the second year running I camped over at Stoneleigh. Now that Donnington has been cancelled the only 'official' kit car shows are Stoneleigh and the RHOCar 'End of Season' bash, so I needed to attend.
I had a wedding reception on the Saturday night so prepositioned the car at my daughters house near Kettering. Unfortunately, it poured with rain all night and when I came to start her in the morning she was completely dead. Once I took the bonnet off the reason was obvious, as the engine electrics were dripping wet. So it was out with m daughter's hair dryer and 5 minutes later she was running perfectly. So I have cut a piece of plastic sheet to cover the engine compartment if I ever have to leave her outside again. Lesson learned.
Nothing really new at the show so after a quick run around the stalls I parked up at the Club stand and spent the rest of the time chatting with old frinds and catching up.
I had a wedding reception on the Saturday night so prepositioned the car at my daughters house near Kettering. Unfortunately, it poured with rain all night and when I came to start her in the morning she was completely dead. Once I took the bonnet off the reason was obvious, as the engine electrics were dripping wet. So it was out with m daughter's hair dryer and 5 minutes later she was running perfectly. So I have cut a piece of plastic sheet to cover the engine compartment if I ever have to leave her outside again. Lesson learned.
Nothing really new at the show so after a quick run around the stalls I parked up at the Club stand and spent the rest of the time chatting with old frinds and catching up.
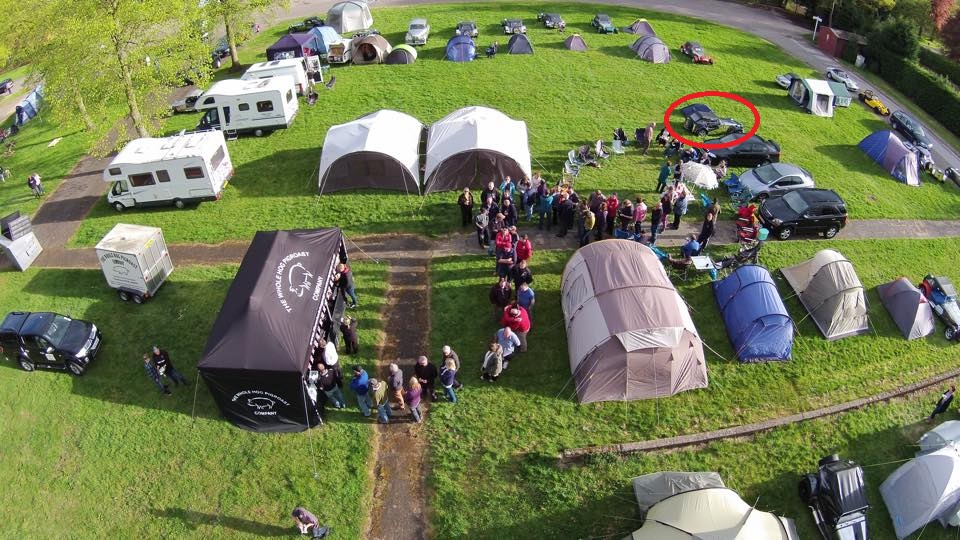
Then off to the campsite for a few beers, a hog roast and chatting long into the night. Here is an overhead shot from a drone while we were queuing for the hog roast. My car and (small) tent are circled..
Then same again on Sunday, left about 14:00 and had a nice 70 mile run home.
Summer definately getting close so looking forward to more runouts.
Monday, 27 April 2015
Back from holiday
After 2 months away, arrived back and covered almost 200 miles in the first 2 days :-)
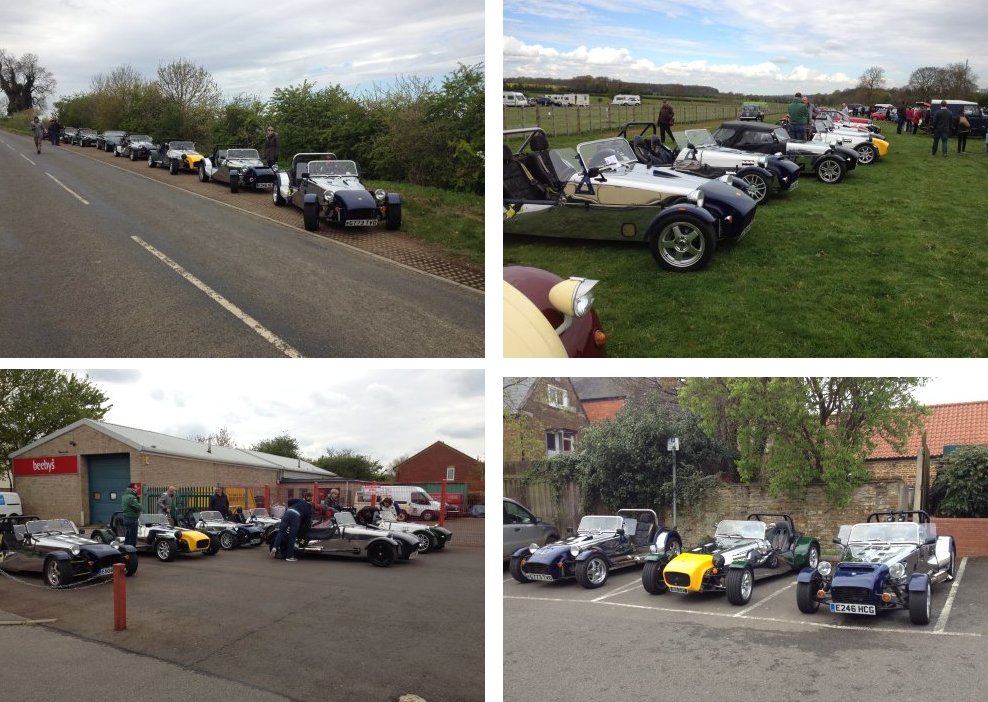
First trip was my second go at the annual Stilton Cheese Classic Car Run (http://stiltoncheeserun.webs.com/). It was great turn out, with 8 Robin Hood cars, 6 of which stayed together for the whole run. After a look around the other 300 participants we did the first 40 miles, stopping off at New Lodge Farm shop for coffee and 'stickies'. Then another 40 miles, finishing up with a pub lunch.
Here are some pictures.
And the next day a run to the hospital. Originally I was going to take the Volvo but the weather was soooo nice..... :-)
I proved the fuel smell hypothesis as for the first 3 miles the day before when I filled her up at the garage there was no smell. Then it started and by the time I got back it was very bad. Later that night the smell in the garage was terrible as it evaporated off. Then next day for the Stilton Run there was no trace of a smell. So I guess I might eventually replace the fuel hose from the tunnel to the filter, but there is no rush.
Now the silencer has started to rattle. Next job is to check that out.
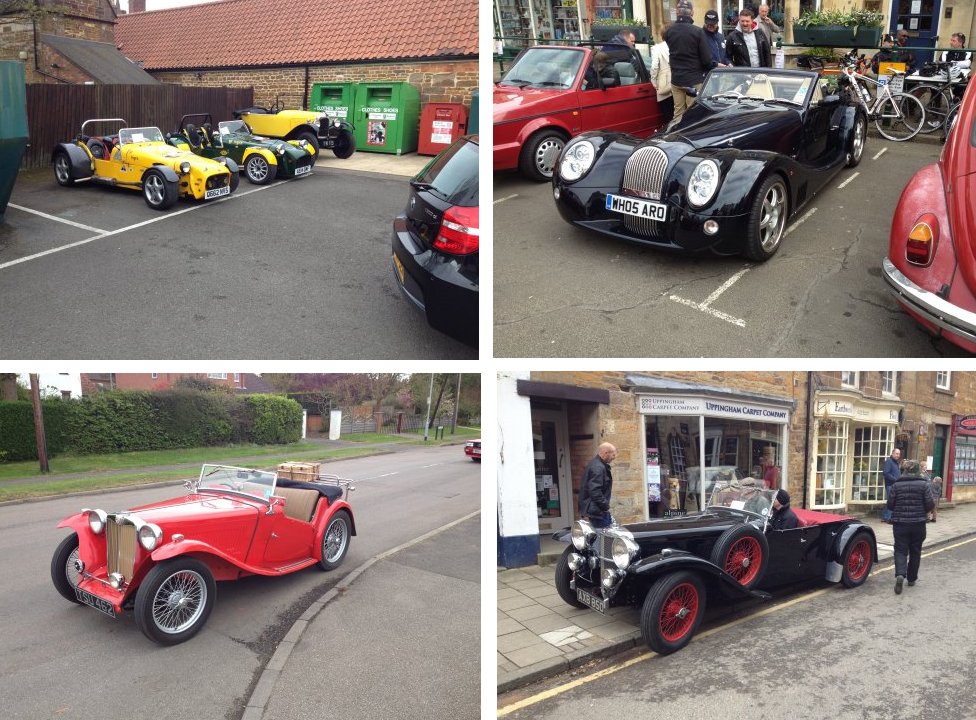
First trip was my second go at the annual Stilton Cheese Classic Car Run (http://stiltoncheeserun.webs.com/). It was great turn out, with 8 Robin Hood cars, 6 of which stayed together for the whole run. After a look around the other 300 participants we did the first 40 miles, stopping off at New Lodge Farm shop for coffee and 'stickies'. Then another 40 miles, finishing up with a pub lunch.
Here are some pictures.
And the next day a run to the hospital. Originally I was going to take the Volvo but the weather was soooo nice..... :-)
I proved the fuel smell hypothesis as for the first 3 miles the day before when I filled her up at the garage there was no smell. Then it started and by the time I got back it was very bad. Later that night the smell in the garage was terrible as it evaporated off. Then next day for the Stilton Run there was no trace of a smell. So I guess I might eventually replace the fuel hose from the tunnel to the filter, but there is no rush.
Now the silencer has started to rattle. Next job is to check that out.
Subscribe to:
Posts (Atom)