SuperSpec

SuperSpec

Sunday, 30 March 2014

More Spare Parts

I am very aware that the car is actually quite old.  Although it was bought in 2005, the engine dates back 1995-8 and the majority of the parts came from the Ford Sierra and Ford Escort of a similar period, and these are becoming rarer and rarer, even in breakers yards.

Update:   30 Mar 2014

Bought 2 more unique items


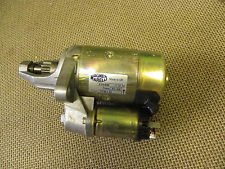
A Spare Starter Motor.  Completely unobtainable now.


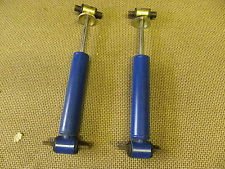
And a set of front 'shockers'.  Again, unique to the car,


More to come !!

Monday, 17 March 2014

Sunday Run with Hot Start

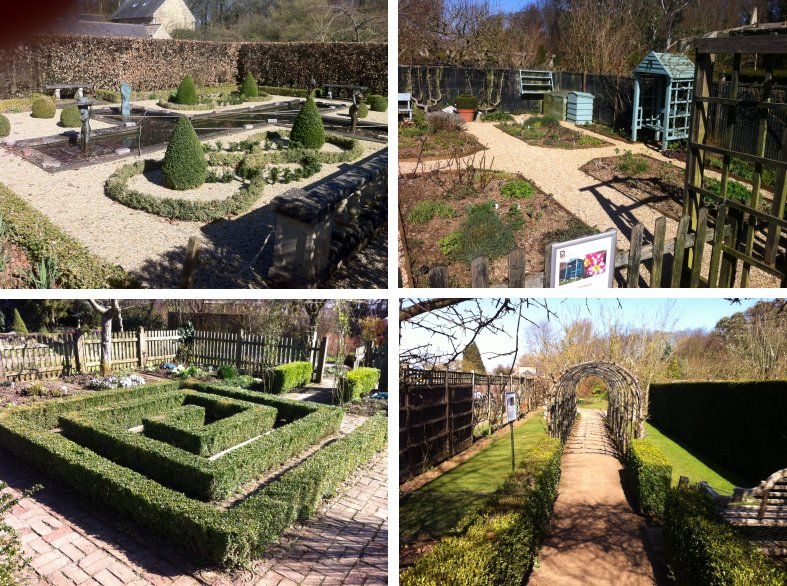
Went for a fairly long run to Barnsdale Gardens (Geoff Hamilton of Gardeners World fame for those old enough to remember).   Lovely weather and lovely country roads. Even managed to get Ruth in for the drive.   And everyone out walking waved as we went past.  This is what motoring should always be like.  

The car had always struggled to start when hot, with a very slow cranking speed.   A full description of possible solutions is at "Engine/Chassis Earth Strap fitted"  On this trip had a chance to try a hot restart and the problem seems to have gone away, so the earth strap was obviously the answer.

Sunday, 9 March 2014

Lincolnshire Inaugural Meeting

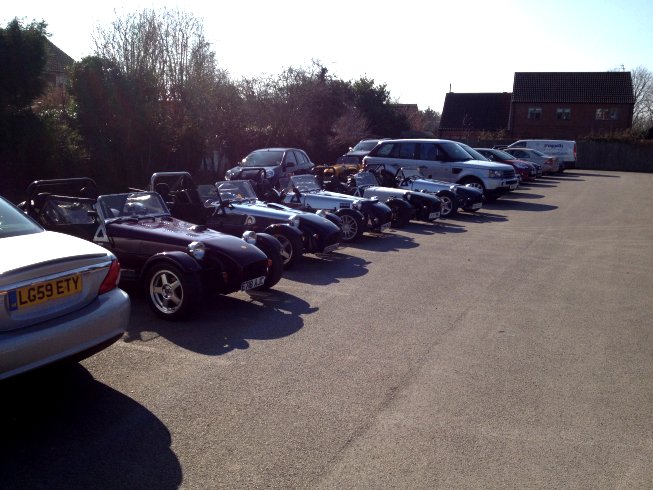
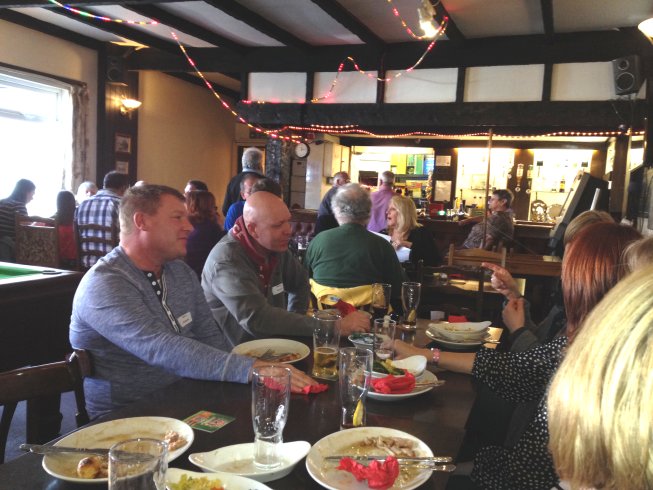
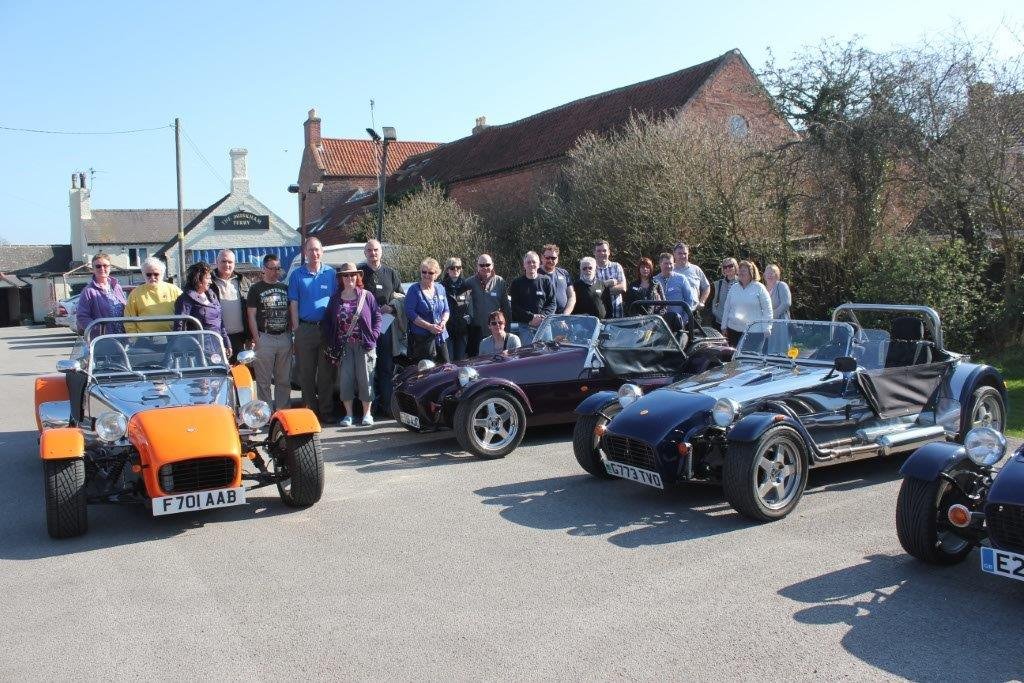
As the brand new Secretary of the Lincolnshire 'chapter' of the Robin Hood Car Club my first task was to arrange a meet.  So I decided the best thing to do was a Sunday lunch outing.  And we went for a mid-location at a pub near Newark right next to the river Trent.   I also invited any other member who lived close to Lincolnshire.  As the day approached the weather suddenly turned glorious and on the day an incredible 30 people turned up (including 9 wives), driving 7 'Robin Hoods', a GBS 'Zero' and a couple of 'Sprites'.

Still couldn't get Ruth into the car so we arranged to car pool with a couple who live near and as it turned out we 'wife-swapped'.  I took his wife as a passenger while Ruth went with him in his 'normal' car.


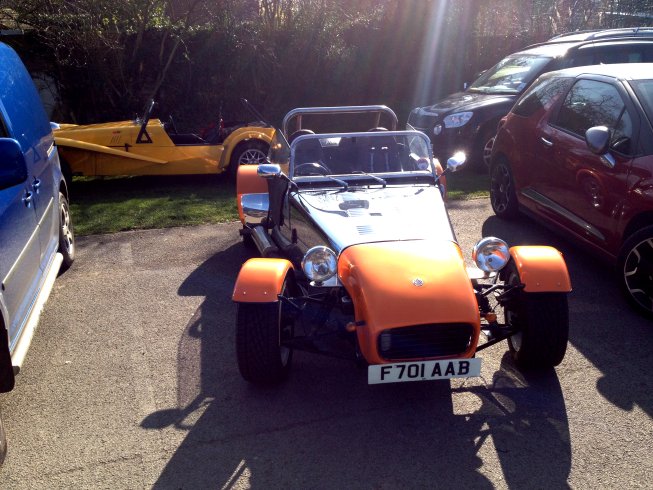
Here are 5 of the 'Hoods' lined up, mine is the farthest one, just before the Range Rover.


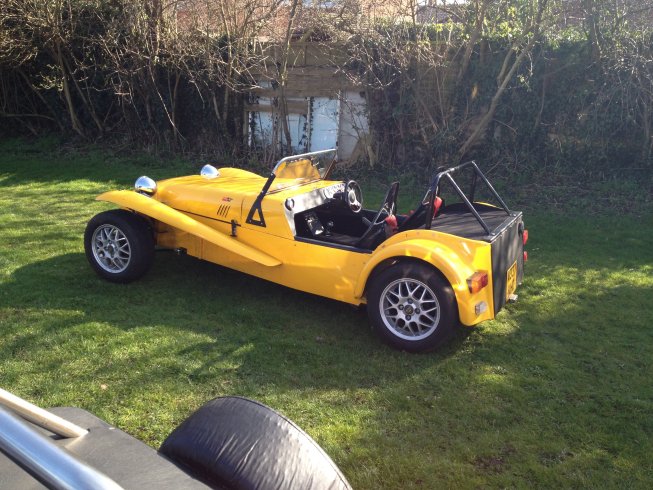
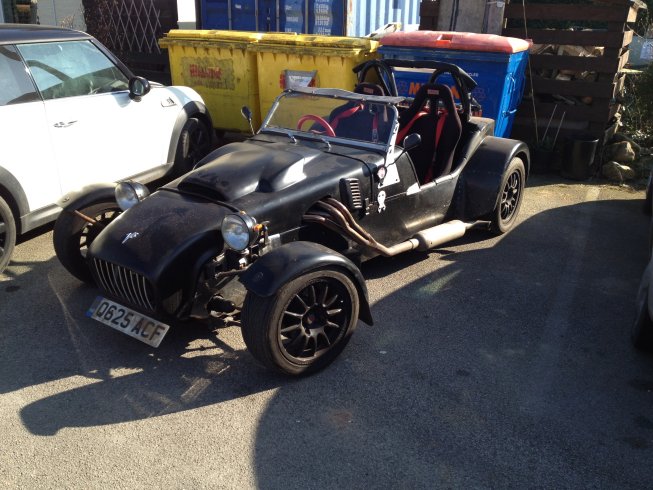
This one was hiding behind the Range Rover


A new Great British Sportscars (GBS) 'Zero'


This beauty has been fitted with a 4 litre V8.   Apparently you can 'burn rubber' in 4th gear if you aren't careful.  Astonishing.

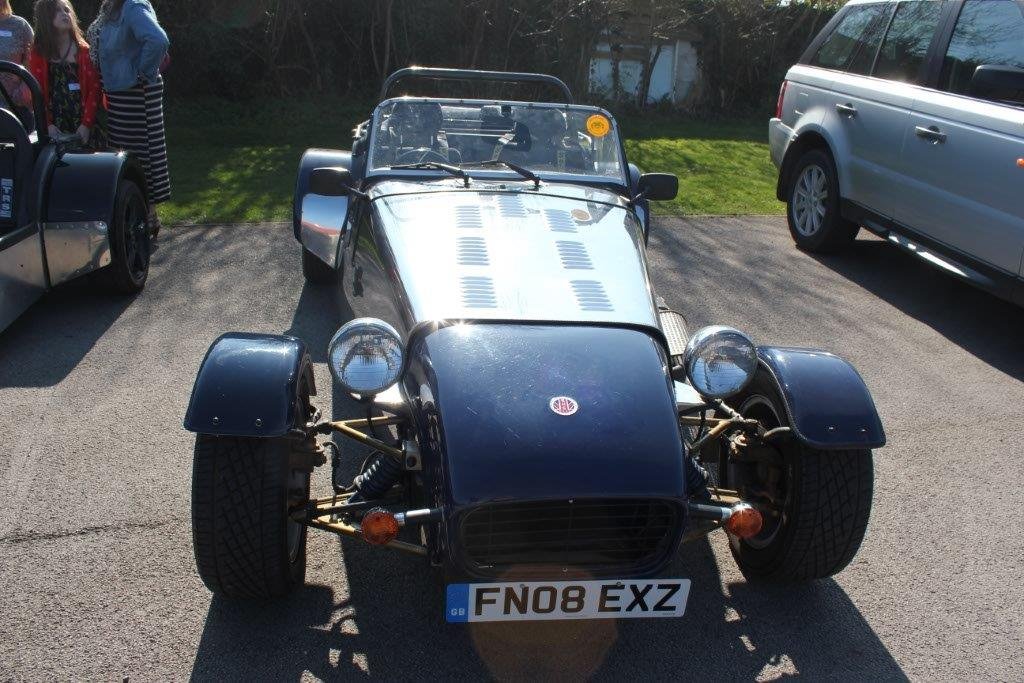
Us !!


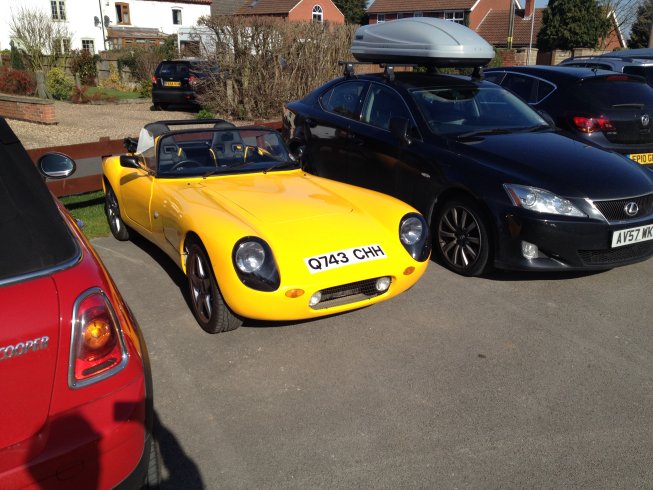
And one of the Sprites.  A great favourite with quite a few of the Club members.


And everyone enjoying the company.


And discussing the important things in life.


A great time was had by all.   Now they are all asking what I am going to arrange next !!

Tuesday, 4 March 2014

Fit New Front Wing

Having made the decision that I could not get a satisfactory finish on the repaired front wing I started looking around for a replacement.  There were plenty of 7" wide and 8.5" wide ones available as that is the size used by the Caterham and Westfield kits.   But my Superspec has extra wide tyres and I needed a 9.5" wide wing to fit.  These were difficult to source and those companies that had them did not do them in Oxford Blue.

Eventually I tracked down a Company that would build me a one-off pair in Oxford Blue for the surprisingly low price of £55.   Another advantage of a kit car, I suspect new wings for modern vehicles would be a lot more expensive that that.   The only problem was that their mould produced wings that were slightly shorter than mine, but I decided that I could probably cope with that.

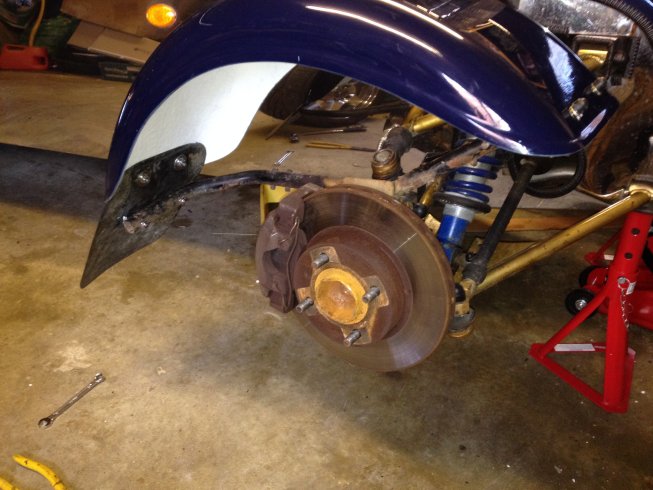
When they arrived I found that I could not mount them on the existing support struts because they were 2" shorter.  So I had 2 options:

a).   Get the support struts remade or bent to fit.
b).   Use an auxiliary support plate that would mount on the existing struts and bolt to the wing.

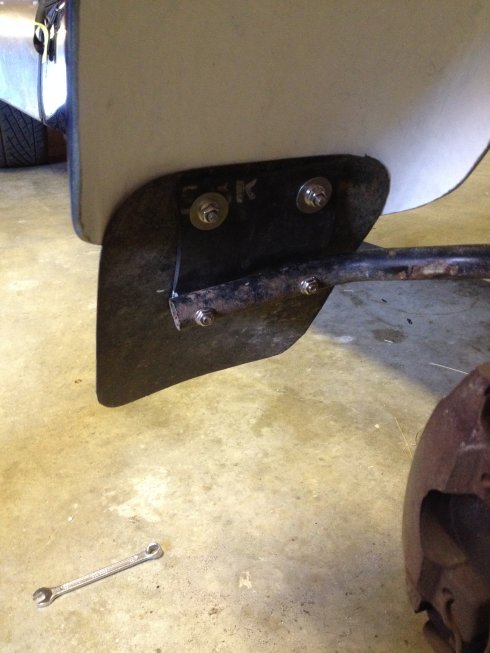
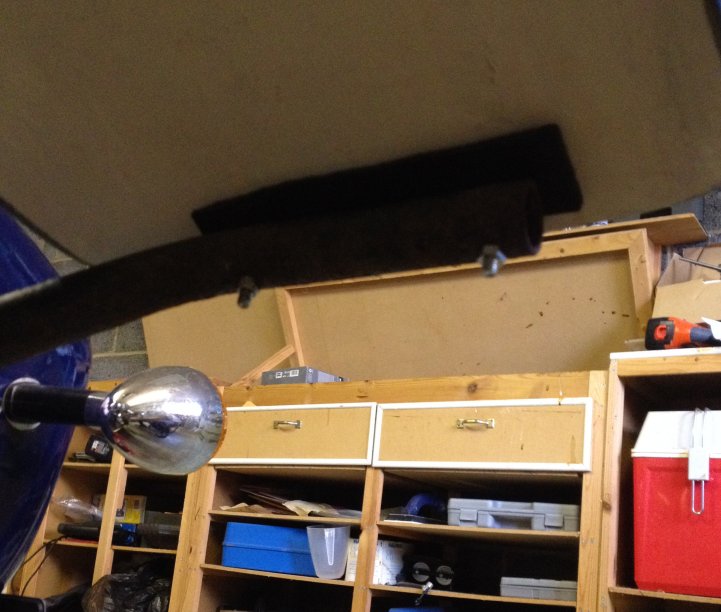
Option a) would have precluded any later fitting of a full size wing and would have to be done at a machine shop.  So I decided to go for Option b) and add an auxiliary plate.   As an initial experiment I decided to use a piece of 5mm rubber to reduce stress on the wing.


So here it the rubber block bolted to the support strut and then 3" above, the wing and mud flap is bolted to the block as well.


I also took the opportunity to rubber mount the front of the wing as well, to avoid excessive stress on the fibreglass.


Here is the whole thing mounted on the car


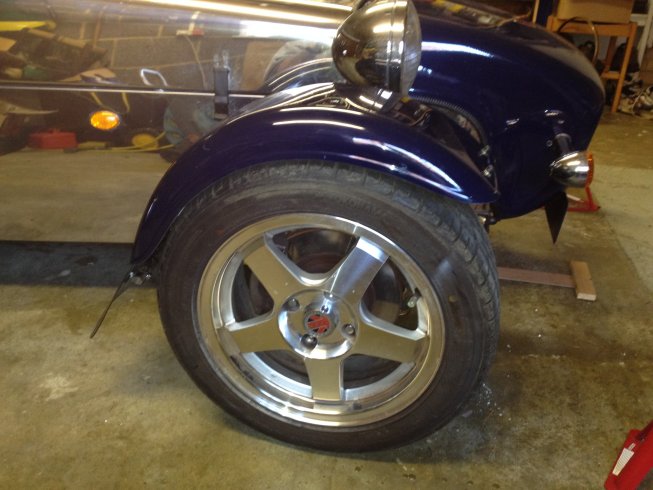
And with the wheel on, job done !!

I decided to put off doing the nearside wing until I find out if the rubber mounting works.  If there is too much vibration I will just replace the auxiliary mount with a piece of of steel.   

I also need to see if I have to replace the mud flaps with some more that are  2" longer.  Not difficult as they are simply made from 2mm rubber sheet.  

The difference between the 2 wings is not that noticeable unless you actually go looking for it, so there is no rush to fit the matching nearside wing.

Thursday, 27 February 2014

Fit Tension Spring to Clutch

Ever since I have had the car there has been a rattle in the clutch area when in neutral or under load.  This is a known design fault of the home-made thrust bearing, but there is was also a rattle from the clutch fork itself (The part the cable pulls onto to release the clutch).  A bit of research showed that the original fit of the clutch and MT75 gearbox to the Ford Escort/Sierra actually came with a tensioning spring between the clutch fork and the bell housing so it would not rattle.   This had not been fitted to the car so it seemed logical to fit one.
   
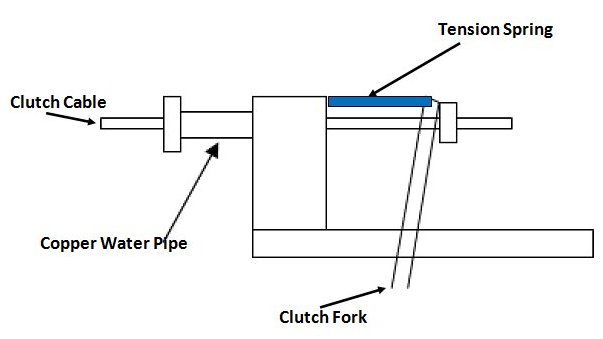
This is what it looks like on a diagram.  I already have the copper water pipe installed to make the clutch adjustment correct, so now I have just added a spring to hold the clutch under tension.  It's a very weak spring so there is no risk of burning out the clutch.


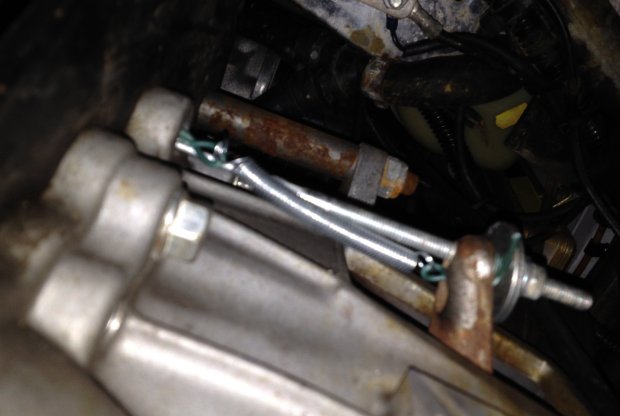
 And here is the spring wired into position.

It remains to be seen if this reduces the rattle.

Monday, 17 February 2014

Repair Offside Front Wing

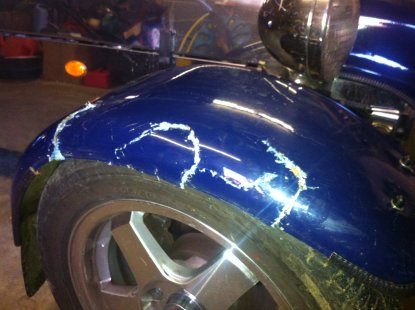
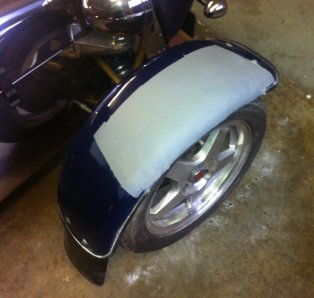
The only damage I sustained in the crash was a cracked offside front wing.
Basically there were three cracks, although none of the material was missing.  But there were lots of sharp edges, so it would be a definite MOT failure.  The sensible thing to do was get a new wing, but I decided to have a practice and add GRP repair to my skill set.


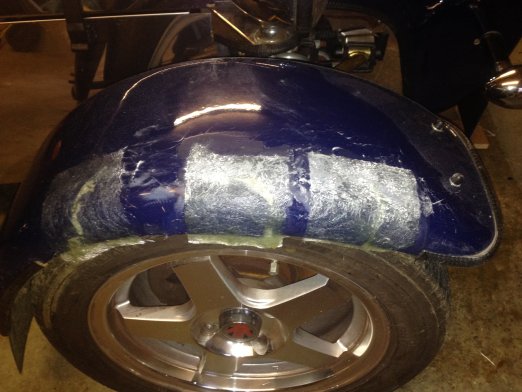
So the first step was to put fibreglass over the 3 cracked areas to reinforce the breaks.


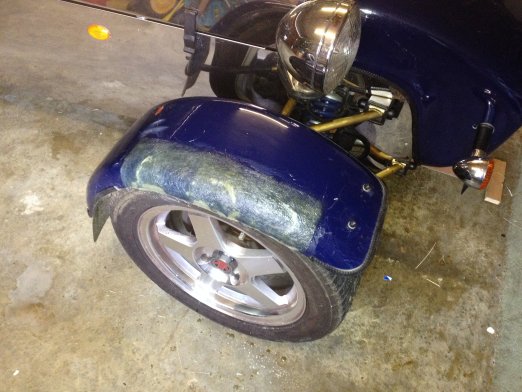
 Then another larger piece of fibreglass over the whole area to minimise the edges.  Then lots of sanding down.  


The advice from the Internet was that you cannot directly paint GRP or it just peels off.  
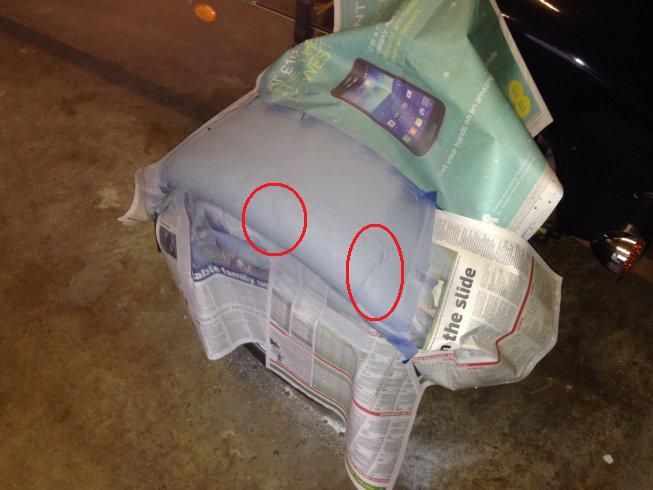
So I masked off the area and applied some Acid Etch Primer.  As you can see, this was generally OK but it highlighted a dent on the top and a ragged front edge. 


So it required more sanding and some filler for the dent.

I used filler to cover the imperfections and once more resorted to the sander and then primed it again.


Have now spent hours trying to get this right and decided it is never going to work.  I'm very happy with the actual repair from a structural point of view, and I am now quite keen to start producing some new fibreglass items, starting with a new steering wheel column cover that will be covered in vinyl.  But the hours I have spent sanding still hasn't produced the perfect finish I hoped for.

Having discussed it with other owners I think I would have been better applying the fibreglass inside the wing to provide the structural strength and then use filler on the top to produce a smooth finish.  Anyway,  probably time to give up and buy a new wing.   

It's been an interesting exercise, glad I went through it and lots of lessons learned.
  

Sunday, 16 February 2014

A Blast from the Past

Robin Hood Engineering, the manufacturer of my Superspec, was a small engineering Company founded in 1984 and dealt in various kit cars.   In 2006, it was sold off, eventually finishing up being absorbed into Great British Sports Cars (GBSC).

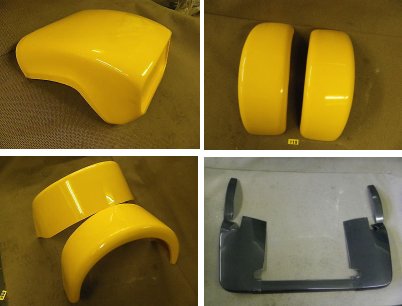
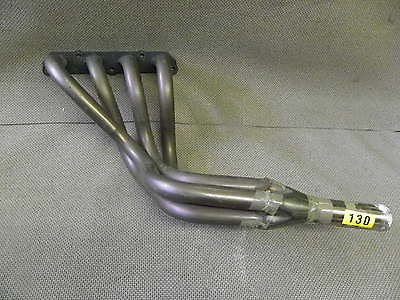
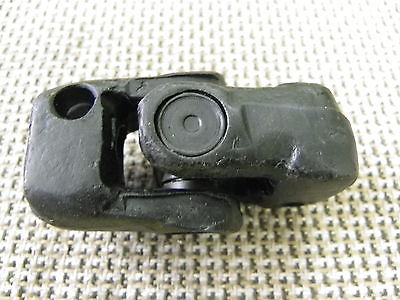
However, it turns out the original owner had a lot of spare parts for many of the cars he had designed, including the Superspec, in storage at his house.  He has now started to put them up for sale on E-Bay.   This was a unique opportunity for me to obtain some one-off spare parts that would never be available again.   He happened to live quite close so I went to visit him and had a most interesting conversation over a cup of coffee.  He told me lots of useful details about the car and specifications for some of the parts I might need.  It was invaluable being able to talk to the actual designer of the car and I enjoyed it immensely.  I also picked up the following:


A full set of the GRP and plastic body panels.  (The rest of the body is normal stainless steel sheet)


A stainless steel exhaust manifold and 4 into 1 exhaust pipe.


and a new Universal Joint for the bottom of the steering column (mine has a bit of play in it so it might need replacing at the next MOT) 


These were the major items I needed but I can see me getting lots more from him.

Monday, 10 February 2014

Buying Spare Parts

I am very aware that the car is actually quite old.  Although it was bought in 2005, the engine dates back 1995-8 and the majority of the parts came from the Ford Sierra and Ford Escort of a similar period, and these are becoming rarer and rarer, even in breakers yards.

So I have a permanent Browser Page open on E-Bay with a filter of 'kit car' to see what comes up.   And if I see something unique at a reasonable (cheap!) price I will bid on it.


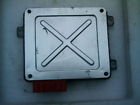
So far I have bought a spare Engine Control Unit (ECU)


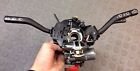
A spare set of Column Switches

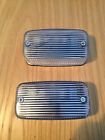
A set of Reversing Lights (£3.20!!)

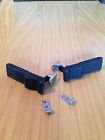
And a pair of Bonnet Catches


More to come !!

Tuesday, 4 February 2014

New Responsibility

As I said in the introduction, I very quickly joined the Robin Hood Owners Club (http://www.rhocar.org) and found it invaluable for advice and parts.   The Club is broken down by County and each County has an Area Secretary who acts as a coordinator and organises regular meetings/run outs for the members in the area.  It turns out that the post for Lincolnshire has been vacant for some years, so I decided it was time to give something back to the Club, so I have volunteered to be the Area Secretary.

There is going to be a problem as Lincolnshire is a huge county and we have members all over it.  I think I will try and organise 'roving' meetings, North, Centre & South, so all members can at least make some of the meetings.   Let's see how it goes.  Watch this space.


Meanwhile I get a nice new profile entry :-)

Sunday, 19 January 2014

First Drive of 2014

Although I am supposed to be convalescing I was going stir crazy so decided to use the car for the next visit to the surgery.

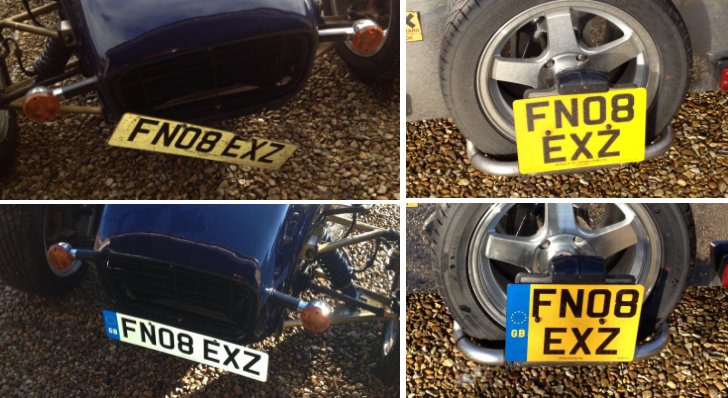
Before that I had to replace the broken front number plate.  So decided I might as well get a European one while I was at it.  And that entailed replacing the rear one as well.


Nice !!  

(And they are straight and level, it is my photography that is tilted :-) )

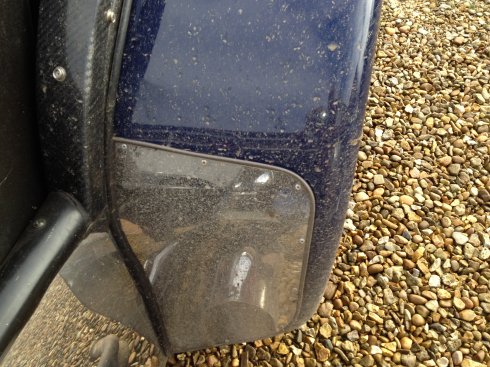
So went for the drive.   Tactical error :-)  The country roads between our house and the surgery were filthy from farm traffic and recent rain.   The very pleasant and fun 20 minute drive has resulted in over an hour's work to clean the car.   Stainless steel is all very nice but it does get dirty easily.   But Windolene works wonders.


Thursday, 16 January 2014

The Cooling System

I was warned that the engine had a tendency to overheat in traffic, and also that the water needed filling up regularly.  The previous owner had fitted an override switch to the fan to get around the problem.  He has also removed the thermostat in case that was not opening fully.   As a result the car was very slow to come to working temperature, worked nicely while still moving but heated up if you were stationary.  I thought this was a bit odd, as there was a thermostatically controlled switch in the radiator that should have turned the fan on long before the override switch was turned on.

As this system was perfectly usable I left it alone initially, filling it up every couple of weeks.  It is rather an odd design in that you fill it up via the expansion bottle.  However, on 3 occasions I noticed water coming from underneath after I returned from a trip and decided it must have a leak somewhere.  But further investigation showed the water was coming from the overflow pipe from the expansion bottle.   To make sure I installed an ‘expansion’ bottle to the ‘expansion’ bottle and ran it with the overflow tube into the new bottle.  Not one of my better plans as after about 15 minutes I saw water cascading into the passenger footwell.  Turned out the new expansion bottle had quickly filled and overflowed as well.

It was after I had refilled it from this incident that I found part of the problem.  I had done up the pressure cap on the expansion bottle to what felt like full tight, but on this occasion I decided to make sure and by applying more pressure I managed another quarter turn.  Since then no water leak.

A test of the original thermostat showed it was probably seized, so a new one was purchased off E-Bay.

I then found that shorting out the thermostatic switch made the fan run, so decided the switch was broken.  The general advice on the forum was not to try and replace it, as apparently it was a poor design (not screwed in, but a bayonet fitting) and incredibly difficult to seal a new one.  So I decided to buy an after-market adjustable thermostat switch and fit that.    
Status:     Thermostat and switch awaiting fitment. 
Thursday, 26 December 2013

My First Crash

Just had my first crash :-)

On the way back from the filling station, there is a sharp corner and I have got into the habit  of going round fairly briskly in 3rd gear and hitting the throttle half way round for a bit of a slide (great fun).   I was behind someone today so was actually in 2nd gear and the road must have been a bit damp as I did the same trick, the back end departed, car went sideways and I exited stage right into the hedge.  Luckily I was at low speed and there was no ditch so although the front of the car was well buried in the undergrowth, I was able to back out under my own steam.   Got the radiator intake full of vegetation but the only damage is to the number plate, the offside wing, and my pride    I suppose it was inevitable this would happen eventually, so I was lucky that at least the damage is minimal.  I will treat her with a bit more respect now and perhaps start acting my age. :-)


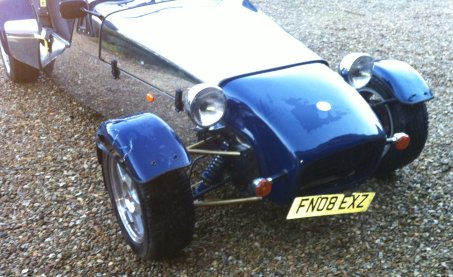
Here is what she looks like (although I did give her a good clean before the taking the photo)


So I just need to buy a new number plate and learn how to 'patch' repair GRP.   Another 'entry' I shall add to my skill set.  I'm guessing it is just like repairing fibreglass. 

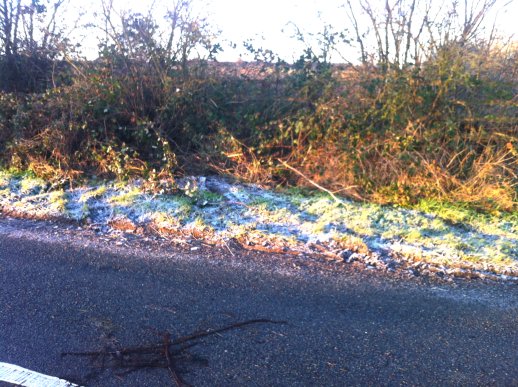
And here is the scene a couple of days later.  The hedge was so overgrown that no-one would ever know if it wasn't for the tyre tracks :-)

Friday, 20 December 2013

Exhaust Pipe Repaired

After a bit of driving I got the impression the exhaust was blowing a bit.  There were various symptoms:

a.  I could hear a noise coming from the side of the car.

b.  There was a bit of a 'burble' on the overrun.

c.  The car was not happy when running in 1st gear after being left for an hour or so.   I suspected that was down to the lamda sensor not reading correctly and that would be explained by a leak just in front of it.

d.  The car had been marginal on the emissions test, again pointing to the lamda sensor not getting the right readings.    

Once I removed the heat shield it was confirmed as there was a distinct sooty deposit on the bodywork.

The lamda sensor is just behind the leak.

So I removed the clamps and the outer tube and it was apparent that there was no corrosion, it was simply that the sealant used by the previous owner had all disappeared and it was simply leaking through the joint.
That was not surprising as the exhaust had been fitted 5 years ago and not touched since.   Also the exhaust manifold is 'lagged' inside the engine bay to cut down the heat, but that does mean that the joint would have been running hotter than normal.

I decided to repair it using a mix of new ideas and the 'old-school' approach.   It meant it is rather 'over-engineered' but that is no bad thing.

So first a liberal dose of Gun Gum (that is what we used to use and is still the best around), followed by a thin aluminimum foil protector.


Followed by an exhaust bandage that solidifies with the heat of the exhaust.


And finally a clamped cover to protect and support the whole thing using an empty Heinz Baked Beans tin (honest!).   That is what we used to use 40 years ago and it is still perfectly good.


Result:   A quieter exhaust and engine running smoother.  Hopefully it will have improved the emissions, I will find out at the next MOT.

Monday, 16 December 2013

Handbrake Warning

I soon found that I kept forgetting to release the handbrake before moving.  

And the design of the Superspec means that it is very difficult to release it when you are already strapped in (a combination of the handbrake being in the passenger footwell and the fact you are strapped in with a 4-point harness). 


So I determined I needed to fit a warning light. 

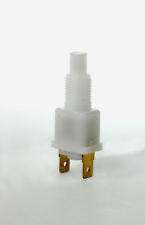
That needed a switch and after trawling E-Bay I came up with this one.


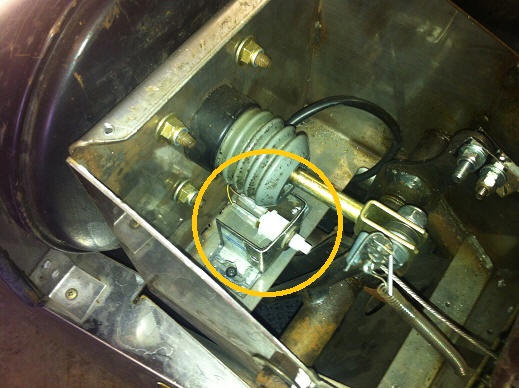
The first idea was to just pop-rivet it to the floor underneath the car, in front of the handbrake.   But I realised I need to be able to adjust it after it was fitted to ensure it matched the position of the brake.   And after breaking 3 drill bits in fairly short order I decided to rethink the design.   So I mounted it on a separate piece of stainless steel with adjustable slots that I could mount on existing bolts in the floor.

The idea was good but unfortunately I found that the movement of the mechanism under the car was not sufficient to overcome resistance in the spring so it was impossible to adjust it correctly.    It looks as though I will have to do something inside the passenger compartment, where the movement of the lever is greater.

So after quite a lot of work I am back to square one.    But that is half the fun of course.

Monday, 9 December 2013

Brake Lights

At some point the brake lights failed. No idea when as it is not something you see as a driver. After some investigation it appeared the switch was the cause. When I took it apart it was burnt and corroded inside. Apparently not unusual. 

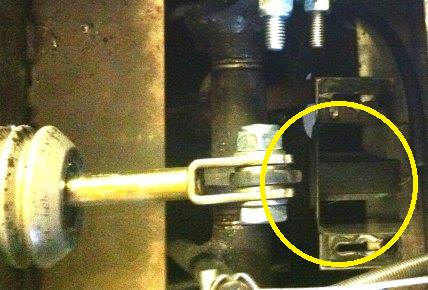
This is the location of the switch, just in front of the brake pedal. 
Pressing the brake pedal closes the switch and turns the lights on.


 I couldn't find a replacement but did find one from a Mini on E-Bay at 99p. 

But fitting it on showed a problem. The brake lights were permanently on. Turns out that whereas the original was a 'push-to-make' switch, this one was a 'push-to-break' switch. 


But rather than try and find another replacement I simply fabricated a new mounting bracket from a stainless steel offcut and mounted it behind the brake pedal instead of the front, adjusting it so that it was pushed close when the brake pedal was in the normal position. 


Very pleased with myself for lateral thinking !! 

Status: Complete

Sunday, 1 December 2013

Auxiliary Electrical Panel

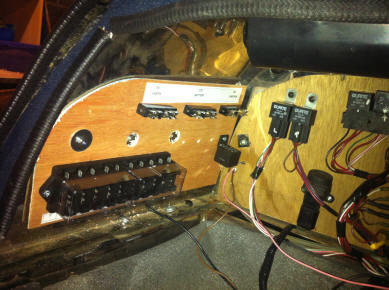
I decided that trying to fix electrical problems when things go wrong would be quite difficult and it would make sense just to 'hot-wire' them. So I decided to add an extra wiring panel to the side of the car next to the existing panel. 

Across the top were 3 'busbars' that I could just plug accessories into (such as the iPhone charger). They were: 
a. Earth 
b. 12V direct from Battery 
c. 12V from Ignition Switch 


I also added a heavy duty fuse box and mountings for 4 Relays. 

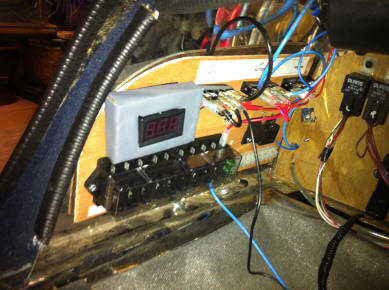
Here it is beginning to be used. The 12V Charger socket is wired in through a fuse, the bus-bars are now wired in, black for neutral, Blue for 12V Battery and Red for 12V Ignition switched. 


A few services, mainly the extra warning lights, are wired in and a voltmeter and multi-connector have been added. 

Status: Ongoing but will gradually fill it up.

Saturday, 30 November 2013

To SORN or not to SORN

Now that the summer is finished and the weather is getting poor the big decision for all kit car owners comes around.   Should you take the car off the road and do all those jobs that have been stacking up over the summer.  Or do you brave the cold weather and continue to drive the car over the winter.

My decision:    Keep her running and just wrap up warmly.

Wednesday, 27 November 2013

Dashboard Project - Phase Four

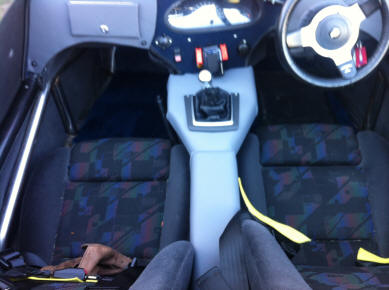
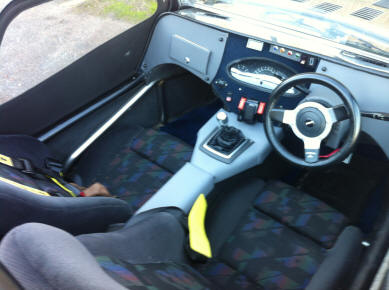
The next stage was covering the gear lever housing and transmission tunnel in vinyl to match, and I took the opportunity to fit a nice chrome surrounded gear lever mounting of a Ford Fiesta.


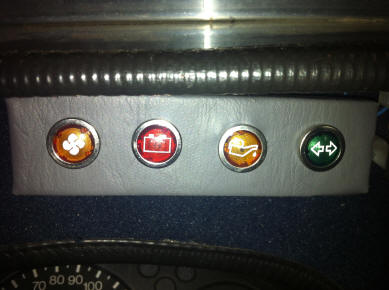
For my birthday I treated myself to a new set of warning lights that actually have the correct symbols displayed. So far they are: Cooling fan, Alternator, Oil Pressure and Indicators. I have also got ones for Headlight Full Beam and Handbrake Warning, which are still to be fitted. 


Status: - Getting there slowly, just centre console left.