SuperSpec

SuperSpec

Sunday, 27 April 2014

Stilton Cheese Run - Great Day Out

Every year there is a 'Stilton Cheese' Classic Vehicle Run in Rutland.  Up to 300 classic cars (and kit cars) drive a 39 mile route which retraces the original horse-drawn route along quiet country roads to deliver cheeses from Quenby Hall at Hungarton to the Bell Inn at Stilton in Cambridgeshire and all the villages in between.

This year, an extra sightseeing diversion was also added to take in Rockingham Castle and the Harringworth Viaduct.

Couldn't resist it so I went with 3 other RHOCar Club Members (and their wives) and we joined the other 300 Classic Cars for the run.


We travelled in convoy from the start to the mid-point at New Lodge Farm for coffee break.

Here is a video taken by one of the other cars (I was behind him).  I MUST get myself one of those cameras.


And all lined up together.


Then a final run to the Bell Inn for a late lunch.  The weather held off beautifully with only a few drops of rain.

The car covered almost 100 miles in total and behaved impeccably.   And she DIDN'T OVERHEAT :-)  So it really looks as though I have sorted that out.

Here is a sample of a few other cars.


Even the 'Stig' turned up. 


So a great day out, good driving, good company and lovely to see all the other cars and chat with other 'petrol heads'.    Roll on next year.
 

Thursday, 24 April 2014

Grease Propshaft CV Joints

I found out by reading the forum that the Constant Velocity (CV) joints at each end of the propshaft should be regularly greased to stop them failing.  So that was the next step.

The rear one was very straightforward to access once the car was jacked up.

The front one was much more difficult.   Apparently some builders cut an inspection panel in the bottom of the car to access it, but the previous owner had not done that.  So I had to take the top of the transmission tunnel and try and figure out how to do it from on the top.
 If you can see the grease nipple from this photo then I'm impressed.  It was very difficult to access but by moving part of the wiring loom I was just able to get the grease gun positioned on the nipple.


Fixed for another year.

Wednesday, 23 April 2014

Jacking Supports

As you would expect, the car doesn't have dedicated jacking points, it's just a case of picking some part of the chassis and using that. Unfortunately,the chassis is made from circular stainless steel pipes, so any time you put the jack underneath you run the risk of the car sliding of the jack. 

It goes without saying that I don't undertake any work on the car without using axle stands or wheel ramps, but after I had the car slide off the jack twice while lifting it up to put the axle stands in, I decided I needed to do something.

The front is fine, as there is a flat stainless steel cover on the front cross member so by putting a piece of 2"x4" on top of the jack I get a very stable platform to put the axle stands on.   

You can see the block actually has 2 heights, one 2" thick and one 4" thick as I cannot put a fully extended axle stand underneath in one go.  Using the 'single' 2" height I can put the axle stand underneath with the locking pin in the lower hole.  Then using the 'double' 4" height part I can then move the locking pins in the axle stand to a higher hole.  Also, with the handbrake on the car is very stable and unlikely to fall off the stands so that is the front sorted.  

But the back is a totally different situation, there is nowhere logical to put the jack that isn't very risky, and having the handbrake on has no effect as the wheels are in the air.

Eventually I figured out I could use a similar system by jacking the centre of the car using the same wooden support.

 And then putting the axle stands onto the chassis.


 Unfortunately it still looks a bit dodgy and I can see that the car might still roll off the axle stands.

So I decided to build another wooden support to make it perfectly safe.
 So now we have the main jack on a 2"x4" with ends to stop it sliding sideways (and note the trusty single/double height 2"x4" tool as again it has to be raised in stages).  

And then the axle stands on the chassis but to be extra careful I have permanently mounted a pair of exhaust brackets just behind the axle stand so the car cannot slide off.   Ridiculously over-engineered of course, but I feel much happier when I am underneath the car.


I also decided to do a practice tyre change in the comfort of the garage rather than wait till when I have to do it for real. 


I had been carrying one of these bottle jacks around in the boot, but had never actually tested it.
The front is very easy as you can just jack up the lower wishbone.


The back was again different as there is nowhere logical to put the jack.  Just lifting the chassis does not get the wheel off the ground, and the gap below the trailing arms is too low to get the jack in.  After getting some advice off the forum I decided there was no safe option and I would have to get myself a small scissor jack that would fit under the suspension unit.   

So it was out with the bottle jack and in with the scissor jack. 

Job done.

Sunday, 20 April 2014

The Cooling System (3)

Still finding problems with the Cooling System.   If you haven't been following the saga see these posts for the story so far.   Cooling System (1) and Cooling System (2)

Went out for a long (40+ mile) run to check it out.  As an aside, the weather turned while I was out so for the second time I had to put the top up.  


Actually I was pleasantly surprised.  I still had lots of headroom.  The windscreen wipers worked well and even the windscreen demister worked as advertised.   On the downside I still haven't figured out to elegantly get in and out of the car with the top up.   But I don't think any other Robin Hood owners have figured it out either.  The other problem was the hour it took to get the car cleaned up.  However, from now on I won't let rain stop me from going out.

Anyway, during this trip I found the car overheating again and when I got back in the garage the 'kettle' was boiling again and after a few minutes there was quite a large puddle of water on the floor.

The location of the puddle made it almost certain that it was the expansion bottle overflowing.   So after some thought I came up with:

(1)   Maybe the expansion bottle radiator cap was faulty, or weak, thereby allowing the water to drain too early.

(2)   I might have a leak somewhere underneath the expansion bottle.

(3)   Maybe I was overfilling the system and it was simply venting the excess.

 So for (1) it was back onto E-Bay for a new cap, again this time I got one from a classic Mini.  I was also aware that you can get various pressure rated caps so I went for a fairly high one (14psi).
 For (2), I added an extension pipe to the overflow and moved it right across to the other side of the engine so I could tell if the water was actually a leak or a genuine overflow.  

Then it was off for another run.  Interestingly it very quickly reached a very high working temperature, although not in the red, and for the rest of the seemed to sit there in the same place.   And reassuringly,  when I was forced to stop at traffic lights the fan came on and it maintained the same position.   So my new thermostat switch is working well.

Once back into the garage there was no sign of the 'kettle' boiling and there was only a small puddle of water, definitely under the overflow pipe and not from a leak.   When I took the bonnet off the engine and water system were hot but nowhere near as hot as I expected.

So from that I deduce the radiator cap is now working, there is no leak and the system will now maintain temperature, although a bit higher than Normal (maybe the temperature gauge is overreading?).  Also, now I know that it is the expansion bottle overflow that is generating the puddle, maybe I have been overfilling it.

I have a couple of long runs planned for the near future so will see how she behaves.  No passengers so will have a couple of litres of water stored in the footwell just in case !!


Tuesday, 15 April 2014

Tyre Pressures

Realised this morning that I had never actually checked the tyre pressures in the 9 months I have owned the car, as all the tyres looked 'normal'.   But nothing is normal about this car, and that includes the tyre pressures.  Unlike normal road cars that have tyre pressures around 28-32 psi, kit cars tend to have pressures of 19psi.

So I checked them at the local garage (today was such a glorious day I had to go for a run out) and they were:

Front Nearside:     19 psi   (Good)
Front Offside:       13 psi   (whoops)
Rear Nearside:      25 psi   (A bit too high)
Rear Offside:        24 psi   (Same)

So I dropped the rear tyres down to 19psi and topped up the Front Offside.   Might be my imagination but seemed to handle a bit better and I didn't notice the squeal going around a left turn.

Better keep monitoring them from now on.

Monday, 14 April 2014

Raising the Rear Ride Height

After raising the front ride height I felt that the steering was a bit light above 60mph so thought it would be an idea to raise the back about an inch as well.  This would also help with the occasional grounding of the exhaust mounting.  

  It was the same method as I had used at the front (See earlier post here).   Unfortunately, when I tried to turn the adjusting nut the whole of the shock absorber sleeve turned.   

So I had to try and find some way of locking it in position.

I didn't have another wide enough spanner to grip the lower part, but also that might have damaged the thread.   So I tried winding gardening wire around it and attaching the end to the rear axle, so that it tightened up as I turned the lock nut.  Nice idea but it didn't work, it looks as though I need some steel wire.  

So decided I needed to sleep on it.  And the weather was absolutely glorious so I decided my time was better spent driving the car around and not getting dirty underneath it.

Status:  Not completed

Friday, 11 April 2014

The Cooling System (2)

Time to look at the Cooling System.  See this post for a description of the problem.   With all the recent short journeys I found the engine just never warmed up and that is not good for her in the long term.

So first I fitted the thermostat.  No problem, only 2 bolts and it came with a new gasket.

Then I mounted the new variable thermostat switch onto the chassis. 

 Not ideal, as I can only adjust it with the bonnet off, but I could not mount it any further away from the radiator.


The instructions tell you to put the probe into the top hose, but I found that was much too tight a fit.  So my first experiment was to mount it on the radiator down tube.  


Singularly unsuccessful, the temperature did not register.


 So the next step was to mount it actually on the top tube.  The advantage of that is that I can play about with it without having to remove the nose cone.
  

Then came the problem of refilling the water.  The design of the Superspec cooling system is very unusual and non-standard.   There is no radiator cap on the radiator itself, but there is hose coming out from the top of the radiator with a tube leading across the top of the engine, and from there into the expansion bottle (see picture above).  Unlike most expansion bottles though, this one is pressurised with a radiator cap.   Half way along the top pipe is a bleed screw that needs to be undone to allow air to escape from the radiator while it is being filled.

So I refilled the system through the expansion bottle, until water came out of the top hose, being slightly surprised at how little it took before it was full (Hindsight is a wonderful thing).    Then took the car out for the first run, minus nose code and bonnet so I could see what was going on.  As I arrived at my front gate one of the neighbours walked past with his dog and stopped to chat.   After about 2 minutes I  noticed the engine was running quite hot and he then pointed out that water was pouring out underneath from the front of the engine.   I checked the 3 connections that I had undone to work on the system (Bottom hose to drain it, thermostat housing and top hose to try and install the probe) and all were watertight so I had no idea where the water was coming from (and I never did find out).   

So back into the garage to check it out.  Couldn't find anything obvious, but checked the water level and managed to get another pint of water in so decided that was the problem.   Took the car for a 3 mile drive and found it was up to temperature within about 400 yds and then gradually got hotter and hotter.  As it entered the red I switched the fan on, but the temperature remained just under the red line.   Once parked in the garage the car made a very peculiar whistling noise, eventually traced to the expansion bottle pretending to be a kettle and the water was boiling.

This is the point when you start thinking of the old saying "If it ain't broke don't fix it" and wishing you hadn't started.

However, as I have said before, the Robin Hood club forum is a fountain of knowledge so it was onto there to search for answers.  Two things were immediately apparent:

1.  Because of the unusual design it is very difficult to get rid of air locks in the system and that gives exactly the symptoms I was seeing.   An air lock prevents proper circulation so the engine rapidly heats up and then overheats, putting the fan on doesn't help because not much water is going through the radiator, and because their is air in the system, it doesn't pressurise properly and the water boils.

2.  Running with the bonnet and nose cone off makes the situation worse as the air is not being forced through the radiator to cool the water.

Luckily the solution is fairly straightforward.  In fact the system will eventually self-heal, as once the water is circulating the air gradually gets pushed to the top.   So I topped her up once again, getting a least 2 litres in.   On the next drive the temperature was still too high and back in the garage the 'kettle' was still boiling.  But I was encouraged by the fact that it only did it for about a minute and also there was no sign of any water leaking out.   So yet again I added more water until the radiator was full.

Next day took her out for a 10 mile run with the nose cone and bonnet fitted and was really pleased that she took about 2 miles to come up to temperature and then sat on the low side of normal for the remaining 8 miles.   Back in the garage, no 'kettle' and no water leaks, so fingers crossed, it looks as though I have eliminated all the air locks and the system is now working perfectly.   Will probably try another final fill up when she has cooled down.

Now I need to figure out how to get her hot again so I can adjust the thermostat to switch the fan on.

Although it was slightly worrying, again I have learned more about the car.  I love the fact that she just doesn't behave like a normal car, and has much more personality    

Sunday, 30 March 2014

More Spare Parts

I am very aware that the car is actually quite old.  Although it was bought in 2005, the engine dates back 1995-8 and the majority of the parts came from the Ford Sierra and Ford Escort of a similar period, and these are becoming rarer and rarer, even in breakers yards.

Update:   30 Mar 2014

Bought 2 more unique items


A Spare Starter Motor.  Completely unobtainable now.


And a set of front 'shockers'.  Again, unique to the car,


More to come !!

Monday, 17 March 2014

Sunday Run with Hot Start

Went for a fairly long run to Barnsdale Gardens (Geoff Hamilton of Gardeners World fame for those old enough to remember).   Lovely weather and lovely country roads. Even managed to get Ruth in for the drive.   And everyone out walking waved as we went past.  This is what motoring should always be like.  

The car had always struggled to start when hot, with a very slow cranking speed.   A full description of possible solutions is at "Engine/Chassis Earth Strap fitted"  On this trip had a chance to try a hot restart and the problem seems to have gone away, so the earth strap was obviously the answer.

Sunday, 9 March 2014

Lincolnshire Inaugural Meeting

As the brand new Secretary of the Lincolnshire 'chapter' of the Robin Hood Car Club my first task was to arrange a meet.  So I decided the best thing to do was a Sunday lunch outing.  And we went for a mid-location at a pub near Newark right next to the river Trent.   I also invited any other member who lived close to Lincolnshire.  As the day approached the weather suddenly turned glorious and on the day an incredible 30 people turned up (including 9 wives), driving 7 'Robin Hoods', a GBS 'Zero' and a couple of 'Sprites'.

Still couldn't get Ruth into the car so we arranged to car pool with a couple who live near and as it turned out we 'wife-swapped'.  I took his wife as a passenger while Ruth went with him in his 'normal' car.


Here are 5 of the 'Hoods' lined up, mine is the farthest one, just before the Range Rover.


This one was hiding behind the Range Rover


A new Great British Sportscars (GBS) 'Zero'


This beauty has been fitted with a 4 litre V8.   Apparently you can 'burn rubber' in 4th gear if you aren't careful.  Astonishing.

Us !!


And one of the Sprites.  A great favourite with quite a few of the Club members.


And everyone enjoying the company.


And discussing the important things in life.


A great time was had by all.   Now they are all asking what I am going to arrange next !!

Tuesday, 4 March 2014

Fit New Front Wing

Having made the decision that I could not get a satisfactory finish on the repaired front wing I started looking around for a replacement.  There were plenty of 7" wide and 8.5" wide ones available as that is the size used by the Caterham and Westfield kits.   But my Superspec has extra wide tyres and I needed a 9.5" wide wing to fit.  These were difficult to source and those companies that had them did not do them in Oxford Blue.

Eventually I tracked down a Company that would build me a one-off pair in Oxford Blue for the surprisingly low price of £55.   Another advantage of a kit car, I suspect new wings for modern vehicles would be a lot more expensive that that.   The only problem was that their mould produced wings that were slightly shorter than mine, but I decided that I could probably cope with that.

When they arrived I found that I could not mount them on the existing support struts because they were 2" shorter.  So I had 2 options:

a).   Get the support struts remade or bent to fit.
b).   Use an auxiliary support plate that would mount on the existing struts and bolt to the wing.

Option a) would have precluded any later fitting of a full size wing and would have to be done at a machine shop.  So I decided to go for Option b) and add an auxiliary plate.   As an initial experiment I decided to use a piece of 5mm rubber to reduce stress on the wing.


So here it the rubber block bolted to the support strut and then 3" above, the wing and mud flap is bolted to the block as well.


I also took the opportunity to rubber mount the front of the wing as well, to avoid excessive stress on the fibreglass.


Here is the whole thing mounted on the car


And with the wheel on, job done !!

I decided to put off doing the nearside wing until I find out if the rubber mounting works.  If there is too much vibration I will just replace the auxiliary mount with a piece of of steel.   

I also need to see if I have to replace the mud flaps with some more that are  2" longer.  Not difficult as they are simply made from 2mm rubber sheet.  

The difference between the 2 wings is not that noticeable unless you actually go looking for it, so there is no rush to fit the matching nearside wing.

Thursday, 27 February 2014

Fit Tension Spring to Clutch

Ever since I have had the car there has been a rattle in the clutch area when in neutral or under load.  This is a known design fault of the home-made thrust bearing, but there is was also a rattle from the clutch fork itself (The part the cable pulls onto to release the clutch).  A bit of research showed that the original fit of the clutch and MT75 gearbox to the Ford Escort/Sierra actually came with a tensioning spring between the clutch fork and the bell housing so it would not rattle.   This had not been fitted to the car so it seemed logical to fit one.
   
This is what it looks like on a diagram.  I already have the copper water pipe installed to make the clutch adjustment correct, so now I have just added a spring to hold the clutch under tension.  It's a very weak spring so there is no risk of burning out the clutch.


 And here is the spring wired into position.

It remains to be seen if this reduces the rattle.

Monday, 17 February 2014

Repair Offside Front Wing

The only damage I sustained in the crash was a cracked offside front wing.
Basically there were three cracks, although none of the material was missing.  But there were lots of sharp edges, so it would be a definite MOT failure.  The sensible thing to do was get a new wing, but I decided to have a practice and add GRP repair to my skill set.


So the first step was to put fibreglass over the 3 cracked areas to reinforce the breaks.


 Then another larger piece of fibreglass over the whole area to minimise the edges.  Then lots of sanding down.  


The advice from the Internet was that you cannot directly paint GRP or it just peels off.  
So I masked off the area and applied some Acid Etch Primer.  As you can see, this was generally OK but it highlighted a dent on the top and a ragged front edge. 


So it required more sanding and some filler for the dent.

I used filler to cover the imperfections and once more resorted to the sander and then primed it again.


Have now spent hours trying to get this right and decided it is never going to work.  I'm very happy with the actual repair from a structural point of view, and I am now quite keen to start producing some new fibreglass items, starting with a new steering wheel column cover that will be covered in vinyl.  But the hours I have spent sanding still hasn't produced the perfect finish I hoped for.

Having discussed it with other owners I think I would have been better applying the fibreglass inside the wing to provide the structural strength and then use filler on the top to produce a smooth finish.  Anyway,  probably time to give up and buy a new wing.   

It's been an interesting exercise, glad I went through it and lots of lessons learned.
  

Sunday, 16 February 2014

A Blast from the Past

Robin Hood Engineering, the manufacturer of my Superspec, was a small engineering Company founded in 1984 and dealt in various kit cars.   In 2006, it was sold off, eventually finishing up being absorbed into Great British Sports Cars (GBSC).

However, it turns out the original owner had a lot of spare parts for many of the cars he had designed, including the Superspec, in storage at his house.  He has now started to put them up for sale on E-Bay.   This was a unique opportunity for me to obtain some one-off spare parts that would never be available again.   He happened to live quite close so I went to visit him and had a most interesting conversation over a cup of coffee.  He told me lots of useful details about the car and specifications for some of the parts I might need.  It was invaluable being able to talk to the actual designer of the car and I enjoyed it immensely.  I also picked up the following:


A full set of the GRP and plastic body panels.  (The rest of the body is normal stainless steel sheet)


A stainless steel exhaust manifold and 4 into 1 exhaust pipe.


and a new Universal Joint for the bottom of the steering column (mine has a bit of play in it so it might need replacing at the next MOT) 


These were the major items I needed but I can see me getting lots more from him.

Monday, 10 February 2014

Buying Spare Parts

I am very aware that the car is actually quite old.  Although it was bought in 2005, the engine dates back 1995-8 and the majority of the parts came from the Ford Sierra and Ford Escort of a similar period, and these are becoming rarer and rarer, even in breakers yards.

So I have a permanent Browser Page open on E-Bay with a filter of 'kit car' to see what comes up.   And if I see something unique at a reasonable (cheap!) price I will bid on it.


So far I have bought a spare Engine Control Unit (ECU)


A spare set of Column Switches

A set of Reversing Lights (£3.20!!)

And a pair of Bonnet Catches


More to come !!

Tuesday, 4 February 2014

New Responsibility

As I said in the introduction, I very quickly joined the Robin Hood Owners Club (http://www.rhocar.org) and found it invaluable for advice and parts.   The Club is broken down by County and each County has an Area Secretary who acts as a coordinator and organises regular meetings/run outs for the members in the area.  It turns out that the post for Lincolnshire has been vacant for some years, so I decided it was time to give something back to the Club, so I have volunteered to be the Area Secretary.

There is going to be a problem as Lincolnshire is a huge county and we have members all over it.  I think I will try and organise 'roving' meetings, North, Centre & South, so all members can at least make some of the meetings.   Let's see how it goes.  Watch this space.


Meanwhile I get a nice new profile entry :-)

Sunday, 19 January 2014

First Drive of 2014

Although I am supposed to be convalescing I was going stir crazy so decided to use the car for the next visit to the surgery.

Before that I had to replace the broken front number plate.  So decided I might as well get a European one while I was at it.  And that entailed replacing the rear one as well.


Nice !!  

(And they are straight and level, it is my photography that is tilted :-) )

So went for the drive.   Tactical error :-)  The country roads between our house and the surgery were filthy from farm traffic and recent rain.   The very pleasant and fun 20 minute drive has resulted in over an hour's work to clean the car.   Stainless steel is all very nice but it does get dirty easily.   But Windolene works wonders.


Thursday, 16 January 2014

The Cooling System

I was warned that the engine had a tendency to overheat in traffic, and also that the water needed filling up regularly.  The previous owner had fitted an override switch to the fan to get around the problem.  He has also removed the thermostat in case that was not opening fully.   As a result the car was very slow to come to working temperature, worked nicely while still moving but heated up if you were stationary.  I thought this was a bit 
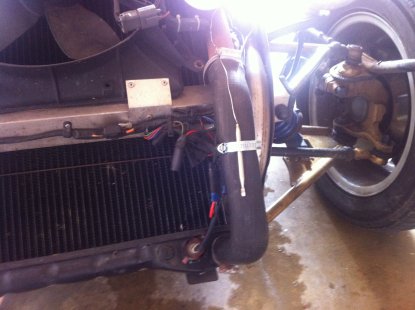
odd, as there was a thermostatically controlled switch in the radiator that should have turned the fan on long before the override switch was turned on.

As this system was perfectly usable I left it alone 
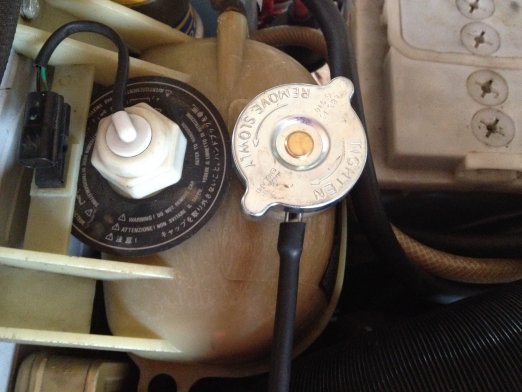
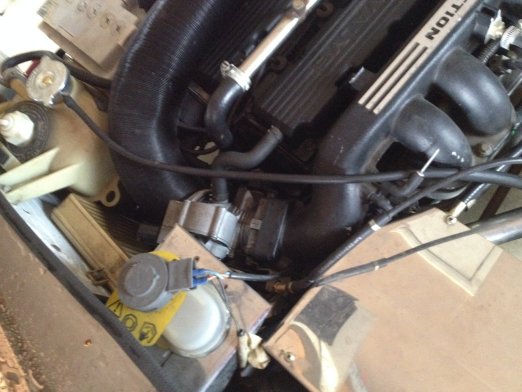
initially, filling it up every couple of weeks.  It is rather an odd design in 
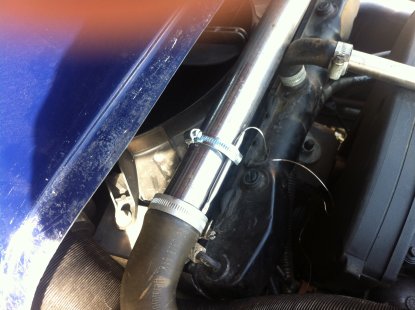
that you fill it up via the expansion bottle.  However, on 3 occasions I noticed water coming from underneath after I returned from a trip and decided it must have a leak somewhere.  But further investigation showed the water was coming from the overflow pipe from the expansion bottle.   To make sure I installed an ‘expansion’ bottle to the ‘expansion’ bottle and ran it with the overflow tube into the new bottle.  Not one of my better plans as after about 15 minutes I saw water cascading into the passenger footwell.  Turned out the new expansion bottle had quickly filled and overflowed as well.

It was after I had refilled it from this incident that I found part of the problem.  I had done up the pressure cap on the expansion bottle to what felt like full tight, but on this occasion I decided to make sure and by applying more pressure I managed another quarter turn.  Since then no water leak.

A test of the original thermostat showed it was probably seized, so a new one was purchased off E-Bay.

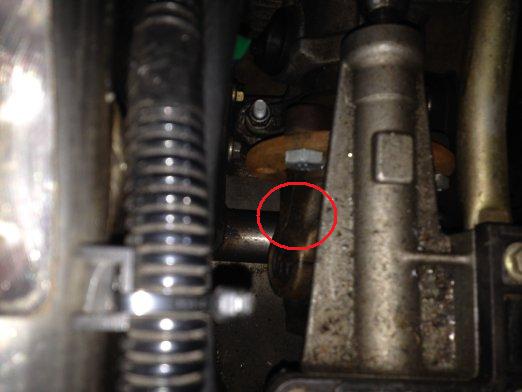
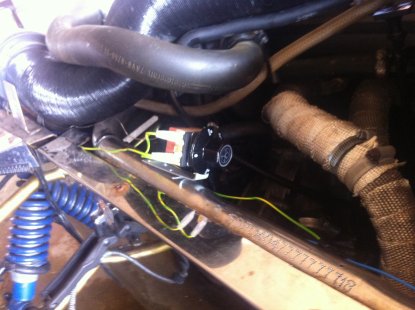
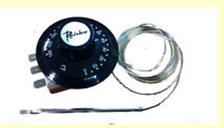
I then found that shorting out the thermostatic switch made the fan run, so decided the switch was broken.  The general advice on the forum was not to try and replace it, as apparently it was a poor design (not screwed in, but a bayonet fitting) and incredibly difficult to seal a new one.  So I decided to buy an after-market adjustable thermostat switch and fit that.    
Status:     Thermostat and switch awaiting fitment.